Author: Shajid Shafee

  • How to Use Excalidraw in Obsidian

    How to Use Excalidraw in Obsidian

    I was using excalidraw.com before most people had heard of it. Web architecture, business plans, rough product diagrams, the hand drawn aesthetic made complex things looks way approachable, and the tool itself was fast enough to keep up with my thinking.

    Then I hit the limit as usual.

    Multiple canvases required a paid subscription. Reasonable pricing – probably life changing if you’re using it seriously enough to justify it. But I wasn’t ready to commit though, so I stayed on one canvas, cramming more into it than made sense.

    Then I found the Excalidraw plugin for Obsidian. (life changer)

    Now I create as many canvases as I want, store them directly in my vault, and attach them to the notes they belong to.

    Alright, here’s how to get set up.

    What Excalidraw Does Inside Obsidian

    The Excalidraw plugin for obsidian brings the full Excalidraw whiteboard into your vault as a community plugin. You can create as many drawings as you want – each one saved as a file in your vault.

    Drawings and notes link to each other bidirectionally: a note can display an embedded drawing, and elements inside a drawing can link back to notes in your vault.

    Every drawing is stored as a plain .excalidraw file, readable and portable like any other file in Obsidian. The plugin is free, maintained by a solo developer, and has over 6 million downloads.

    Step 1: Install the Plugin
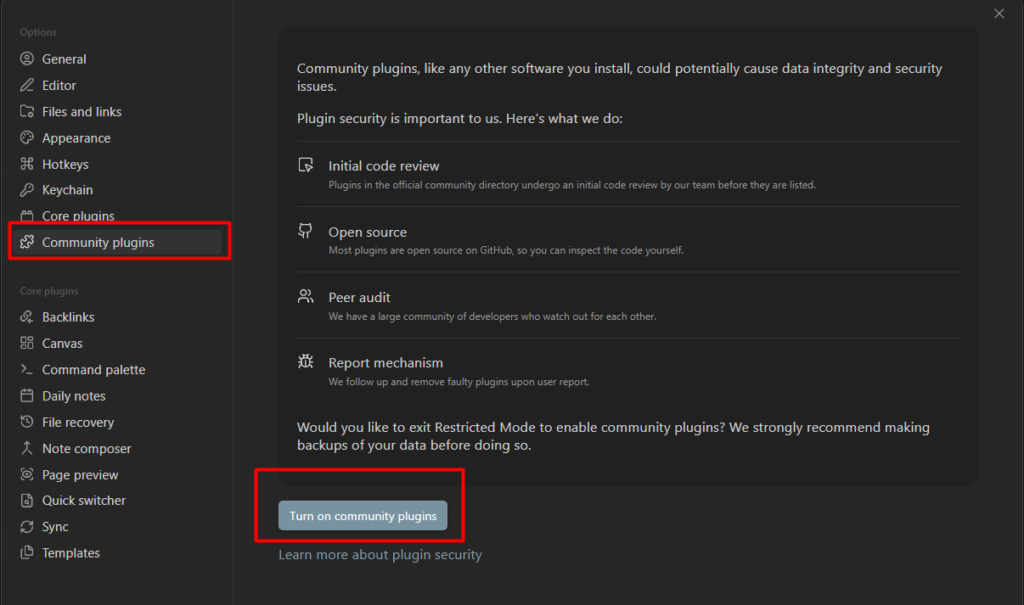
    1. Open Obsidian and go to Settings (gear icon)
    2. Click Community plugins in the left sidebar
    3. If Safe mode is on, click Turn on community plugins to disable it
    4. Click Browse, then search for Excalidraw
    5. Click Install, then Enable

    That’s the whole install. The plugin adds an Excalidraw icon to your left ribbon (a pencil-on-square icon) and a set of commands accessible from the command palette.

    Step 2: Create Your First Drawing
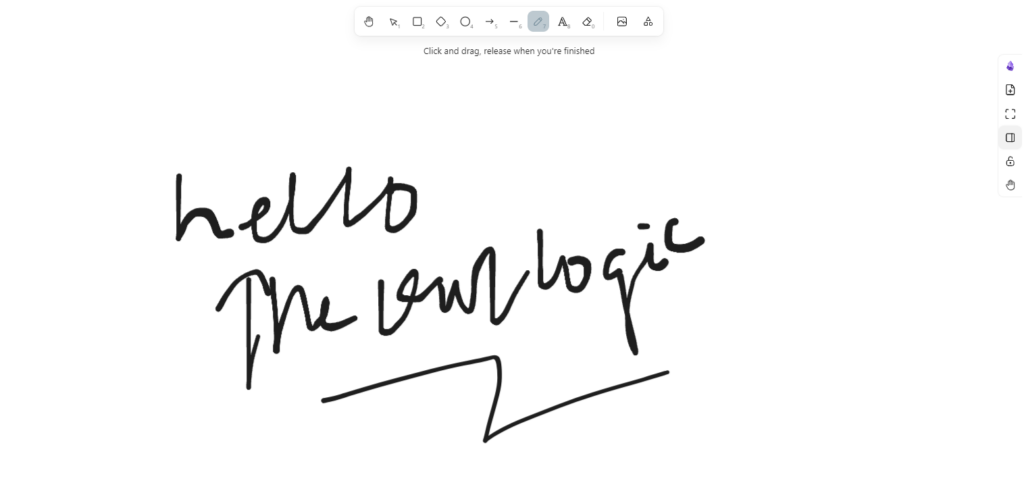
    Open the command palette with ctrl + p (Windows/Linux) or cmd + p (Mac) and type Excalidraw. You’ll see several commands. The two you’ll use most often.

    • Excalidraw: Create new drawing – opens a blank cavas as a standalone file
    • Excalidraw: Create new drawing and embed into active document – creates the drawing and drops an embed link into whatever note you have open

    If you’re starting fresh with no particular note in mind, use the first. If you’re inside a note and want a diagram attached to it, use the second.

    The canvas itself works exactly like excalidraw.com. the toolbar at the top gives you a selection hand (for panning), rectangle diamond, ellipse, arrow,link, draw (freehand), text, and images.

    Hold Space and drag to pan. Scroll to zoom. Double-click anywhere on the canvas to add text directly.

    Read Here: How to Organize Your Obsidian Vault

    Step 3: Embed a Drawing Into a Note
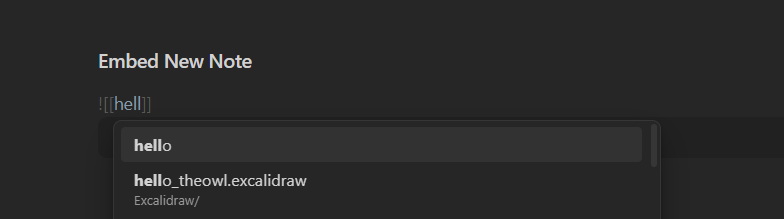
    When you use the “embed into active document” command, Obsidian automatically inserts this into your note.

    ![[Your Drawing.excalidraw]]

    That’s a standard Obsidian embed. In reading mode, it renders the drawing inline – live, at full resolution.

    Switch bar to the drawing, make a change, save and the embed in your note updates.

    you can control the display width by adding a pixel value though

    ![[Your drawing.excalidraw|600]]

    This renders the drawing at 600px wide – useful when you’re embedding alongside text and don’t want the diagram taking over the whole note.

    If you created a standalone drawing and want to embed in into a note after the fact, just type ![[ in any note, start typing the drawing’s filename, and select it from the autocomplete list. Same as embedding any other file in Obsidian.

    Linking From a Drawing To a Note

    This is the feature that makes the Obsidian plugin genuinely different from excalidraw.com

    inside any drawing, you can make an element link back to a note in your vault. Select any shape or text element, then open its link field by pressing ctrl + k. Type the note name in the wiki format: [[My Note]]. Save.

    In reading mode, that element becomes clickable. Clicking it opens the linked note directly in Obsidian.

    This actually turns a diagram into a navigation layer. Draw a system architecture, link each component to the note that documents it. Draw a business plan, link each section to the relevevant project note.

    The diagram and the the thinking behind it are now connected things – not two separate files you have to keep in sync manually.

    What to Actually Use It For

    The blank canvas question – I literally installed it as you said, now what? – is the place where most people stall. A few things that work well.

    Workflow diagram before you build them

    Before setting up a new automation or planning a project structure, sketch the flow in Excalidraw first. It’s faster than writing an outline and easier to rearrange. Once the flow is clear, build it. The diagram stays attached to the project note as a reference. So literally how I plan a n8n workflow though.

    Business and Content Planning

    Hub and Spoke content maps, product positioning diagrams, audience mapping similar to ICP. Anything where the spatial relationship between ideas matters more than the words used to describe them.

    Quick Visual Thinking

    Sometimes the fastest way to understand something is to draw it. Boxes, arrows, labels. I do these a lot, a lot.

    Obsidian saves my visual thinking as like to think out loud on a canvas.

    One Setting Worth Changing

    Go to Settings > Excalidraw and then search for SVG Ex, you’ll see Auto-export SVG and make sure to enable it.
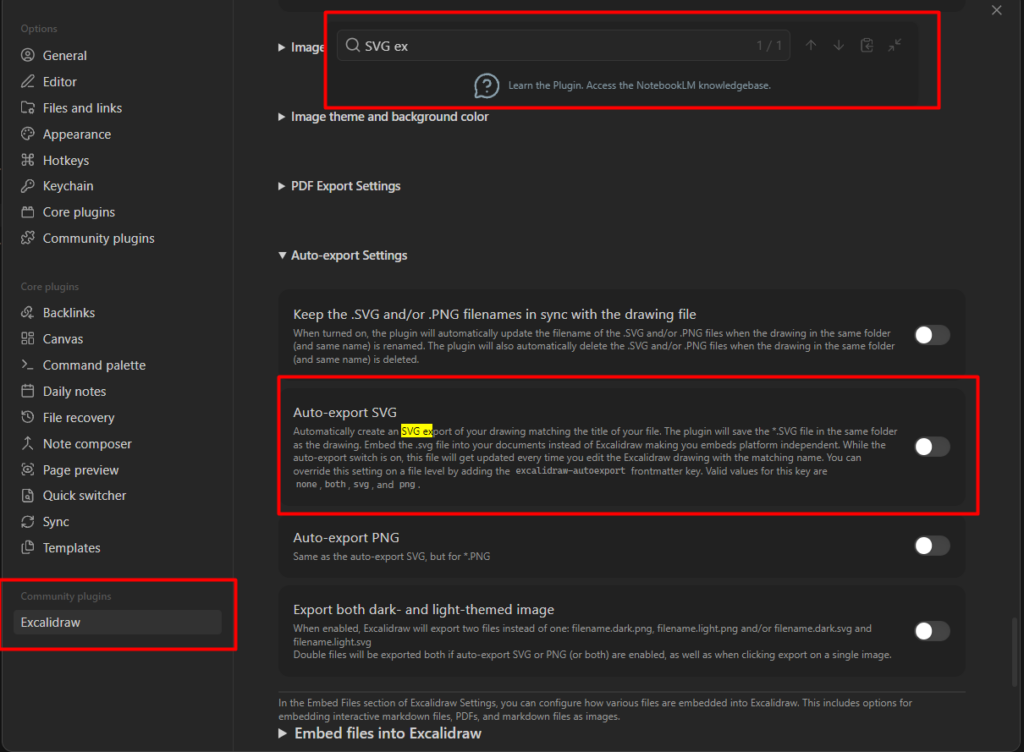
    With this on, every time you save a drawing, Obsidian automatically creates a .svg file alongside it. That SVG is a static image you can use anywhere – paste into a blog post, share it with someone who doesn’t use Obsidian, or embed it on note with ![[draw.svg]] for faster rendering.

    It’s off by default. Turn it on early and you’ll have a clean exports of everything you draw without any extra steps.


  • Why Most People Give Up on n8n (Not be One of Them)

    Why Most People Give Up on n8n (Not be One of Them)

    There’s a pattern that plays out constantly in automation communities.

    Someone, a marketer, a founder, a solo operator running their business on spreadsheets or manual copy-paste and hears about n8n for the very first time and seeing some reels.

    The pitch sounds exactly right: visual, flexible, free if you self-host, capable of automating almost anything.

    They sign up. They open the canvas for the very first time.

    If this is you right now, my complete n8n beginner guide is specifically build for this moment – right order, no shortcuts skipped.

    The interface isn’t quite what they expected. There are nodes everywhere, JSON everywhere, expressions with curly braes that look vaguely like code.

    They follow a tutorial, build something, and it breaks in a way the tutorial didn’t mention.

    They fix one thing and break another. After few hours, maybe a few days, they close the tab.

    They tell themselves they’ll come back to it when they have more time. but Most don’t.

    Here’s what I think is actually happening, n8n isn’t failing those people. It’s being introduced to the wrong audience, with the wrong expectation, in the wrong order.

    The tool is genuinely powerful – but it was built by developers, and it shows.

    If you’re not technical, the first hour feels like being handed a manual written for someone else.

    That doesn’t mean non-technical people can’t use it. Thousands do, and build workflows that save them hours every week.

    But there’s a gap between “this tool can be learned” and “here’s how to get through the part where it feels impossible” – and most content about n8n doesn’t bridge it honestly.

    The Short Answer

    Most people quit n8n before they build anything that works. The blocker is the data layer – JSON, expressions, {{ $json.email }} which you have to understand before you can do almost anything useful. Non-technical users feel it hardest because nothing in their prior experience maps to it.

    The way through isn’t to learn faster. It’s to start smaller. One trigger, one action, one working result. Every workflow you finish teaches what tutorials skip. The people who stick past week one all describe the same turning point: a workflow runs, and it does something they actually needed done.

    The real reason it feel impossible at first

    n8n market itself as no-code tool. That’s partially true. You don’t need to write code to use it. But it does require you to think like data moves, and that’s different kind of literacy than most no-code tools ask for.

    In Zapier, when you connect a Gmail trigger to a Google Sheets action, you pick your trigger, pick your action, and Zapier surfaces the available fields in a dropdown. And you click the “Sender Email” and it maps for you. The data plumbing is hidden.

    In n8n, the data plumbing is visible. Every node outputs JSON, and the next node reads from that JSON.

    When you want to use a value from a previous step, you write an expression like `{{ $json.email }}` or your drag-and-drop from the output panel, which creates the expression automatically. Either way, you need to understand that data is structured, that it has a shape, and that shape matters.

    For someone who’s never worked with APIs or structured data, that’s not a small task. It’s a completely new mental model. And most n8n tutorials written by people who’ve been doing this for years – skip past it in about 30 seconds.

    This is why the n8n workflows, nodes, and data flow guide is worth reading before anything else. Not because it required, but because understanding how data moves between nodes makes every subsequent step make sense instead of feeling arbitrary.

    Starting with the wrong workflow

    starting with wrong workflow in n8n

    Most beginners open n8n and immediately try to build a 15-node automation. They connect APIs, add LLM agents, throw in webhook, and wonder why nothing works. The workflow becomes a mess they can’t debug. They give up, and blame the tool. The tool isn’t the problem.

    This is the second failure mode, and it’s driven by the content people consume before they start.

    YouTube tutorials about n8n tend to show impressive, multi-step workflows, such as lead enrichment pipelines, AI agents that responds to emails, scrapers that feed into CRMs.

    Those workflows are real and buildable. They’re also the wrong place to start. They combine five or six concepts simultaneously: webhooks, expressions, conditional logic, API authentication, error handling. If any one of those breaks, debugging it requires understanding all of’em.

    The better starting point is something so small it feels almost pointless.

    Like, A scheduled trigger that runs every morning and sends you a Slack message with the current date. A webhook that receives a form submission and writes one row to Google Sheets, or maybe a manual trigger that fetches one URL and log the response.

    From there, add one node. Then another. Complexity comes from stacking simple things, not from planning elaborate system upfront.

    A good starting point for this approach is building your first n8n workflow – It’s specifically designed to get something running before anything else.

    The expression wall

    most people quite on expressions

    An expression in n8n references data from a previous node. It lives inside double curly braces: {{ }}.

    The one you’ll write most is {{ $json.fieldname }} take this field’s value from the current item.

    If a webhook sends a form with an email field, you access it with {{ $json.email }}. If that email is nested inside a body object, it’s {{ $json.body.email }}.

    The structure is visible in the output panel of the previous node. You don’t need to guess it. You just need to look.

    One shortcut worth knowing: you can drag a field from the output panel directly into the next node’s input, and n8n writes the expression for you. The best way to learn the syntax is to read what it generates. Here’s the complete expression guide

    Most people struggle with expressions because they try to write them before they’ve seen one in practice. Look first. Write second.

    What happens if you push through?

    pushing through in n8n

    The people who stay with n8n past the first week describe a consistent experience: it clicks. Not all at once, but gradually. The data model starts to feel natural.

    Expressions stop being cryptic and start being readable. The canvas stops feeling overwhelming and starts feeling like a drawing board.

    And then the automation possibilities open up in a way that Zapier never quite matched.

    Looping over hundreds of items, running conditional logic per item, calling APIs mid-workflow, writing a short JavaScript function to transform data exactly the way you need – all of that becomes genuinely accessible. Not easy, but learnable.

    A practical path if you’re in the stuck phase right now

    This is how I got started though,

    Week One

    Build only three node workflows. Pick something you do manually that takes five minutes, copy data from a form to a sheet, get a daily digest of something, send yourself a scheduled reminder. Finish it. Run it. Confirm it works.

    Week Two

    Add error handling to your first workflow. This sounds boring, but understand how n8n handles errors teaches you how execution work, what failed runs look like, and how to read the logs. Those skills matter for everything you build after.

    Week Three

    Import a template from the n8n template library that’s close to something you actually want to automate. Don’t build from scratch. Study how the template is structured. See how it handles the data. Then modify it for your use case.

    By week three, the mental model that felt alien in week one will have started to settle. Not because you read more documentation, but because you ran enough workflows to internalize how the tool thinks.

    Not only that, but also get help from AI itself, but do not rely heavily on it as well.

    That’s it. Go build something small. See what it does.

  • 7 Signs You’re Ready to Move From Zapier to n8n

    7 Signs You’re Ready to Move From Zapier to n8n

    Most people don’t decide to leave Zapier. They get pushed.

    It usually starts quietly though.

    A workflow that costs more than it should, a limitation you hit mid-build that you didn’t expect, or a moment where you realize you’ve been tinkering around the tool instead of with it.

    By the time someone starts searching for Zapier alternatives, they’ve often already made the decision. They’re just looking for confirmation.

    This post isn’t a comparison of the two platforms – I already covered that in full n8n vs Zapier breakdown.

    This is specifically for people who are already on Zapier and trying to figure out whether the frustration they’re feeling is worth acting on.

    Here are seven signs that it probably is.

    What Moving From Zapier to n8n Actually Means

    Moving from Zapier to n8n makes sense when you’re consistently hitting one or more of these situations:

    • your monthly Zapier bill is climbing above $50–100 and your workflow count is still growing
    • your workflows have more than 4–5 action steps and you’re burning through task limits faster than expected
    • you need logic Zapier doesn’t support natively (loops, branching per item, custom code mid-workflow)
    • you’re handling data you’d rather keep off a third-party server.

    n8n is harder to set up than Zapier – it has a real learning curve, but once past it, the execution-based billing, full JavaScript and Python access, and self-hosting option eliminate most of the pain points Zapier users report.

    If only one of the signs below applies to you, stay on Zapier. If three or more apply, you’ve probably already outgrown it.

    Sign 1: Your Zapier bill is growing faster than your workflows

    updated zapier's price on 2026

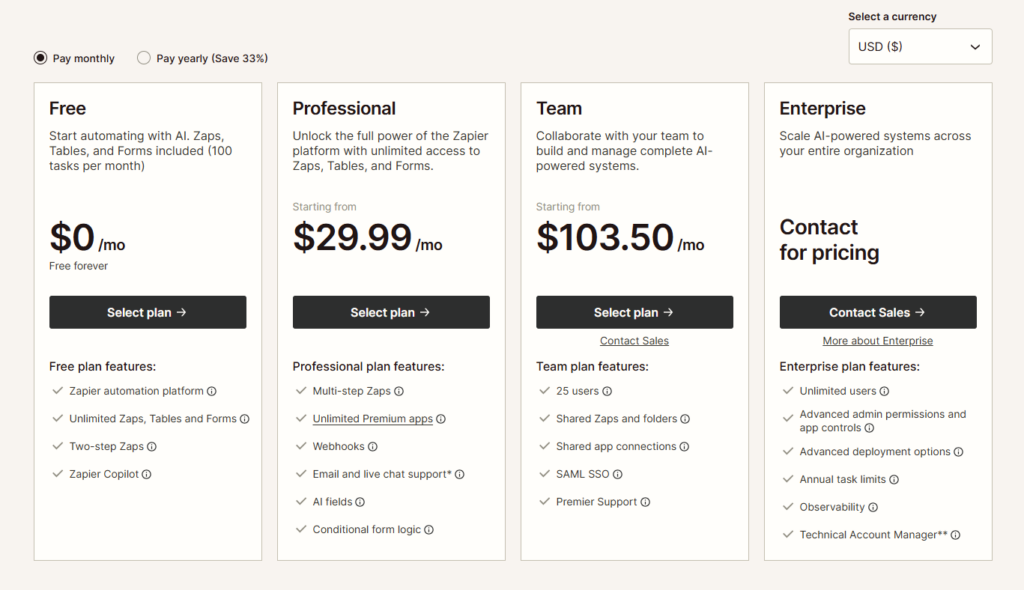
    Zapier’s Professional plan starts at $29.99 per month for 750 tasks, and the Team plan sits at $103.50 per month for 2,000 tasks. Those numbers sound reasonable until you understand what “tasks” actually means.

    Zapier charges based on workflow execution, counting each action or step as one task – even simple ones.

    Workflows that branch, loop, or call multiple APIs can consume tasks rapidly, so what starts as an affordable tool can become surprisingly expensive as complexity or volume increases.

    A typical workflow that does something useful – pulls data from an API, filters it, transforms it, writes it to a sheet, and sends a Slack message – runs five action steps.
    Every time it fires, that’s five tasks. Run it 200 times a month and you’ve used 1,000 tasks. You’re already over the Professional plan limit.

    n8n bills based on workflow execution, not individual steps. No matter how complex or branched your workflow is, each run counts as a single execution.
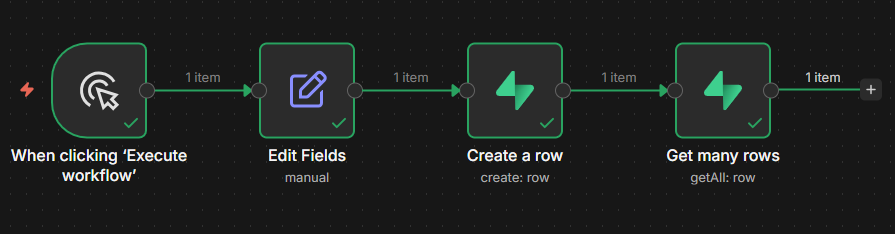
    That same five-step workflow, run 200 times, costs 200 executions on n8n. The math compounds fast once your workflows get sophisticated.

    Sign 2: You’ve started designing workflows around the task limit

    zapier or n8n

    This one is subtle and worth paying attention to.

    When Zapier’s billing model starts shaping your workflow architecture.

    When you’re combining steps you’d rather keep separate, skipping validations to save tasks, or avoiding filters because you’re worried about burning budget.

    You’re not building the automation you want.

    You’re building around a constraint.

    Some Zapier users learn to use Formatter, Filter, and Paths strategically because certain built-in Zapier steps like Filters, Formatter, and Delay do not count toward monthly task usage.

    So they structure logic around those free nodes to protect their budget.

    That’s clever, but it’s also a signal that the tool is making decisions for you.

    n8n doesn’t have this problem. Every node in a workflow whether it’s a Set node that renames a field or a full HTTP Request pulling from an API – costs nothing extra per run.

    You build what makes sense, not what costs less.

    Sign 3: You’ve hit a wall with complex logic

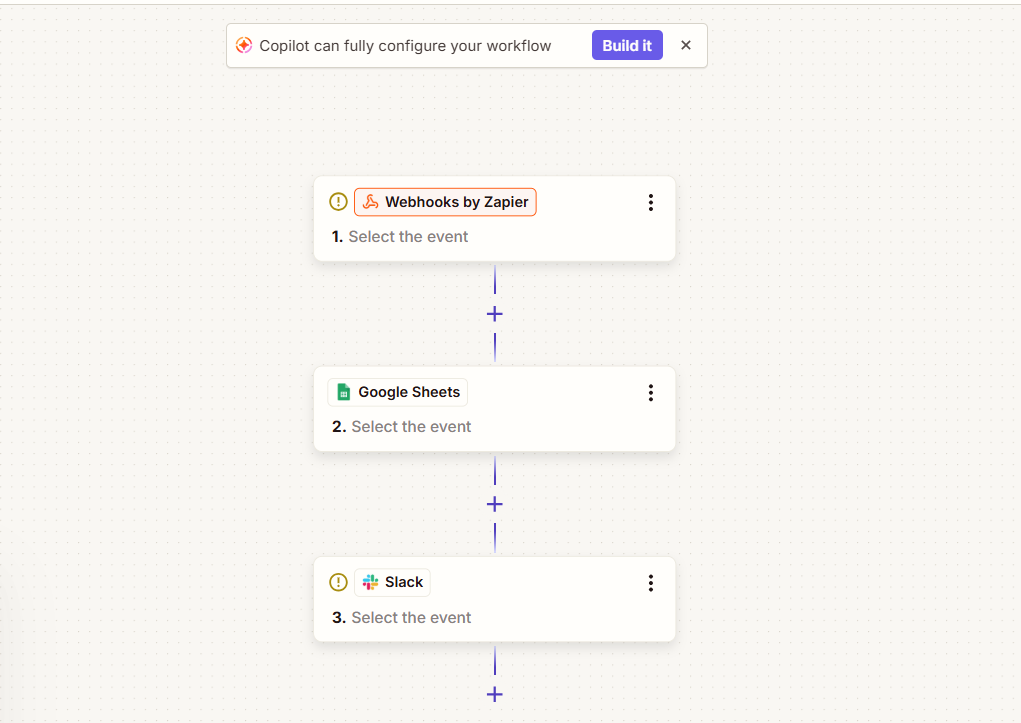
    zapier zaps

    Zapier is genuinely good at linear automation:

    trigger → do this → do that.

    Where it struggles is anything that requires treating data as a collection rather than a single item.

    If you’ve ever needed to:

    • Loop through every row in a sheet and process each one differently
    • Run a workflow for each item in an API response array
    • Branch per-item rather than per-workflow

    …you’ve hit Zapier’s logic ceiling.

    n8n’s Loop Over Items node handles iteration natively.

    You can process every item in a list, run a sub-workflow for each one, and rejoin the results downstream.

    Zapier has no direct equivalent – the closest workaround involves Looping by Zapier, a paid add-on that approximates the behavior but doesn’t match the flexibility.

    The same gap shows up with conditional logic.

    n8n’s IF and Switch nodes let you branch at the item level, not just the workflow level.

    If you’ve found yourself building multiple separate Zaps to handle what should be one workflow with branching, that’s the sign.

    Sign 4: You need to run custom code mid-workflow

    Zapier has Code by Zapier – a node that lets you write JavaScript or Python inline.

    It works for simple transformations. But it’s sandboxed, has memory limits, and sits in a fixed position in the flow rather than operating as a peer to other nodes.

    n8n’s Code node is a first-class citizen.

    It runs full JavaScript (Node.js), has access to all items flowing through the node, can make external HTTP calls, and connects to everything before and after it exactly like any other node.

    You can transform data, call an API you don’t have a native node for, or write logic that would take three Zapier nodes to approximate.

    If you’ve written a Code by Zapier function and felt like you were fighting the sandbox or if you’ve wanted to do something like parse a JWT, transform a nested JSON structure, or call a library. n8n gives you that without restrictions.

    Sign 5: You’re handling data you’d rather not share with Zapier’s servers

    Every workflow you run on Zapier passes your data – customer emails, form submissions, order details, API responses through Zapier’s infrastructure.

    For most use cases that’s fine. For some it isn’t.

    If you’re in a regulated industry, handling PII, building for a client with strict data residency requirements, or simply at a point where you’d rather control where your data lives.

    Zapier has no option for you. It’s cloud-only.

    n8n’s self-hosted option lets you run the entire platform on your own server.

    Your workflow data never leaves your infrastructure.

    You get the same visual editor, the same nodes, the same execution model – just running on a VPS you control.

    Sign 6: You’re building something that needs to scale without a predictable ceiling

    predicting the infrastructure in their workflow

    Zapier’s task-based billing means that the more your product or team grows, the more unpredictable your automation costs become.

    A marketing campaign that sends 10× more emails than usual, a webhook that fires more often than projected, a new feature that adds two more action steps to an existing Zap all of these translate directly to a higher bill.

    If you go over your plan’s monthly task limit, Zapier automatically starts billing you for every additional task, which can lead to a surprisingly high bill during a busy month.

    n8n’s execution model doesn’t have this dynamic. If you self-host, there are no usage limits at all.

    If you’re on n8n Cloud, you know exactly what a busy month looks like in terms of executions, and the billing model scales more predictably because complex workflows don’t cost more per run than simple ones.

    If automation is becoming infrastructure, something your business depends on rather than just uses.

    Sign 7: You’re spending more time on Zapier than you expected

    This one is harder to quantify but worth naming.

    Zapier is marketed as something you set up in minutes. That’s true for simple two-step Zaps.

    For anything more complex – multi-step workflows, error handling, retry logic, data transformations, the time investment climbs steeply, and the tooling doesn’t scale with your needs.

    n8n has a real learning curve upfront.

    Understanding how data flows between nodes, getting comfortable with expressions, wrapping your head around the JSON-first mental model, none of it is instant.

    But once you’re through it, you move faster.

    The same workflow that took an hour to build in Zapier (split across multiple Zaps, with workarounds for the logic Zapier doesn’t support) takes 20 minutes in n8n.

    If you find yourself spending real time engineering around Zapier’s constraints rather than building the actual automation, you’ve passed the crossover point where the learning investment in n8n pays off.

    What to do if three or more of these apply

    You don’t have to migrate everything at once. A practical approach:

    Start by installing n8n locally to get familiar with the interface without committing to anything.

    Pick one of your existing Zaps, ideally a multi-step one that’s been costing you tasks and rebuild it in n8n.

    Run it for a week.

    That single workflow will tell you more about whether n8n fits your use case than any comparison article can.

    If data privacy is the driver, the self-hosted setup guide is the right next step.

    If you want a managed option that avoids the infrastructure responsibility, n8n Cloud is a direct replacement for Zapier without the self-hosting overhead.

    One honest note: if only one or two of these signs apply especially if that sign is just “Zapier seems expensive”, it’s worth running the actual numbers before moving.

    n8n Cloud isn’t dramatically cheaper at low execution volumes.

    The economics shift most significantly once you’re running complex, high-frequency workflows, or once you’re doing something Zapier simply can’t do.

    The signs above aren’t theoretical. They’re the actual friction points where Zapier stops working for a specific kind of user. If you’re feeling them, you’re probably that user.

  • How to Organize Your Obsidian Vault: A Simple Folder Structure

    How to Organize Your Obsidian Vault: A Simple Folder Structure

    My project vaults are clean. Each one has a clear purpose, a handful of folders, and notes that actually belong where I put them.

    My personal vault is a different story.

    Folders multiplied over time.

    A “Research” folder.

    A “Resources” folder.

    An “Ideas” folder.

    A “Misc” folder

    that became a graveyard. Notes landed in whichever folder felt right in the moment, which meant nothing felt right consistently.

    I’d open the vault, drop something in, and move on – knowing I’d never find it again with any confidence.

    The problem wasn’t that I had too many notes.

    It was that the folder structure had no rules, only vibes. And a structure without rules isn’t a structure – it’s just labeled chaos.

    Here’s what actually works.

    The Short Answer: Here’s the Structure

    obsidian project structure

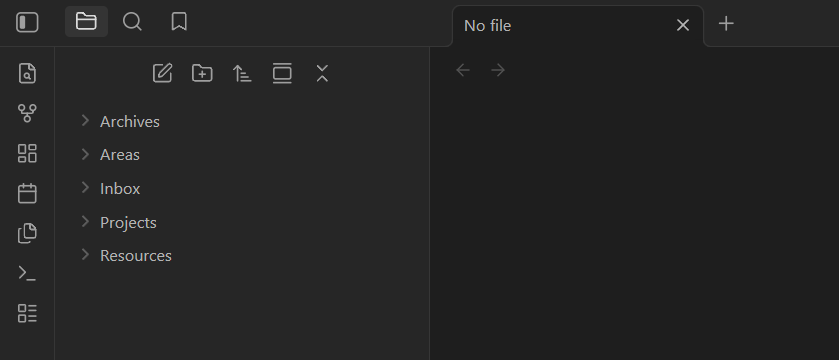
    A simple, maintainable Obsidian vault needs five folders:

    📁 Inbox
    📁 Projects
    📁 Areas
    📁 Resources
    📁 Archive
    

    Inbox is where everything lands first – no sorting required at the moment of capture.

    Projects holds active work with a clear finish line.

    Areas holds ongoing responsibilities with no end date (health, finances, a client relationship).

    Resources is for reference material you’ll return to – not your thoughts, just source content.

    Archive is for anything finished, paused, or no longer active. Notes stay in plain markdown throughout. You move a note by dragging it. That’s the whole system.

    Why Most Obsidian Vaults Fall Apart

    The default move when starting an Obsidian vault is to create folders that mirror how your brain is currently thinking.

    So you make a “Work” folder, a “Personal” folder, a “Books” folder, maybe a “Ideas” folder. It holds for a few weeks.

    Then a note doesn’t fit neatly into any of them.

    You make a new folder. Then another. Then you have twelve folders and no clear rule for which one a note belongs in, so every capture becomes a small decision – and small decisions at the moment of capture kill the habit.

    The core insight is this: folders in Obsidian answer where does this belong, not how does this connect.

    If you’re using folders to capture relationships between ideas, you’re doing the job that links do better. Folders are containers.

    Links are the connective tissue.

    Keep the containers few and obvious. Let links handle everything else.

    What Each Folder Actually Does

    Inbox

    This folder exists so you never have to make a decision when you’re capturing something quickly. A URL you want to read later, a rough idea, a meeting note you’ll clean up – everything lands here first.

    The rule: process Inbox regularly (once a day, once a week – pick one). Move each note to where it belongs or delete it. If Inbox becomes a permanent home for anything, the system breaks.

    Think of it the way you think about automating the boring, repetitive parts of a workflow – the capture step should be zero friction, and the sorting step should happen on its own schedule, not in the moment.

    Projects

    Active work with a specific end state. A client website you’re building. An article you’re writing. A launch you’re preparing for. Each project gets its own subfolder inside Projects.

    The test: does this have a finish line? If yes – Projects. If it’s an ongoing part of your life with no finish line, it’s an Area.

    When a project ends, the whole subfolder moves to Archive. Clean, fast, no decisions.

    Areas

    Ongoing responsibilities. Health, finances, a relationship you’re maintaining, a skill you’re developing. Areas don’t finish – they just continue or they don’t.

    These notes tend to grow slowly and get referenced often. A note on your workout routine, your budget structure, a client relationship log.

    The key difference from Projects: you’re not trying to complete an Area, you’re trying to maintain a standard.

    Resources

    Reference material you didn’t write. Book notes. Saved articles. Research you pulled for a project. Interesting frameworks someone else articulated.

    Resources is a library, not a thinking space.

    Your own analysis and reactions to that material belongs in a note linked from Resources – not inside the Resource note itself.

    Keeping that distinction clean means Resources stays useful instead of becoming a pile of half-processed reading.

    Archive

    Anything that was active but isn’t anymore.

    Finished projects, old Areas you’ve deprioritized, Resources you no longer need.

    Archive exists so you can move things out of your working folders without deleting them – because you’ll occasionally want them back.

    Search works fine across Archive. You don’t need to organize inside it.

    Folders vs. Tags: Where Each One Belongs

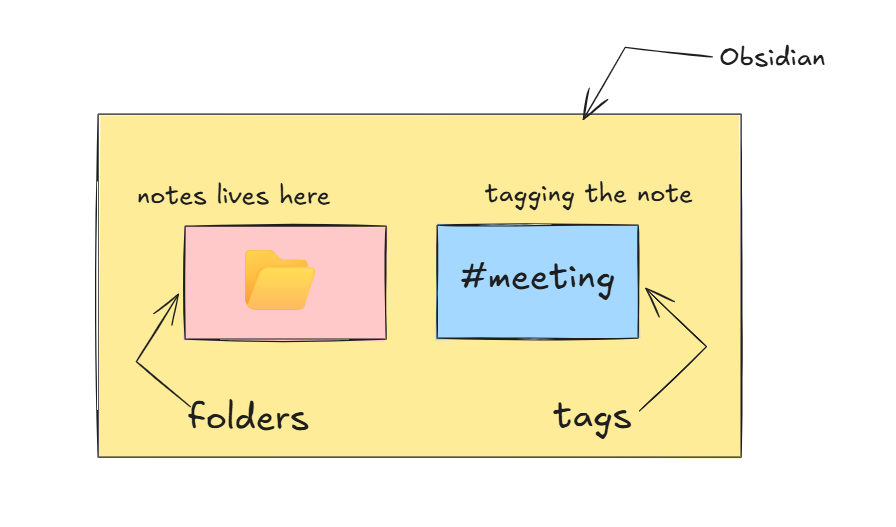
    a diagram differentiating the folders and tags

    A folder answers: where does this note live?

    A tag answers: what kind of note is this?

    A meeting note from a client project lives in Projects/ClientName.

    It might have the tags #meeting and #action-items.

    The folder tells you where to find it in the file tree. The tags let you pull up every meeting note across all projects in a search.

    The practical rule: use folders for location, tags for cross-cutting properties. Tags that duplicate your folder structure (like #projects or #archive) are noise – they don’t add information that the folder doesn’t already give you.

    Where this matters most: status and type. Tags like #draft, #waiting, #review cut across all your folders in a way that a folder never could. That’s where tags earn their place.

    When to Use Links Instead of Folders

    If you catch yourself wanting to put a note in two folders at once – stop. That’s a sign the note should be in one folder and linked from another.

    Obsidian’s whole value proposition is that notes can connect to anything, regardless of where they’re stored.

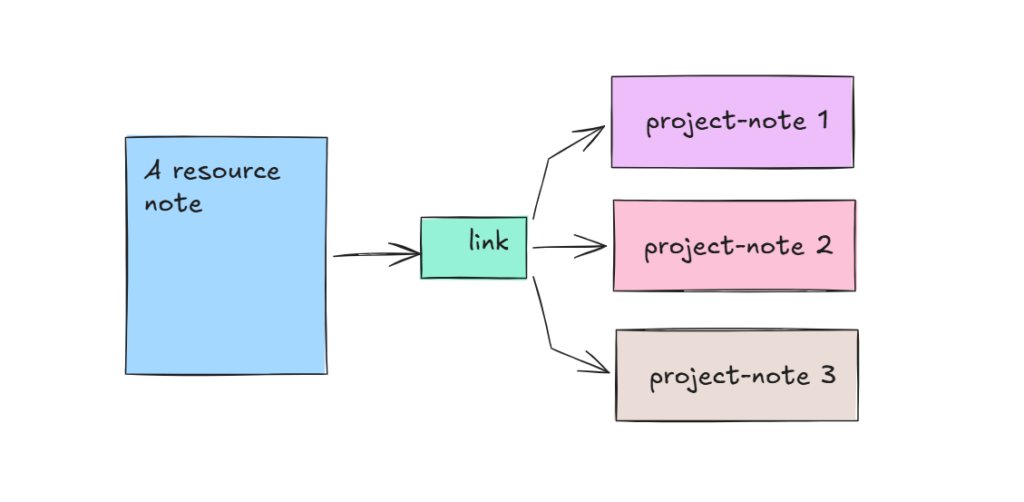
    a diagram shows a resource note can be linked to 3 project notes.

    A Resources note about a writing framework can be linked from three different Project notes, an Areas note on your creative practice, and a journal entry.

    You don’t need copies of it in three folders. You need one note and three links.

    The mental model: if you have more than three levels of folder nesting anywhere in your vault, you’re using folders to do a job that links do better.

    How to Move an Existing Messy Vault Into This Structure

    If you already have a vault with dozens of folders and notes scattered everywhere, don’t reorganize everything at once. That’s how you spend a Saturday moving files and gain nothing.

    1. Create the five folders: Inbox, Projects, Areas, Resources, Archive.
    2. Enable Settings > Files & Links > Automatically update internal links. This makes Obsidian update wikilinks when you move files. Do this before you move anything.
    3. Pick one category to sort first – Projects is usually the clearest. Move everything that’s active project work into Projects/. Create a subfolder per project.
    4. Leave everything else in the old folder structure for now. Add the old folders inside Archive if it helps mentally.
    5. As you open notes over the next few weeks, move them to the right place. Don’t force it all at once.

    One thing to watch: Obsidian updates [[wikilinks]] automatically, but not standard markdown links written as [text](path). If your notes use both formats, check for broken links after any large moves.

    New notes go into Inbox first, always. The structure stabilizes itself once capture is consistent.

  • What I Wish I Knew Before Building My First AI Agent in n8n

    What I Wish I Knew Before Building My First AI Agent in n8n

    My first AI agent took about four minutes to build.

    Chat Trigger node. Gemini model connected. Hit execute. Typed “Hello” got back “Hello! How can I help you today?”

    I genuinely thought I was done. I told people I built an AI agent.

    The next day I came back and typed something that referenced our earlier conversation.

    The agent had no idea what I was talking about. Total blank. Like meeting someone who smiled at your warmly yesterday and today looks right through you.

    Amnesia patient. Full reset. Zero memory of anything.

    That’s when I realized: what I’d built wasn’t really an agent. It was a chat window with a model attached.

    Smart, sure. but stateless. No memory of yesterday, no awareness of context, no persistence of any kind.

    Every message it receives is the first message it’s ever received.

    Fixing that one thing opened a whole set of new questions. What is context, exactly? Where does it live? How does the agent retrieve it? How much of it can you pass before the model chokes?

    What follows is everything I wish someone had told me before I wired up that first AI node.

    Here’s the Short Version (If you’re skimming)

    ai agent in n8n

    Building an AI agent in n8n is straightforward until your first production failure. Here’s what actually trips people up:

    • Simple Memory only lasts for the current session – when it’s restarts n8n and its gone.
    • Your System Prompt is doing the real configuration work – not the model settings
    • The agent will call tools in a loop if you don’t cap the iteration limit.
    • The description you write on each tool node is literally the instruction the LLM uses to decide when to call it.
    • Happy-path testing in the Chat UI hides every failure that happens with real, messy input.

    Know these five things before you build anything you plan to use more than once.

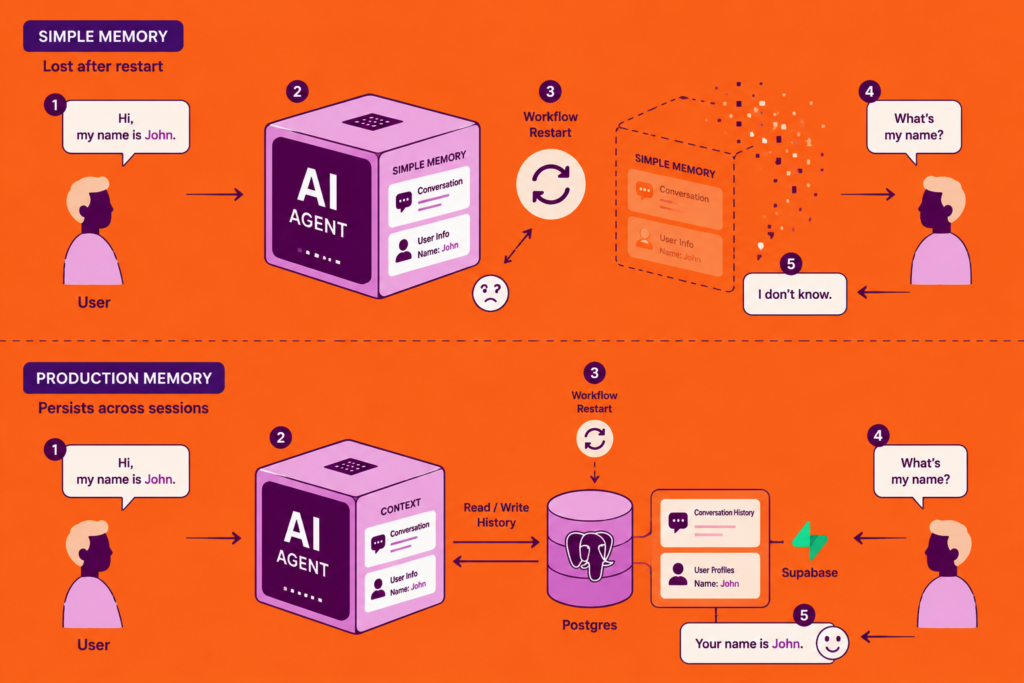
    1. Simple Memory Is Not Production Memory

    When you first add a Memory sub-node to your AI Agent, n8n gives you Simple Memory as the default. It works immediately. The agent remembers what you said two messages ago, threads context, feels like real memory.

    It isn’t.

    Simple Memory stores conversation history in RAM – in the running process, nothing else.

    The moment your workflow restarts, the session ends, or n8n itself restarts, every conversation it was holding disappears. No database.

    No file. Nothing written anywhere. It evaporates.

    This matters the second your agent is handling real users.

    User A sends a message. Workflow runs, Simple Memory holds the context.

    User A sends a follow-up three minutes later – new workflow execution, Simple Memory is empty. The agent introduces itself again. User A closes the tab.

    For actual persistence, you need to store conversation history in an external database and retrieve it at the start of each workflow run. Postgres and Supabase are the most common setups. The pattern looks like this:

    Workflow Starts

    • fetch user’s conversation history from DB
    • pass the history into AI Agent as context
    • agent responds
    • append the new message back to DB

    It adds nodes. It adds setup time. It’s the difference between a demo and something works.

    2. Your System Prompt Is Doing All the Real Configuration

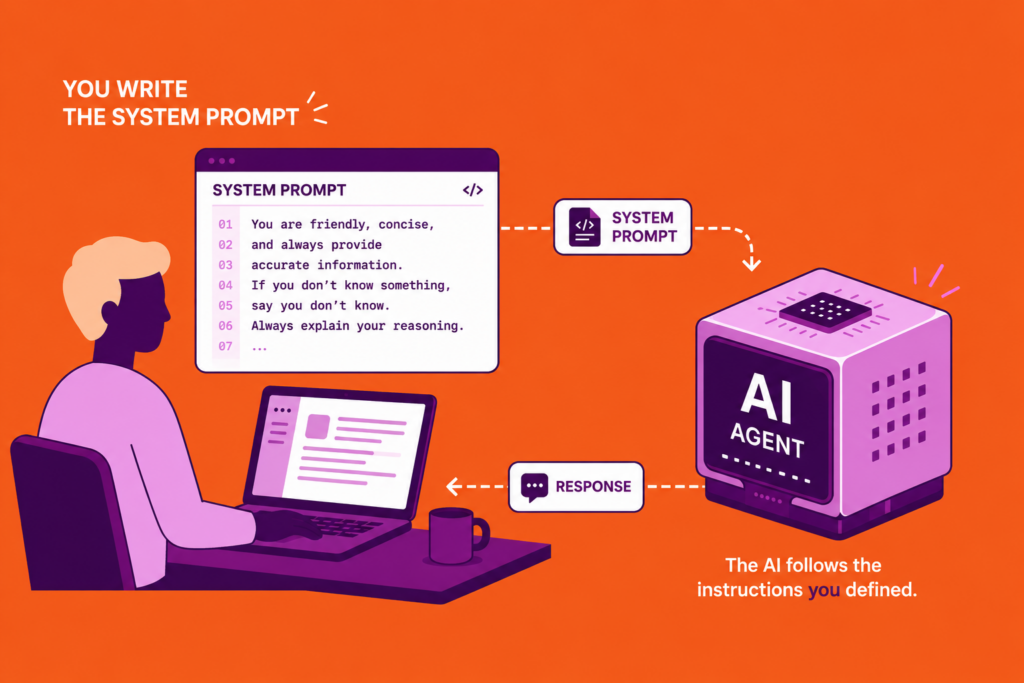
    system prompt in a nutshell

    Most people write one line in the system prompt field. Something like: “You are a helpful assistant.

    Then they wonder why the agent answers questions it shouldn’t, goes off-topic or maybe hallucinate, calls tools in the wrong order, or produces output in a format nothing downstream can parse.

    The system prompt isn’t a label you attach to the model. It’s the only place you’re actually configuring the agent’s behavior.

    The model settings – temperature, top-p – nudge randomness.

    The system prompt shapes what the agent does, how it responds, what it refuses or perhaps guardrails, and in what format it returns output.

    A system prompt that does real work looks more like this:

    You are a customer support agent for [Company].
    
    Your job: answer questions about orders, refunds, and product issues only.
    If someone asks something outside these topics, politely redirect them.
    
    Always respond in this JSON format:
    {
      "message": "your response here",
      "category": "order | refund | product | other",
      "escalate": true | false
    }
    
    If you cannot resolve the issue, set escalate to true.

    That’s not long. But it’s specific. It tells the agent what to do, what not to do, and what to return. Every missing constraint is a behavior you haven’t defined – which means the model fills it in however it sees fit.

    When your agent acts unpredictably, the system prompt is the first place to look.

    3. The Agent Will Loop If You Don’t Cap It

    The AI Agent node has a setting called Max Iterations. It controls how many times the agent can call a tool before n8n forces it to stop and return a response.

    The default is generous. Too generous for most cases.

    Here’s what happens without a sensible cap: the agent calls a tool, gets a result, decides it needs more information, calls another tool, gets confused, calls the first tool again, loops. Depending on the model and the tools you’ve connected, this can run for a while before anything fails visibly.

    By then you’ve burned API credits and the workflow has timed out.

    Set Max Iterations to something reasonable. Five to ten is usually enough for a well-scoped agent.

    If your agent genuinely needs more than ten tool calls to complete a single task, that’s a design problem, not a number to increase.

    The other thing worth knowing: when the agent hits the iteration limit, it doesn’t crash.

    It returns whatever it has at that point, which may be incomplete.

    Build your downstream nodes to handle that – don’t assume the agent’s final output is always a finished response.

    For handling what happens when things go wrong beyond tool loops, the error handling guide covers the workflow-level patterns.

    4. Tool Descriptions Are Instructions, Not Labels

    When you add a tool to your AI Agent – a workflow tool, an HTTP Request, a custom function, there’s a Description field. Most people write something short. “Gets customer data.” “Sends email.”

    That description is not for you. It’s for the model.

    n8n passes the tool name and description to the LLM when it’s deciding which tool to call. The model reads your description and uses it to figure out when to invoke that tool, what input to send, and whether this is the right tool for the current step.

    A vague description produces inconsistent tool selection. The model guesses. Sometimes it guesses right.

    A description that actually works tells the model the trigger condition and the expected input:

    Use this tool when the user asks about their order status or shipping.
    Input: the order ID as a string. Example: "ORD-12345".
    Returns: current order status, estimated delivery date, and tracking URL.
    

    Three sentences. Now the model knows exactly when to call it, what to send, and what to expect back.

    Rewriting your tool descriptions this way is the single fastest way to make agent behavior more consistent without changing anything else.

    5. Test With Bad Input, Not Good Input

    The Chat UI in n8n is excellent for testing.

    You can fire messages directly at your agent, watch the tool calls, check the output. Fast, real feedback.

    The problem: you already know what your agent expects. You write clean, complete messages.

    Real users do all of those things.

    Before you call an agent ready, run it through inputs it wasn’t designed for:

    • “yeah do the thing” – no clear intent
    • A message referencing something the agent has no context for
    • An empty message
    • A question entirely outside its defined scope

    Watch what happens. If it calls the wrong tool, loops, or returns a malformed response – that’s exactly the information you need. Fix the system prompt or tool descriptions before that behavior reaches anyone outside your own browser tab.

    The n8n Chat UI is a safe sandbox. Use it to break things on purpose.

    Where to Go From Here

    If you haven’t built your first AI agent with n8n, and want the step-by-step setup, How to Build an n8n AI Agent Workflow walks through the full build from a Chat Trigger to a working agent with memory and tools connected.

    The agent you build on day two will be better than the one you build on day one. That’s the actual lesson. None of these gotchas are obscure, they just don’t show up until you’ve run the thing at least once and observed it break.

  • Why Solo Builders Build Forever and Launch Never

    Why Solo Builders Build Forever and Launch Never

    I built an Android app in a week.

    It worked. It did exactly what I planned. And instead of submitting it to the Play Store (and, I didn’t have $25 at that time to publish), I kept going. Better architecture. Cleaner code. One more feature that would make it “ready”. Then another. Then a refactor that made the first version look embarrassing by comparison with other huge recognized apps.

    A few weeks later, someone else published the same app. Same core idea. Rougher around the edges than mine, honestly, But it was out there. People were installing it. The numbers were real. And I was still tinkering.

    That was money I left on the table. Not because I was lazy. Not because I didn’t care. Because I convinced myself that more engineering was the same thing as more progress.

    It wasn’t.

    The Real Reason You’re Not Shipping

    overengineering is a trap

    Most solo builders don’t fail to ship because they’re stuck. They fail to ship because building feels like progress – and it is, right up until it isn’t.

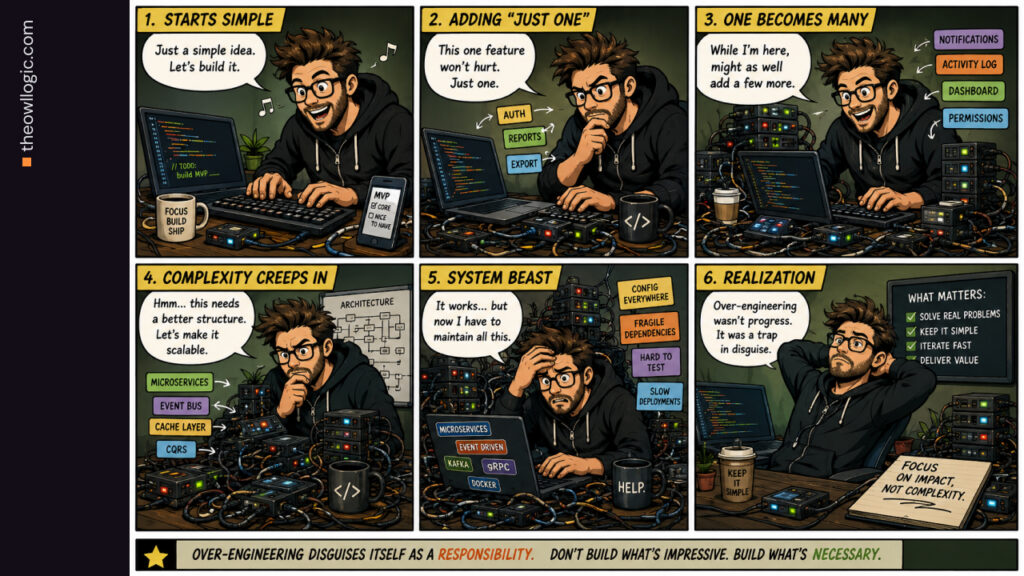
    Over-engineering is a specific trap that gets the sharpest and most talented builders. It disguises itself as a responsibility. You’re not procrastinating, you’re being thorough. You’re not avoiding launch, you’re making sure it’s done right. But the result is identical to just not shipping: your product doesn’t exist in the world, and someone else’s does.

    The real reason most solo builders never ship is that they never define what “done” actually means. Without a clear finish line, building expands to fill all available time – and there’s always something that could be better. The problem isn’t your work ethic. It’s that you’re optimizing a product that no one is using yet.

    Ship the version that works. Everything else is future you’s problem.

    Why Over-Engineering Feels Productive (But Isn’t)

    When you’re building alone, there’s no one to tell you the authentication flow you spent three days redesigning was already fine. No PM cutting scope. No deadline that isn’t self-imposed. Just you, your laptop, and growing list of improvements that feel completely justified.

    This is what makes over-engineering so dangerous for solo builders specifically. In a team setting, someone eventually says “that’s good enough, ship it” Solo, that voice has to come from you though – and you’re too close to the thing to hear it clearly.

    There’s also a psychological comfort to building. The product is perfect in your head right up until users get it and tell you it’s not. Staying in build mode delays that moment indefinitely. It’s not conscious, but it’s real: the longer you build, the longer you don’t have to find out whether people actually want what you made.

    I understand this more clearly now looking back at that Android app. The “improvements” I was making weren’t for users. There were no users. They were for me – because I wanted to feel ready before I was exposed to the verdict.

    The MVP Boundary Test

    Here’s the thing about MVPs that gets lost in the way people talk about them: minimum viable doesn’t mean minimal effort. It means minimum scope. The features in your MVP should work well. But the list of features should be ruthlessly short.

    Before building anything new, I now ask one question: does a user need this to get value from the product?

    Not “would this be nice” Not “would this impress someone”. Does a real user need this specific thing to accomplish the core reason they downloaded or signed up?

    If the answer is no, it doesn’t go into v1. Full Stop. I actually write a short list of feature I’m explicitly not building for launch and keep it visible while I work. It’s easier to say no to scope creep when you’ve already decided in advance that those things don’t belong in this version.

    The goal of v1 isn’t to make something perfect. It’s to get your idea into contact with reality. Everything you learn from real users in the first two weeks is worth more than anything you could have added in those two weeks of extra building.

    What “Done” Actually Means for a Solo Builder

    Done means: someone who isn’t you can use this and get value from it.

    That’s it. Not “it’s architected the way I’d want a production system to be”. Not “I’ve handled every edge cases I can think of” Not “it’s something I’d be proud to show a senior staff or engineer”

    Can a stranger us it? Does it do the one core thing it’s supposed to do? Is it live somewhere they can reach it?

    If yes – It’s done enough to ship. The rest comes after.

    This is the mindset shift that actually changes things. You’re not launching a finished product. You’re launching the first version of something you’ll improve based on what you learn. The architecture can evolve. The features can expand. But none of that happens until it’s out.

    The builder who ships a rough v1 and iterates will always beat the builder who ships a perfect v3 two months later – because by then, the person with rough v1 has two months of real feedback, real users, and real signal.

    The Practical Habit That Actually Helps

    One thing that helped me break out of the over-engineering loop: timeboxing the build, not the features.

    Instead of deciding what’s in v1 and building until it’s done, I flip it. I pick a ship date, usually 1 – 2 weeks out – and then decide what’s possible within that window. The date is fixed. The scope adjusts.

    This work because it forces a different kind of decision making. Every feature request your brain generates get evaluated against a real constraint: does this fit before the date? If no, it goes on the v2 list. Having a v2 list is useful too – it makes cutting scope feel less like giving up and more like planning ahead.

    The App Already Has Installs. Ship Yours.

    Right now, somewhere, someone is using a version of what you’re building. Maybe it’s rougher than yours. Maybe it’s missing two features you consider essential. But it’s out, and yours isn’t – and that gap compounds every day.

    The cost of not shipping isn’t just opportunity. It’s motivation. Every week a project sits unshipped, it gets a little heavier. The longer you wait, the more the gap between what you have and what you imagine grows. Until one day you either force-ship something or quietly abandon it.

    The app I built in a week was good enough. The person who shipped theirs in a week got the installs. I got a lesson.

    Build enough to work. Ship it. Learn from real people using real software. Then build more. That’s the only sequence that actually moves anything forward.

  • n8n vs Zapier: Which Automation Tool Is Actually Right For You?

    n8n vs Zapier: Which Automation Tool Is Actually Right For You?

    Every week someone in the reddit community asks the same question: should I switch from zapier?

    Usually it starts with a bill. Their Zapier costs crept up as they added workflows, and now they’re paying $150-200/month for automations that feel like they should cost a fraction of that. Sometimes it starts with a wall – they hit something Zapier can’t do and started looking for alternatives.

    The honest answer is that it depends entirely on who you are and what you’re building. Zapier isn’t bad. n8n isn’t automatically better. They’re built for different people, and picking the wrong one costs you either money or weeks of frustration.

    The Short Answer: Which Tool Is Right for You?

    If you want the verdict before the explanation.

    You should useIf…
    ZapierYou’re non-technical, need a specific niche app integration, or want something running in 20 minutes.
    n8n cloudYou’re technical (or willing to learn), run complex multi-step workflows, and want to stop paying per action
    n8n self-hostedYou want zero executions limits, you handle sensitive data, or your zapier bill has gotten uncomfortable

    If none of those click immediately, keep reading – the billing model section below will make the decision obvious.

    What Makes These Tools Fundamentally Different

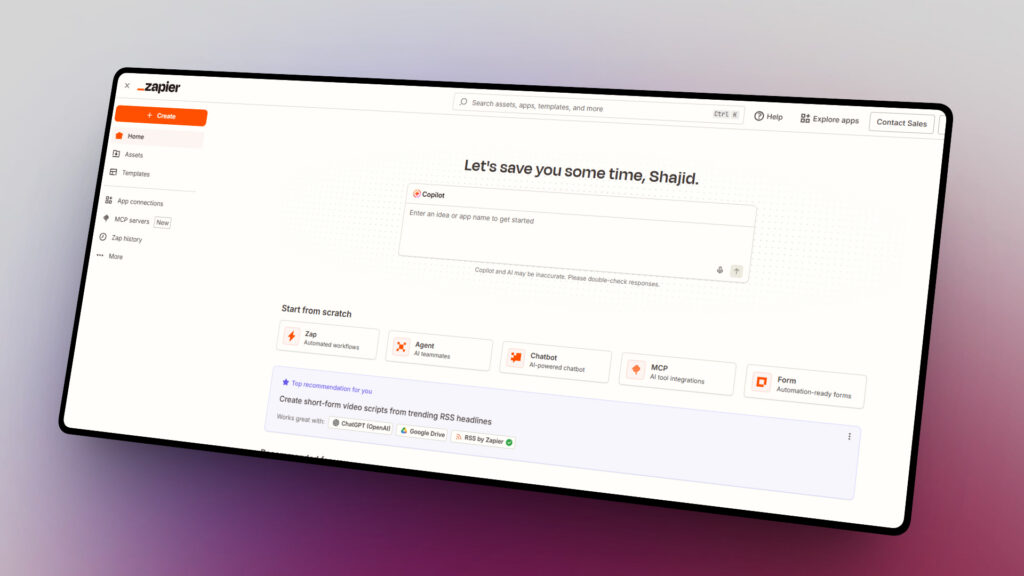
    zapier initial dashboard

    Zapier is a managed SaaS product. You sign up, connect your apps, and Zapier runs everything on their servers. You never touch infrastructure.

    n8n gives you a choice. You can use n8n Cloud (managed, like zapier) or self-host the entire thing on your own server.

    That one difference changes the economics, the privacy story, and the ceiling on what you can build.

    The philosophy behind each tool reflects that split.

    Zapier is built around accessibility – anyone should be able to automate in minutes. n8n is built around control – developers should be able to build anything without hitting artificial limits.

    Neither philosophy is wrong. The problem happens when people pick a tool that doesn’t match what they actually need.

    The Billing Model: Tasks vs Executions (This Changes Everything)

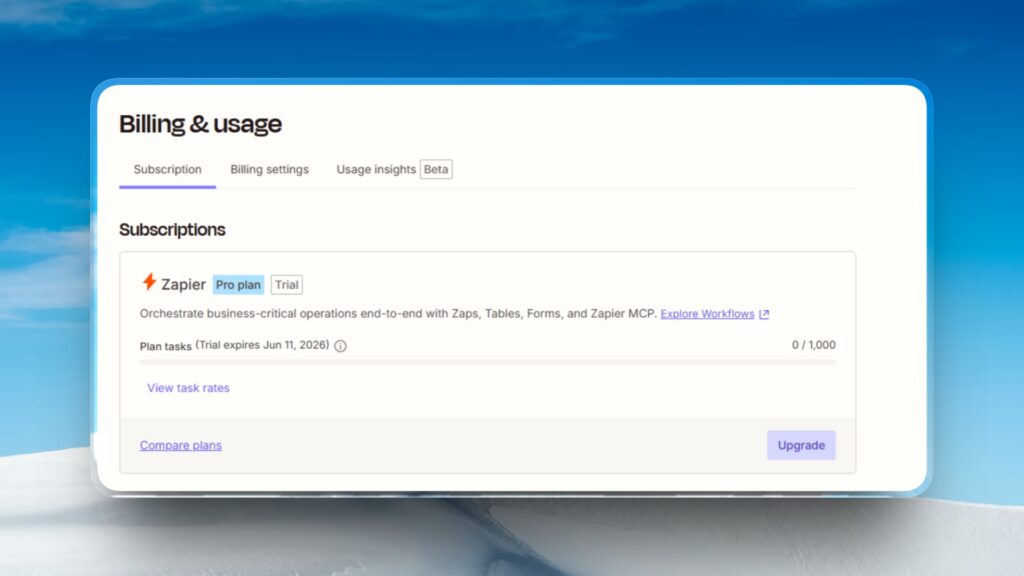
    zapier billing usages

    This is the part most comparison articles bury 1500+ words in. I’m putting it second because it’s the single most important thing to understand.

    Zapier charges per task. A task is each individual action step that runs in a workflow. A workflow with a trigger and four actions uses four tasks every time it runs. The trigger itself is free. Filters are free. But every action setup counts.

    n8n charges per execution. An execution is one complete workflow run – regardless of how many nodes are inside. A 20-node workflow running 500 times costs 500 executions.

    That same workflow on Zapier would cost 10,000 tasks.

    A Real Cost Example

    ScenarioMonthly RunsZapier tasks usedn8n executions used
    Light use5002,000500
    Medium use20008,0002,000
    Heavy use10,00040,00010,000

    At heavy use, Zapier’s professional plan (2,000 tasks/month) runs out at 500 workflow runs. You’d need a significantly more expensive tier. n8n’s Pro Cloud plan (10,000 executions) handles all 10,000 runs with room to spare.

    One more thing worth knowing: n8n only counts successful executions. Failed runs and test executions don’t count against your limit.

    Pricing Tiers Side by Side

    Current pricing as of May 2026 – verify on each vendor’s pricing page before committing, as these do change.

    PlanZapiern8n
    Free100 tasks/month, 5 zapsNone (Cloud), Self-hosted unlimited executions
    Entry paid$19.99/mo – 750 tasks~$24/mo – 2,500 executions
    Mid tier$49/mo – 2,000 tasks~$60/mo – 10,000 executions
    Team$69/mo – 2,000 tasks, shared workspace~$800/mo – 40,000 executions, SSO
    Self-hostedNot availableFree (Pay $5 – $20/mo) for a VPS

    Two things stand out. First, Zapier’s free plan used to offer 750 tasks – it was cut to 100. If you set something up years ago on “free tier” and it stopped working, that’s why.

    Second, n8n’s self-hosted community edition has no execution limits, no feature restrictions, and no use limits. You pay only for your server.

    If you’re comfortable with Docker and a basic Linux command line, setting up n8n self-hosted take a few hours and eliminates the billing question entirely.

    Integrations 9,000 vs. Unlimited (The Misleading Stat)

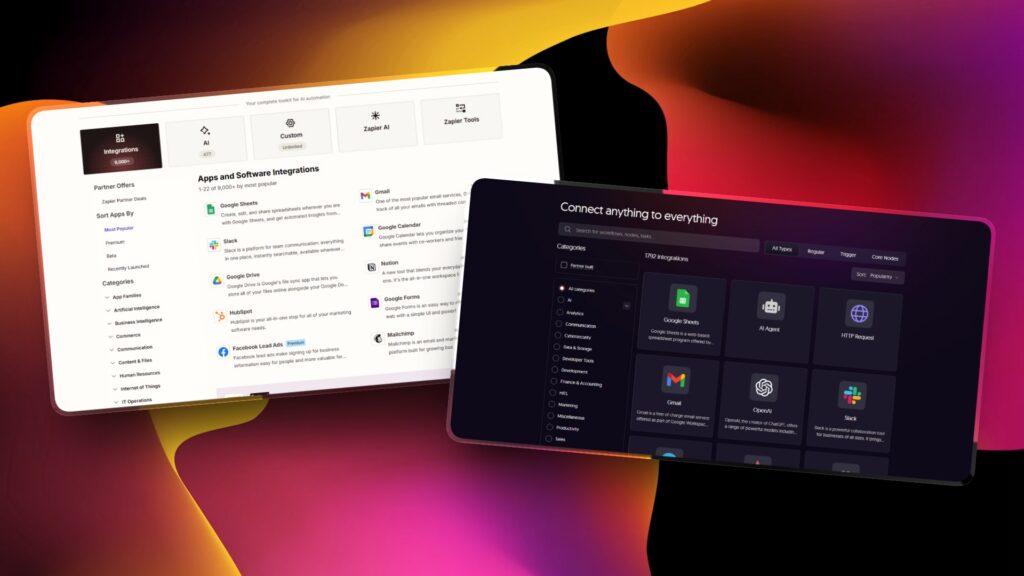
    n8n and zapier integration

    Zapier has 7,000 – 8,000+ native integrations. n8n has around 400+ native nodes. That gap sounds enormous. In practice, it’s less significant than it appears – but not zero.

    Here’s the nuance. n8n’s HTTP Request node connects to any REST or GraphQL API. Combined with 500+ community-built nodes on npm, n8n can reach virtually any service that has a public API.

    For developer teams, the integration count is effectively unlimited – it just requires building the connection yourself rather than clicking a pre-build option.

    Where Zapier’s breadth genuinely wins

    • Niche SaaS tools with no public API or non-standard auth (some older CRMs, specialized project management tools, industry-specific software)
    • Apps that require OAuth flows you’d rather not implement yourself.
    • Quick one-off connections where building an HTTP node workflow isn’t worth the time.

    If you’re connecting Google Sheets, Slack, Notion, Airtable, Asana, GitHub or any major product – n8n has you covered natively. If you need to connect something obscure that only exists in Zapier’s catalog, that’s a real consideration.

    Ease of Use vs. Power

    I won’t sugarcoat this. n8n has a steeper learning curve.

    Zapier uses a step by step guided interface. You pick a trigger app, pick an action app, map the fields. It’s genuinely usable in 10-15 minutes with no prior knowledge.

    n8n uses a node canvas. Data flows as JSON between nodes. You need to understand at least roughly what your data looks like at each step to configure the next one.

    Concept like how data flows between nodes and conditional branching require more upfront investment.

    If someone tells you n8n “just as easy” as Zapier – they’ve forgotten what it’s like to learn it fresh. It isn’t. The learning curve is real and worth acknowledging.

    That said, once you’re past the initial learning period, n8n’s power ceiling is dramatically higher.

    Things Zapier can’t do at all – looping over thousands of items, writing custom JavaScript in the middle of a workflow, changing sub-workflow, calling your own database – are straightforward in n8n.

    AI Capabilities in 2026

    AI automation is where the gap between these tools has widened most noticeably this year.

    n8n ships 70+ native AI and LangChain nodes. You can build an LLM chain, connect it to a vector store, add memory, and route outputs through conditional logic – all within the same workflow canvas.

    The n8n AI agent workflow is treated as a first-class feature, not a plugin.

    Zapier has AI capabilities, but they’re positioned differently. Zapier Agents and Chatbots are separate products layered on top of the core automation platform.

    For straightforward AI actions (summarize this email, classify this support ticket), Zapier works fine.

    For complex AI pipelines – multi-agent systems, retrieval-augmented generation, custom memory management – Zapier’s abstraction layer becomes a constraint.

    If AI-native workflows are central to what you’re building, n8n’s architecture suits it better. Zapier’s approach makes AI accessible to non-technical users, but trades depth for that accessibility.

    Data Privacy & Self-Hosting

    Zapier is cloud-only. All your workflow data, credentials, execution history, and business logic live on Zapier’s servers in the United States.

    For most small businesses and solo operators, that’s fine. For healthcare, legal, finance, or any team subject to GDPR or strict data residency requirements, it’s a hard blocker. You have no choice about where your data lives.

    n8n self-hosted puts everything on your infrastructure. Your credentials never leave your server. Your execution logs stay private. Setting up n8n on your own machine or VPS means you control the entire stack.

    This matters more than people initially think. It’s not just compliance. It’s also vendor lock-in. If Zapier changes pricing (which it has, multiple times), your only options are to pay more or migrate. With self-hosted n8n, the platform upgrade risk is yours to manage, but the pricing risk is essentially zero.

    Who Should Pick Which: The Final Verdict

    Use Zapier if:

    • You’re non-technical and want automation running today, not after a learning curve
    • You need a specific integration that only exists in Zapier’s 8,000+ catalog and has no public API
    • You’re running fewer than 5 simple 2-step workflows at low volume (the free tier actually works)
    • Your team has zero appetite for infrastructure or technical setup of any kind

    Use n8n Cloud if:

    • You’re comfortable with JSON and willing to spend a day or two learning the canvas
    • You run multi-step workflows (5+ actions) at any real volume the per-execution billing pays off fast
    • You want native AI/LangChain nodes without paying Zapier’s AI add-on pricing
    • You want the option to migrate to self-hosted later without rebuilding your workflows

    Use n8n self-hosted if:

    • Your Zapier bill has become painful and you’re technical enough to run Docker
    • You handle sensitive data and need full control over where it lives
    • You want to run high-volume workflows (10,000+ runs/month) without per-execution costs
    • You’re building something where workflow logic is part of your product, not just glue code

    One profile that genuinely belongs on Zapier: the solo founder with 3 simple automations who will never touch a terminal. Telling that person to self-host n8n would waste more time than it saves.

    If you’ve decided n8n is the right direction, the complete n8n beginner guide is the fastest path is getting your first workflow running.

    Start with installing n8n locally to explore without any cloud setup. Once you’re ready to build something real, the first Hello World workflow gets you familiar with how nodes connect and data flows.

    If you’re coming from Zapier, the canvas will feel different at first. Give it a couple of real workflows before forming an opinion. Most people who stick with it past the first week don’t go back.

    If Zapier is clearly the right fit – use it. The goal is automating what matters, not winning an argument about tools.

    Comparing more options? See n8n alternatives for how n8n stacks up against Make, Activepieces, and other platforms.

  • n8n vs Make: Which Automation Tool Should You Pick in 2026?

    n8n vs Make: Which Automation Tool Should You Pick in 2026?

    My first automation tool was Make.com.

    I didn’t go looking for it after research or a recommendation. It was simply the first thing I came across when I wanted to automate something in my workflow.

    I spent week on it. Learning how modules connect, how data flows from one step to the next, how integrations talk to each other. At the time I didn’t realize it, but Make was quietly teaching me how to think in automations.

    Then I heard about n8n.

    I expected a steep learning curve. Instead, something clicked me faster than I anticipated because Make had already built the mental model. The nodes, the connection, the logic. n8n just looked different on the surface. Underneath, I already spoke the automation language.

    That experience is actually why I think I’m in a decent position to compare these two.

    Not because I read the documentation for both, but because I’ve lived inside them at different points in my automation journey. What I’m sharing here isn’t a feature matrix repackaged as an article – it’s like, I genuinely wish someone had told me before I had to figure it out myself.

    So let me give you that shortcut first.

    If you already know your situation, the table below ends the decision in under a minute. If you’re not sure which row fits you, keep reading and the rest of this post gives you the context behind each choice.

    Short Answers

    Your situationPick this
    Non-technical team, visual-first, fast setup, no compliance concernsMake
    Developer or technical team, complex logic, high-volume workflows,
    AI agents
    n8n
    Mid-technical ops team, some scripting needed, no self-hosting
    required
    Either. Read the pricing section
    first

    If you’re not sure which row fits you, that third row is more common than people admit. The rest of this post gives you the information to decide.

    Why This Is a Harder Call Than n8n vs Zapier

    If you’ve already compared n8n to Zapier, you know that comparison has a clear winner for most technical users. This one is different.

    Make sits between Zapier and n8n on the technical spectrum. It has a visual canvas (like n8n), a free tier, integrations for 3,000+ apps, and this is what most comparisons miss JavaScript
    and Python support on paid plans.
    Make is not a purely no-code tool. Once you’re on a paid tier, you can add a Code module to a scenario and write real scripting logic.

    That changes the decision. If you assumed n8n was your only option for any scripting work, it isn’t.

    The gaps between Make and n8n are real, but they’re narrower than the marketing on both sides suggests. What actually separates them is the pricing model, the AI architecture, and whether you need to self-host.

    Pricing. Operations vs Executions (With Real Numbers)

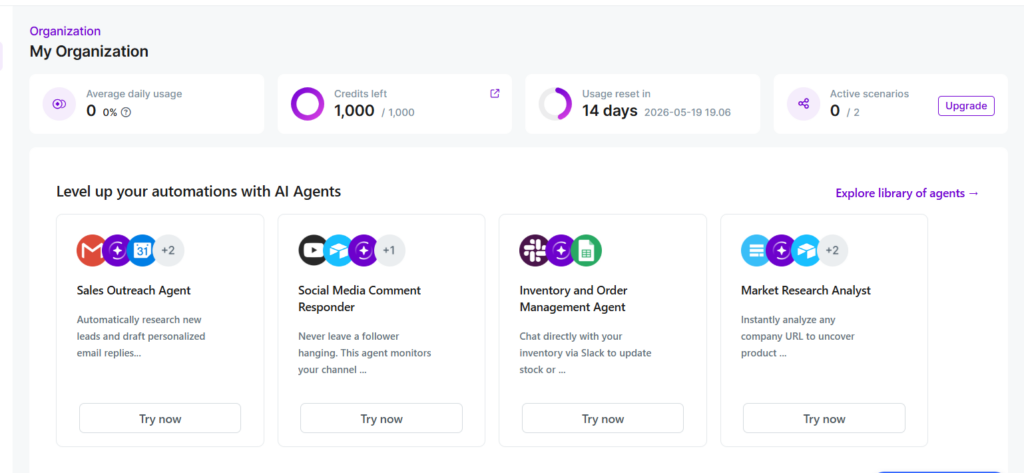
    credits in make.com

    This is the single most important thing to understand before committing to either platform.

    How Make charges

    Make bills per operation. Every individual module step in a scenario counts as one operation.

    A scenario with 8 modules that runs 500 times consumes 4,000 operations (8 × 500). Make’s Free plan includes 1,000 operations per month. Their Core plan starts at around $9/month for
    10,000 operations.

    That sounds like a lot until your scenarios get complex. A 15-step scenario processing 1,000 items per month = 15,000 operations. You’ve already outgrown the base paid tier on that one workflow alone.

    How n8n charges

    n8n bills per execution one complete workflow run, regardless of how many nodes it passes through.

    That same 8-node workflow running 500 times = 500 executions. n8n’s Starter cloud plan includes 2,500 executions/month at around $20/month.

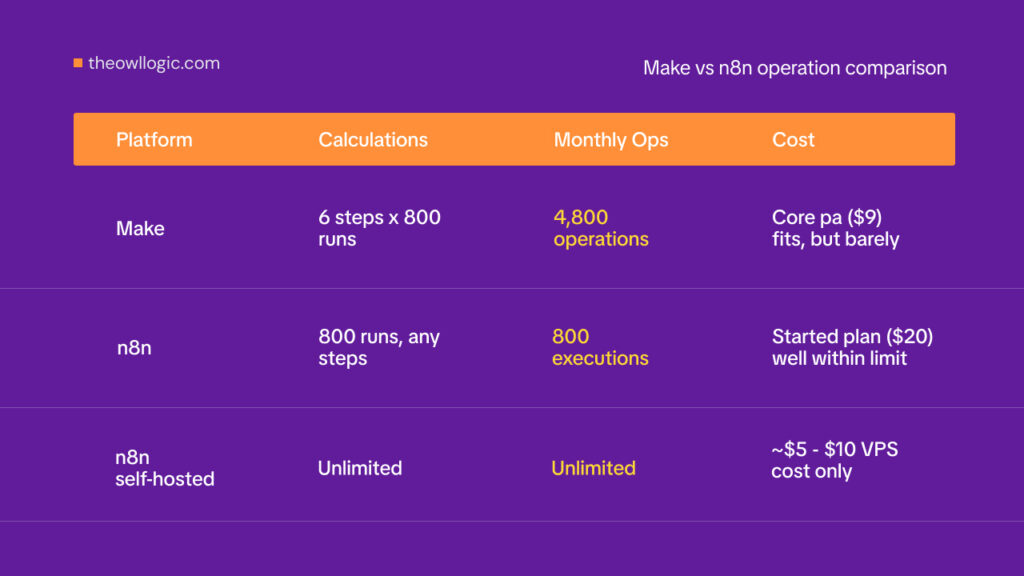
    The same workflow, priced on both platforms

    make vs n8n operation comparison

    Here’s a real scenario: a workflow that triggers on a new HubSpot contact, enriches the data with Clearbit, formats the record, adds a row to Google Sheets, sends a Slack notification, and creates a
    follow-up task in Asana. That’s 6 steps. It runs 800 times per month.
    PlatformCalculationMonthly
    operations/executions
    Approximate cost
    Make6 steps × 800 runs4,800 operationsCore plan ($9) fits, but barely
    n8n800 runs, any
    steps
    800 executionsStarter plan ($20) well within
    limit
    n8n self-hostedUnlimitedUnlimited~$5–10 VPS cost only

    Now add complexity. Double the steps to 12, or run it 2,000 times/month, and Make’s operation count climbs to 24,000. You’re adding operation packs. On n8n self-hosted, nothing changes.
    The breakeven point depends on your workflow complexity and run frequency. For simple, low-step scenarios running infrequently, Make’s free tier is genuinely useful. For anything running at scale with multiple steps, n8n’s execution model is often significantly cheaper.

    Setting up self-hosted n8n takes about 30 minutes with Docker. The full setup is covered in n8n self-hosted setup if you want to skip the cloud cost entirely.

    Visual Interface. Where Make Genuinely Wins

    Make’s scenario builder is more polished than n8n’s canvas. The icons are cleaner, the module connections are visually intuitive, and the onboarding flow gets non-technical users to a working
    automation faster. If you hand Make to a marketing manager who’s never touched automation software, they’ll figure it out in an afternoon.

    n8n’s canvas is more powerful but more demanding. The node-based layout resembles developer tooling like Node-RED more than a consumer app. JSON data structures are visible throughout. Expressions use their own syntax.

    These aren’t problems for developers, but they’re a real friction point for anyone who just wants to connect Typeform to Mailchimp without thinking about data payloads.

    There’s one area where n8n’s interface is concretely better debugging.

    n8n lets you deactivate individual nodes with a single click while keeping the rest of the workflow intact useful when
    you’re isolating a problem in a 15-step workflow.

    In Make, you’d need to manually disconnect modules to achieve the same result, which is slower and more disruptive to your workflow structure.

    For planning and structuring workflows before you build, n8n’s canvas also scales better as complexity grows branching paths and parallel flows are easier to follow visually at larger sizes.

    Integrations and Code. Correcting a Common Misconception

    The integration count comparison: Make has 3,000+ native modules, n8n has around 1,200 native nodes.

    Make wins on raw breadth, particularly for niche SaaS tools your marketing or finance team uses. If the app you need has a Make module, setup takes minutes. If it only has an n8n HTTP Request node option, you’re doing some API configuration work.

    Make on paid plans supports JavaScript and Python via the Code app. You’re not locked into purely visual logic once you upgrade. Enterprise plans add Custom Functions. This is a genuine
    middle ground that ops teams with some scripting ability should factor in.

    n8n’s Code node is unrestricted on all plans cloud and self-hosted. There’s no tier gating on scripting. You can write arbitrary JavaScript or Python in any workflow from day one, with full
    access to the node’s input/output data.

    Where n8n goes further: community nodes, self-hostable custom node development, and the HTTP Request node cover virtually any REST or GraphQL API. If an app has a public API at all, n8n can connect to it. The development overhead is real, but the ceiling is higher.

    For teams evaluating whether either platform covers a specific integration, n8n alternatives cover the broader tool landscape if you hit a gap.

    AI Capabilities 2026 Update

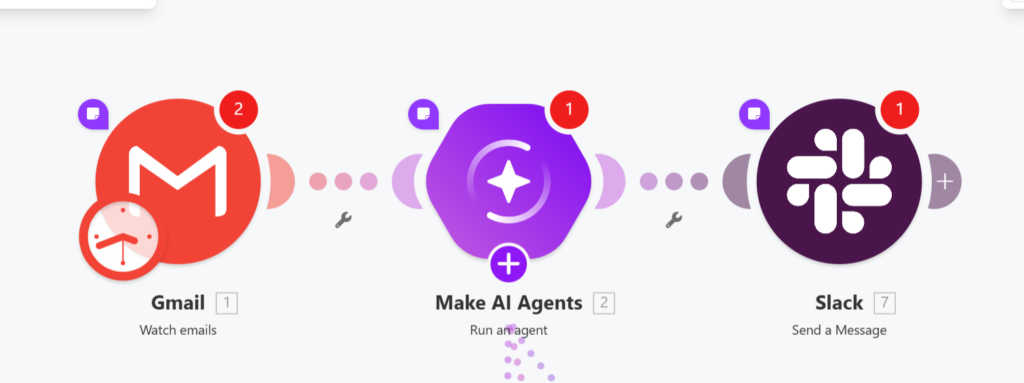
    Make has added AI capabilities that weren’t there 18 months ago. You can now trigger OpenAI and Anthropic calls as standard modules, and Make AI Agents provides a proprietary module for
    multi-step AI automation.

    For teams that want to add AI steps to existing workflows, like summarize this document, classify this email, extract these fields from this text Make works fine.

    The architectural difference shows up when you need AI that makes decisions, not just processes text.

    n8n’s AI Agent node lets an LLM choose which tools to call based on incoming data.

    The agent can decide to query a database, call an API, send a Slack message, or loop back based on what the data says, not based on a fixed sequence you defined.

    LangChain integration adds memory nodes (conversation context across runs), vector stores for RAG pipelines, and model flexibility across OpenAI, Anthropic, Mistral, and local Ollama models.

    Make’s AI modules are fixed steps in a sequence. You define when the AI runs and what it receives. n8n’s agent architecture means the AI is part of the routing logic itself.

    If you’re building an AI-powered support workflow, a document intelligence pipeline, or any automation where the AI needs to decide what happens next, that’s n8n. If you’re adding AI as
    one step in an otherwise rule-based workflow, Make handles it.

    A real n8n AI agent workflow with the actual node setup is covered in the n8n AI agent workflow.

    Self-Hosting and Data Residency

    n8n can be self-hosted. Make cannot.

    For teams with data sovereignty requirements, healthcare, finance, legal, any org with strict GDPR obligations around where data is processed, self-hosted n8n means workflow data,
    credentials, and execution history never leave your infrastructure.

    Make is cloud-only, but there’s a detail worth knowing: Make is a European company (Czech-based, part of Celonis since 2022), and its cloud infrastructure runs in European data centers. For
    EU businesses that need data to stay within the EU but can’t manage self-hosted infrastructure, Make is meaningfully different from US-hosted platforms like Zapier. This isn’t the same as self-hosting, but it matters for GDPR compliance discussions where US data transfers are the specific concern.

    The practical breakdown:

    • Full data sovereignty, any compliance requirement → n8n self-hosted
    • EU data residency without infrastructure overhead → Make (EU cloud)
    • US-based team with no residency requirements → either platform, choose on other criteria

    The Decision Framework. 4 Questions

    Answer in order. First “yes” ends the decision.

    • Do you need to self-host or keep all data within your own infrastructure?
      n8n. Make has no self-hosting option.
    • Is your team primarily non-technical, and do they need a polished visual interface with minimal configuration for common SaaS tools?
      Make. The UI onboarding is faster, the module library covers more apps out of the box, and the operation-based pricing is reasonable at low volumes.
    • Will your workflows regularly exceed 10 steps, or run at high volume (thousands of times per month)?
      n8n. The execution model becomes substantially cheaper than operation-based billing at any meaningful scale.
    • Are you building workflows where AI makes routing decisions, not just processing text as one fixed step?
      n8n. The AI Agent architecture and LangChain integration have no direct equivalent in Make.

    If none of these apply, small team, simple integrations, low volume, EU cloud is fine. Make and n8n are genuinely interchangeable for your use case. Pick whichever interface feels more natural after a free trial on both.

    To get started with n8n, the complete n8n beginner guide is the fastest way to go from zero to your first workflow.

  • n8n and Supabase: Complete Integration Guide

    n8n and Supabase: Complete Integration Guide

    Connecting n8n to Supabase is straightforward once you know which connection method to use. There are three options, and picking the wrong one is the most common reason people end up
    reading troubleshooting docs instead of building workflows.

    Three Ways to Connect n8n to Supabase

    Before touching credentials, decide which connection method fits for your workflow or usecase.

    MethodWhen to use it
    Native Supabase
    node
    CRUD on public schema tables simplest setup, no SQL required
    Postgres nodeComplex queries, JOINs, stored procedures, or direct database access with custom
    schemas
    HTTP Request
    node
    Supabase Edge Functions, Auth API, Storage API, or Realtime REST endpoints the
    native node doesn’t cover

    Most workflows use the native Supabase node. It handles the common operations create, read, update, delete rows through a visual interface without writing SQL.

    The Postgres node gives you more power but requires a direct database connection string instead ofAPI key auth.

    The HTTP Request node is for anything outside the database itself.

    The rest of this guide focuses on the native Supabase node and Vector Store node, with a section at the end on when to reach for Postgres instead.

    Credentials Setup Supabase Node

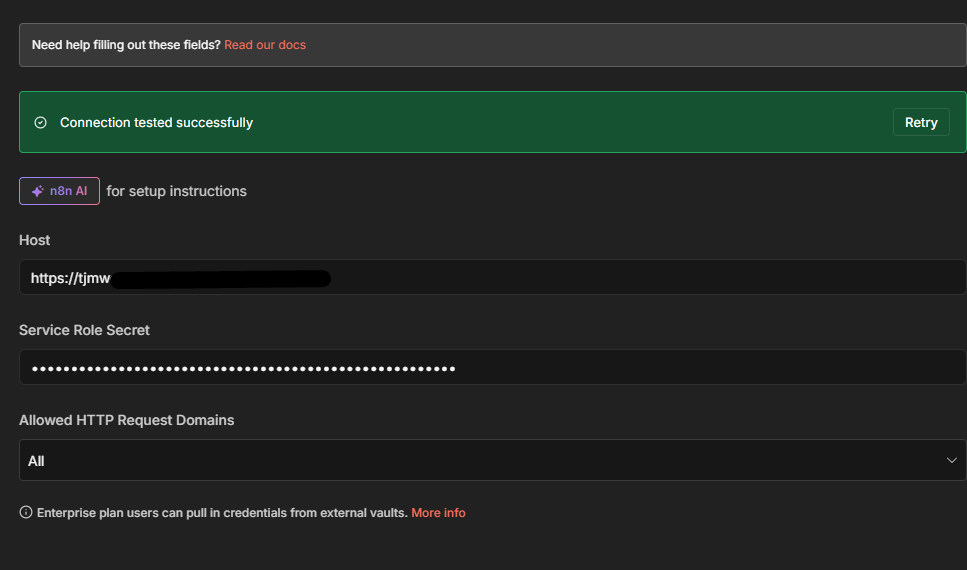
    The Supabase node authenticates with two pieces of information: your project URL and your service role secret key. These come from two different places in Supabase.

    Host (Project URL): On your project’s main dashboard, the URL appears directly below the project name — something like https://asfddssdexz.supabase.co. Hit Copy to grab it.

    Service Role Secret: Go to Project SettingsAPI. Scroll to the API Keys section, click Reveal next to the service_role key, and copy it.

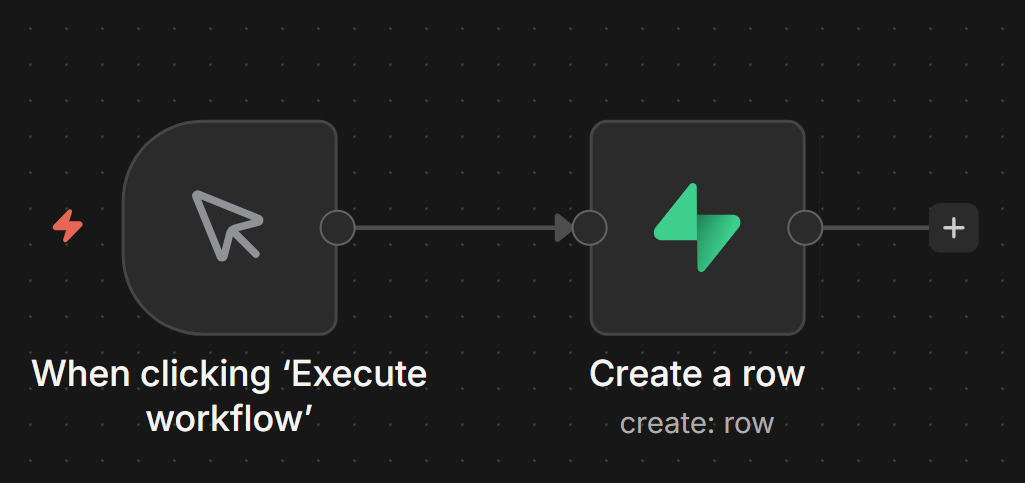
    In n8n: open Credentials → New → search for Supabase → paste both values → Save.

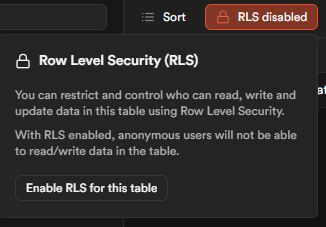
    One thing to understand before saving: the service_role key bypasses all Row Level Security (RLS) policies. That means your n8n workflows have unrestricted read and write access to every
    table in the database. For internal automation syncing data, processing records, building pipelines this is usually fine. If you’re building workflows that act on behalf of specific users or
    handle multi-tenant data, review whether service_role is appropriate before using it in production.

    For help with n8n credential management more broadly, the n8n credentials and service guide covers the patterns in detail.

    CRUD Operations What the Supabase Node Actually Does

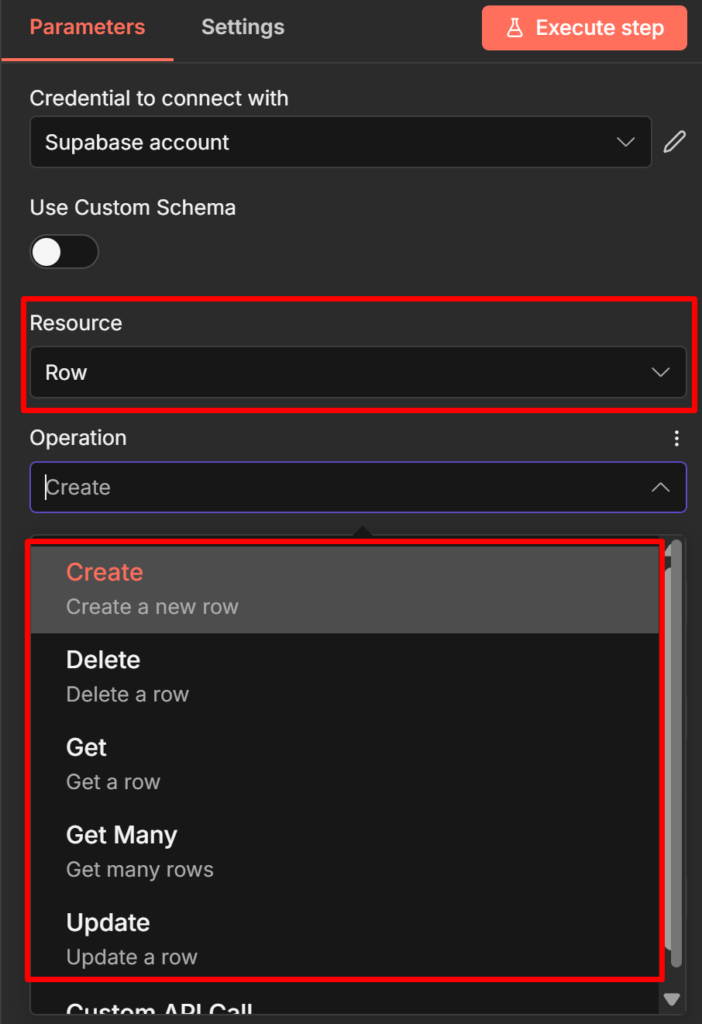
    The Supabase node supports five operations: Get Row, Get All Rows, Create Row, Update Row, and Delete Row. Here’s what each does in practice.

    Create Row

    Use this to insert a new record into a table. Set Table to your table name, then map the fields you want to write.

    A typical use case: a form submission webhook triggers an n8n workflow, and you write the submission data to a leads table.

    // What the node writes to Supabase
    
    {
    "name": "Alice Chen",
    "email": "alice@example.com",
    "source": "contact_form",
    "created_at": "2026-04-23T09:15:00Z"
    }

    Map each field in the node’s Fields to Send section using expressions like {{ $json.name }} to pull values from the previous node.

    Get All Rows (with filters)

    This is the most-used read operation. It retrieves multiple records and supports filtering, AND/OR logic, and a limit on return count.

    Example: a scheduled workflow that runs every hour and fetches all leads where status is pending :

    • Table: leads
    • Return All: off (leave the default limit unless you need all records)
    • Filter: status equals pending

    For large tables, keep Return All off and set a reasonable Limit. Returning 10,000 rows into a workflow that processes each one will slow execution and may hit memory limits.

    Custom schema support: By default, the Supabase node only reads from the public schema. If your tables live in a custom schema, enable Use Custom Schema in the node settings and enter your schema name. This option is easy to miss and causes silent failures if you forget it.

    Why Your Supabase Node Returns No Data (The RLS Problem)

    This is the most common failure pattern when connecting n8n to Supabase for the first time. The node runs without error, the execution shows green, but the output is empty.

    The cause is Row Level Security.

    Here’s the mechanism: When you create a table using the Supabase Table Editor (the UI), Supabase enables RLS on that table automatically. With RLS active and no policies defined, the
    anon (public) key returns zero rows not an error message, just nothing. The service_role key bypasses RLS entirely, which is why switching to service_role in your credentials immediately fixes the empty output.

    The confusing part is that there’s no error to tell you what’s happening. Your query ran, it just returned no data because RLS blocked it.

    Two valid fixes:

    Fix 1 Use the service_role key (recommended for internal automations). This is what the credentials setup section above configures. If your n8n workflows are internal, not acting on
    behalf of end users, service_role is the right choice.

    Fix 2 Create an RLS policy. If you need the anon key for a specific reason, go to Authentication → Policies in your Supabase dashboard, select your table, and create a policy that grants the access pattern you need. For example, to allow all reads:

    CREATE POLICY "Allow public read access"
    ON leads
    FOR SELECT
    USING (true);

    A third failure mode applies only to self-hosted setups: if both n8n and Supabase run in separate Docker containers, don’t use localhost as the host. Use supabase-kong (the Supabase API
    gateway container name
    ) instead.

    Check it out How to Install n8n locally (Docker + NPM Method)

    For setting up error alerts so silent failures like this get caught automatically, the error handling guide covers the error trigger workflow pattern.

    Triggering n8n Workflows From Supabase Events

    The connection works in both directions. Supabase can push events to n8n when database records change. There are two methods.

    Database Webhooks (simpler)

    Supabase Database Webhooks send an HTTP POST request to a URL whenever a row is inserted, updated, or deleted. In n8n, a Webhook node receives this POST and triggers your workflow.

    Setup in Supabase: Database → Webhooks → Create a new hook. Select your table, choose the events (INSERT, UPDATE, DELETE), and paste your n8n Webhook node URL as the endpoint.

    The payload n8n receives looks like this:

    {
    "type": "INSERT",
    "table": "leads",
    "schema": "public",
    "record": {
    "id": 42,
    "name": "Bob Okafor",
    "email": "bob@example.com",
    "status": "pending",
    "created_at": "2026-04-23T10:30:00Z"
    },
    "old_record": null
    }

    For UPDATE events, old_record contains the row’s state before the change. This lets you compare before and after without an extra database query useful for detecting which specific
    fields changed.

    The webhook guide covers how to configure the n8n Webhook node.

    Supabase Realtime (more complex)

    Supabase Realtime broadcasts database changes over WebSocket connections. n8n doesn’t have a native Realtime listener node, so you can’t subscribe to Realtime directly from a workflow canvas.

    The practical pattern is to bridge Realtime using a Supabase Edge Function: the Edge Function subscribes to Realtime events and POSTs to an n8n Webhook node when events arrive. This adds
    a layer of infrastructure, so most teams stick with Database Webhooks unless they need the lower latency Realtime provides.

    Using Supabase as a Vector Store for AI Workflows

    If you’re building AI workflows, RAG systems, document Q&A, and AI agents that search a knowledge base, the Supabase Vector Store node is a completely separate node from the CRUD Supabase node. It’s found in the AI section of the node panel, not the regular integrations section.

    It requires two things in Supabase that the CRUD node doesn’t need – the pgvector extension enabled, and a documents table structured for vector storage. The n8n docs include a SQL script
    in the Vector Store node’s quickstart section run it in Supabase’s SQL editor to create the right table structure.

    -- Run this in Supabase SQL editor to create the vector store table
    -- (use the exact script from n8n's Supabase Vector Store node docs,
    -- as the schema may vary with pgvector version)
    create extension if not exists vector;
    
    create table documents (
    id bigserial primary key,
    content text,
    metadata jsonb,
    embedding vector(1536) -- adjust dimension to match your embedding model
    );

    The dimension (1536 above) must match your embedding model’s output. OpenAI’s text embedding-3-small uses 1536. If you use a different model, update this value or you’ll get a dimension mismatch error on insert.

    Two main workflow patterns:

    Insert Documents (ingestion pipeline): Document Loader → Text Splitter → Embeddings model → Supabase Vector Store (Insert Documents mode)

    Use this to load PDFs, web pages, or text files into your vector store. Each chunk of text gets embedded and stored with its vector representation.

    Retrieve Documents (RAG chain or AI agent tool): Connect the Supabase Vector Store in Retrieve Documents (As Tool for AI Agent) mode directly to your AI Agent node’s tools connector. The agent calls it when it needs to search your knowledge base.

    When to Use the Postgres Node Instead

    The native Supabase node covers most CRUD use cases, but two scenarios push you toward the Postgres node.

    Complex queries. The Supabase node’s filter UI handles simple conditions well equality, greater than, less than. If you need JOINs across tables, aggregate functions, subqueries, or anything that requires writing actual SQL, use the Postgres node. It accepts raw SQL queries and returns results the same way any other n8n node does.

    Custom schemas and stored procedures. While the Supabase node supports custom schemas via the Use Custom Schema toggle, the Postgres node gives you direct database access without going through Supabase’s API layer. For stored procedures or database functions that aren’t exposed through the RESTAPI, the Postgres node is your only option.

    The trade-off: the Postgres node requires a direct database connection string (host, port, database name, username, password) rather than API key auth. Supabase provides these under Project Settings → Database → Connection string. Credential rotation is slightly more involved than rotating an API key.

    For teams running both n8n and Supabase self-hosted, the n8n self-hosted setup guide covers the infrastructure considerations for connecting services in the same environment.

  • How to Back Up n8n Workflows to GitHub (Step by Step)

    How to Back Up n8n Workflows to GitHub (Step by Step)

    If you’re self-hosting n8n, nothing is versioned by default.

    New to n8n? Start with the complete n8n beginner guide first – this tutorial assumes you already have an instance running.

    What if delete things accidentally – It’s gone. There’s no undo, no history or the rollback.

    Github fixes this. Every backup is a commit with a timestamp, which means you get a full version history and can restore any workflow to any point in time. It’s free for private repos and takes about 15 minutes to set up.

    This guide walks you through building an automated backup workflow that runs on a schedule, pulls all your n8n workflow via the API, and commits each one as a JSON file to your GitHub repo.

    Why GitHub For Backup

    GitHub is the best default choice for most self-hosted users.

    Every backup is a commit with timestamp. You get full version history. You can restore any workflow to any point in time. And it’s free for private repos.

    What you need,

    • A self-hosted n8n instance with API access enabled
    • A GitHub account
    • A new private GitHub repository created for backups (public repos expose your workflow logic)
    • A GitHub Personal Access Token with repo scope

    To create your n8n API Key: In n8n, go to Settings > API > Create API Key (Copy this and keep it safe)

    To generate GitHub token

    • Go to GitHub > Settings > Developer Settings
    • Personal Access Token > Tokens (classic) > Generate new token
    • Check the repo scope. Copy the token immediately – You won’t see it again. same goes for n8n as well.

    Building the Backup Workflow

    Step 1: Add a Scheduled trigger or Manual trigger

    Since this is a tutorial, so I go with the manual trigger, for production, I’d go with Scheduled trigger. Set it run daily midnight or whenever your instance is least active. You can adjust the frequency later.

    Step 2: Fetch All Workflows

    Add a n8n node. Set resources to workflow and operation to Get many. Connect your n8n API credentials here.

    In the base URL add your name or else if your using self-hosted locally then add this http://localhost:5678/api/v1 – If it’s self-hosted on a VPS then it should be like this http://YOUR_VPS_IP:5678/api/v1

    Basically, In whatever URL you type in your browser to open n8n, just add /api/v1 at the end. That’s your base URL.

    This node hits your instance’s REST API and returns every workflow, Active, Inactive, literally all of them. Nothing gets missed.

    I retrieved 29 items, which means connection is working.

    Step 3: Loop Over Each Workflow

    Add a Loop Over Items node. This processes one workflow at a time, which matters because you’ll be making individual GitHub API calls per workflow (If you’re new to loops in n8n, here’s how the loop node works)

    Step 4: Prepare the File Content

    Add a Code node. You need to convert the workflow JSON to base64, because the GitHub API requires base-64 encoded content when creating or updating files.

    // Convert workflow JSON to base64 for GitHub API
    const workflow = $input.first().json;
    
    // Build a clean filename: workflow-name-ID.json
    // Replace characters that cause issues in filenames
    const safeName = workflow.name
      .replace(/[^a-zA-Z0-9-_]/g, '-')
      .replace(/-+/g, '-')
      .toLowerCase();
    
    const fileName = `${safeName}-${workflow.id}.json`;
    const content = Buffer.from(JSON.stringify(workflow, null, 2)).toString('base64');
    
    return [{ json: { fileName, content, workflowId: workflow.id } }];

    This output two things you’ll need in the next steps fileName and content

    Step 5: Check if the File Already Exists on GitHub

    Add an HTTP request node with these settings

    • Method: Get
    • URL
    https://api.github.com/repos/YOUR_USERNAME/YOUR_REPO/contents/{{ $json.fileName }}
    • Authentication: Header Auth > Name: Authorization, Value: Bearer YOUR_GITHUB_TOKEN
    • Go to setting tab > On Error > Continue

    A 404 response here means the file doesn’t exist yet – that’s expected on first run. Setting on Error to Continue means the workflow keeps going instead of stopping.

    Step 6: Create or Update a File

    Add another HTTP request node next to the previous one.

    • Method: Put
    • URL:
    https://api.github.com/repos/YOUR_USERNAME/YOUR_REPO/contents/{{ $('Code in JavaScript').item.json.fileName }}
    • Authentication: same Header Auth Credentials as Step 5, no change.
    • Body Content Type: JSON
    • Specify Body: Using Fields below

    Add these fields individually.

    • name: message
    • value:
    Backup: {{ $('Code in JavaScript').item.json.fileName }} - {{ $now }}
    • name: content
    • value
    {{ $('Code in JavaScript').item.json.content }}
    • name: sha
    • value: {{ $json.sha }}

    The sha field handles both cases automatically. When the file already exists, the previous GET request returns the sha and it gets passed here. When the file is new, the GET returns nothing and $json.sha is simply empty – which is exactly what GitHub expects for file creation. No IF node needed eventually, no extra complexity.

    Step 7: Publish the Workflow

    Publish the workflow. From now on, every day your n8n instance will back itself up to your GitHub repo – one JSON file per workflow, with a full commit history you can restore from at any point.

    My Final Thoughts

    The backup workflow itself is straightforward once it’s running – but there are two things worth keeping in mind.

    First, this protect you from workflow-level mistakes. Accidental edits, deletions, broken changes – covered.

    It doesn’t protect against a full server or database failure. If you’re self-hosting, a database-level backup of your SQLite or Postgres instance is a separate thing worth setting up alongside this.

    Second, check your GitHub repo after the first run to confirm files are actually there.

    A workflow that runs without errors isn’t the same as a workflow that’s actually backing up correctly. Verify once, then trust the schedule.

    That’s it. One workflow, runs daily, commits everything to GitHub. You’ll forget it exists until the day you actually need it – which is exactly how it should work.