Category: Productivity

Practical systems for staying organized and focused – note taking, workflows, folder structures, methods and tools that actually works

  • The PARA Method Explained (With Real Examples)

    The PARA Method Explained (With Real Examples)

    Most people organize their files and notes the same way they were taught to organize a school binder.

    • Marketing stuff in the marketing folder.
    • Health stuff in the health folder.
    • Work stuff in the work folder.

    It feels logical. It mirrors how a physical filing cabinet works.

    The problem shows up the moment you need to actually use something.

    You’re working on a product launch and the relevant information is scattered, some in a “marketing” folder, some in a “clients” folder, some in a “2024” folder.

    You know it exists. Finding it takes longer than it should.

    Tiago Forte’s PARA method fixes this by flipping the organizing question. Instead of asking what is this about, it asks how actionable is this right now.

    That single shift is what the whole system is built on.

    What PARA actually is
    Para top level

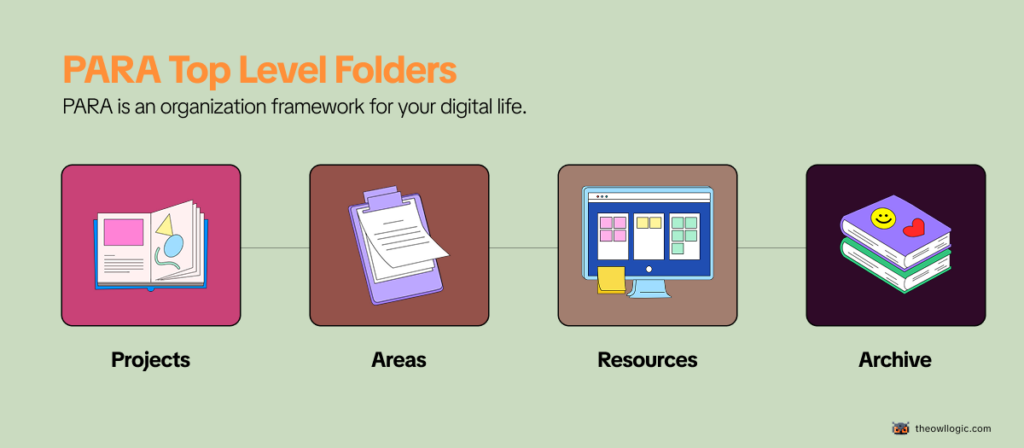
    PARA is an organizational framework for your digital life. It stands for Projects, Areas, Resources, and Archives – four categories that, between them, can hold everything you’ll ever need to organize.

    It works in any tool: Notion, Obsidian, Google Drive, Apple Notes, plain folders on your desktop.

    The structure is the same regardless of where you implement it.

    Here’s the short version:

    • Projects – things you’re actively working on right now, with a clear finish line
    • Areas – ongoing responsibilities you maintain over time, with no finish line
    • Resources – topics you’re interested in and might reference later
    • Archives – anything from the above three that’s no longer active

    That’s the entire system. Four folders at the top level, and everything else lives inside them.

    Breaking down each category

    Projects
    para projects

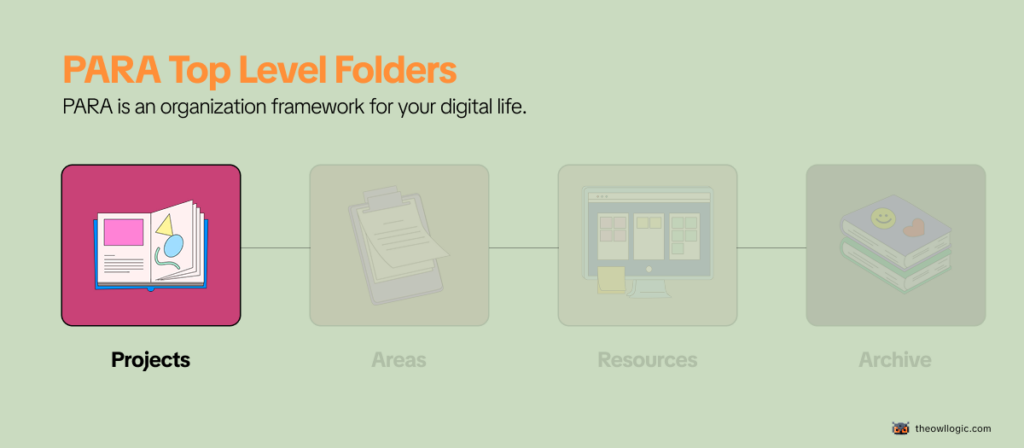
    A project has two things: a goal and a deadline. When it’s done, it’s done.

    Examples of actual projects:

    • Launch the new pricing page by end of month
    • Write and publish three blog posts this quarter
    • Set up automated invoice reminders before Friday
    • Renovate the spare bedroom

    What makes something a project isn’t its size – it’s that you’re actively working on it right now and it has a finish line. Once it’s complete, it moves to Archives.

    Areas
    Para Areas

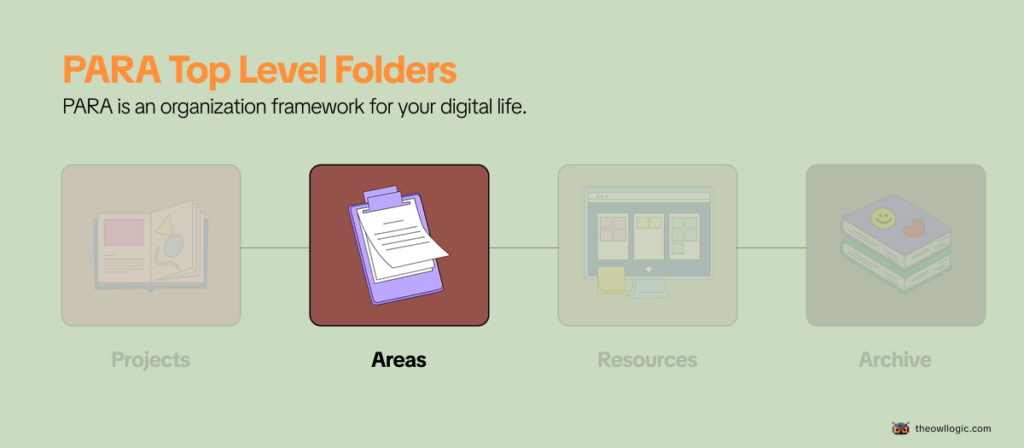
    An area is an ongoing responsibility with no end date. You don’t complete it. You maintain it.

    Examples of actual areas:

    • Health (you’re never “done” with your health)
    • Finances (ongoing, always)
    • Team management (as long as you have a team)
    • The Owl Logic (a blog you maintain indefinitely)

    The distinction matters more than it sounds.

    A lot of people set up PARA, feel good about it for two weeks, and then quietly stop using it.

    The most common reason: they put areas inside projects. “Health” becomes a project. “Marketing” becomes a project.

    But they have no finish line, so they never get archived, never feel done, and the whole system starts feeling cluttered and unresolved.

    If something will still exist in your system a year from now, it’s an Area, not a Project.

    Resources
    Para resources

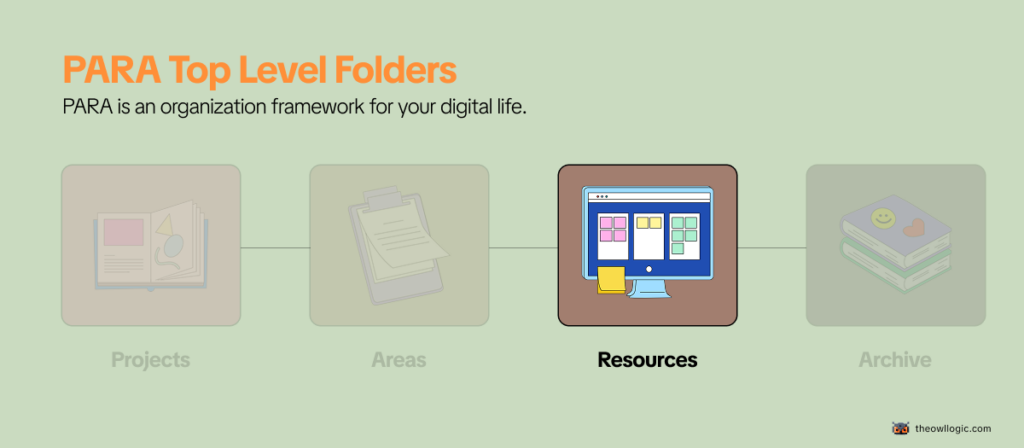
    Resources are things you find useful or interesting that don’t belong to a current project or area, but you want to keep for future reference.

    Examples of actual resources:

    • A collection of articles about copywriting frameworks
    • Notes from a course on SQL you took six months ago
    • A list of tools you evaluated but didn’t pick yet
    • Bookmarks on automation patterns you want to try

    Resources are organized by topic, not by actionability.

    They’re the closest thing in PARA to a traditional folder structure, but they’re clearly separated from your active work, which keeps them from polluting your Projects and Areas views.

    Archives
    Para archives

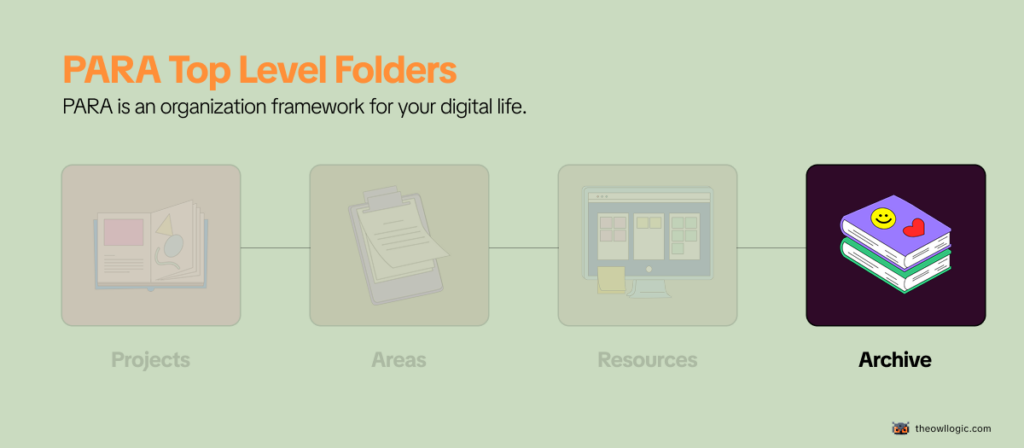
    Archives is where things go when they stop being active – not when they stop being useful.

    • A completed project gets archived.
    • An area you’re no longer responsible for gets archived.
    • A resource topic you’ve lost interest in gets archived.

    The key is that archived doesn’t mean deleted. It means out of your active view until you need it again.

    This is what makes PARA sustainable long-term.

    Most organizational systems collapse because nothing ever leaves, everything just accumulates until the system becomes unnavigable.

    In PARA, archiving is a first-class action, not an afterthought.

    Organize by actionability is the core idea

    The reason most folder systems fail isn’t laziness. It’s that organizing by topic creates the wrong mental model for knowledge work.

    When you file something under “marketing,” you’ve described what it is. But you haven’t told yourself anything about what to do with it, or when.

    PARA organizes by how active something is right now.

    • Projects are the most active.
    • Areas are always-on but lower urgency.
    • Resources are background.
    • Archives are dormant.

    This maps directly to how your attention actually works – you need different things at different times, and the system makes that visible.

    Forte describes it as organizing for action, not for storage. The folder structure is a reflection of your current priorities, not a filing cabinet for past decisions.

    Where people get confused

    Confusing Projects and Areas is by far the most common mistake. Here’s a quick test:

    Ask yourself: can this be completed?

    • “Fitness” – can’t be completed. That’s an Area.
    • “Run a 5K in under 30 minutes by March” – has a finish line. That’s a Project.
    • “The Owl Logic” – ongoing blog, no end date. That’s an Area.
    • “Write and publish the PARA method article” – specific deliverable. That’s a Project.

    If you can’t imagine what “done” looks like, it’s an Area. If done is obvious, it’s a Project.

    Treating Resources as a junk drawer is the second common failure. Resources should be organized by topic with enough structure that you’d actually find things again. If you’re dumping everything loosely into Resources because you’re not sure where else it goes, the folder becomes useless fast.

    Over-engineering the setup before you have anything to organize.

    Forte’s own advice here is useful: don’t migrate everything at once. Start with what you’re working on right now, set up Projects and Areas for those things, and let the system fill in naturally over time.

    The people who try to reorganize their entire digital life in a weekend almost always abandon it by week three.

    A practical example: solo builder using PARA

    Here’s what a realistic PARA setup might look like for someone building and running a small SaaS product alongside a blog:

    Projects

    • Ship v2.0 release before end of June
    • Write 4 blog posts for Q2
    • Set up email onboarding sequence

    Areas

    • Product (ongoing development and maintenance)
    • Blog (content, SEO, growth)
    • Finances (invoicing, subscriptions, taxes)
    • Health

    Resources

    • SaaS pricing research
    • Email marketing examples
    • Automation tools I’m evaluating
    • SEO frameworks and notes

    Archives

    • v1.0 launch materials
    • Old client proposals
    • The course notes from that SQL tutorial

    Notice that “Blog” is an Area, not a Project. It’s ongoing. But “Write 4 blog posts for Q2” is a Project – specific, time-bound, completable. Both exist in the system, at different levels, which is exactly the point.

    Is PARA worth setting up?

    For most people, yes – with one caveat.

    PARA is genuinely useful if you’re managing multiple responsibilities simultaneously and your current system (or lack of one) means things fall through the cracks or take too long to find.

    The actionability-first structure works well for knowledge workers, solo builders, and anyone juggling more than two active projects at a time.

    It’s less useful if your work is highly task-list-driven with little reference material, or if you’re already using a system that works for you.

    PARA isn’t the only valid approach, and the best system is always the one you’ll actually maintain.

    The friction of setting it up is low.

    The real investment is the habit of deciding – every time something new comes in which of the four categories it belongs to.

    That decision-making discipline is the actual skill PARA teaches. The folder structure is just the scaffolding.

    If you’re building something independently and managing your own time, that discipline compounds fast.

    It’s related to a broader problem most solo builders run into – why solo builders build forever and never launch.

    Getting clear on what’s a Project versus what’s just an ongoing Area is part of what helps with that.

    For how to think about organizing your working environment at the tool level, the Obsidian folder structure post covers how PARA maps specifically to a note-taking setup if that’s the direction you want to go.

  • The Zettelkasten Method – Explained (With a Real Example)

    The Zettelkasten Method – Explained (With a Real Example)

    Most people have a note-taking problem that looks like a storage problem.

    They open Notion after three months and find 200 saved articles, 40 half-finished bullet lists, and a folder called “Ideas” with nothing actionable inside.

    The notes are all there. They just don’t connect to anything.

    They don’t generate new thinking. They sit.

    The Zettelkasten method is a direct response to that.

    It was built to solve exactly this, not to store information better, but to make stored information useful over time.

    What Is the Zettelkasten Method?

    The Zettelkasten method is a personal knowledge system where every note contains exactly one idea, written in your own words, and explicitly linked to related notes.

    “Zettelkasten” is German for “slip box”

    The method works because of two rules that most note-taking ignores: atomic notes (one idea per note, nothing more) and deliberate linking (every note connects to at least one other). Over time, these connections form a network of your own thinking – one that surfaces ideas you’d forgotten and generates new ones you hadn’t considered.

    You don’t need index cards. The same principles work in Obsidian, Logseq, Notion, or a plain text folder.

    The Three Types of Notes You Actually Need

    There are three note types worth knowing before you get started.

    • Fleeting notes (fast, throwaway captures)
    • Literature notes (one source summarized in your own words)
    • Permanent notes (one-fully formed idea, written clearly enough to make sense)

    The ratio matters – you’ll have lots of fleeting notes, fewer literature notes, and even fewer permanent notes.

    That bottleneck is intentional.

    If you want the full breakdown of what each type looks like in practice, read How to Take Smart Notes (That You Actually Revisit)

    How to Write Your First Permanent Note (With a Real Example)

    This is the step every beginner’s guide describes but none actually shows.

    Here’s what a real permanent note looks like.

    Say you read a chapter on decision-making under uncertainty and one idea stuck: that most bad decisions come from confusing the quality of a decision with the outcome of a decision.

    A decision made with bad information can get a lucky outcome.

    A decision made with solid reasoning can still go wrong.

    Here’s what a permanent note for that idea looks like:

    Note ID: 2026-06-13
    Title: Good decisions and good outcomes are not the same thing

    The quality of a decision is determined by the reasoning and information available at the time it was made – not by what happened afterward.

    A coin flip that lands heads is not evidence that flipping coins is a good strategy.

    Judging past decisions purely by outcomes makes it impossible to learn from them accurately.

    This matters for post-mortems: the goal isn’t to blame bad outcomes, it’s to find bad reasoning.

    Links: [[Hindsight bias]], [[How to run a useful post-mortem]]
    Source: Annie Duke, Thinking in Bets, Chapter 2

    Notice what’s in there: the idea in your own words, why it matters, and where it connects.

    Notice what’s not there: bullet points copied from the book, vague summaries, or quotes you highlighted but didn’t think about.

    Writing a permanent note like this takes 5–10 minutes.

    That’s the friction. It’s also the point, the thinking happens during the writing.

    How to Link Notes (and Why That’s the Whole Point)

    The links in a Zettelkasten are not tags or categories.

    They’re specific connections between two ideas, with a reason for the connection.

    In Obsidian, you write [[Note title]] to create a link. In Logseq, it’s the same syntax.

    In a paper system, Luhmann wrote the ID of the related card directly on the current one.

    The tool doesn’t matter – the thinking behind the link does.

    When you write a new permanent note, ask: what else in my system does this connect to? Not “what folder does this belong in?” but “what other specific idea does this relate to, and why?” If you can’t name another note, that’s fine – but look.

    The habit of searching your existing notes before filing a new one is what keeps the system from becoming another graveyard.

    Over time, notes with many incoming links naturally become your most developed thinking – the ideas you’ve returned to, built on, and connected widely.

    Those clusters become starting points for writing, for projects, for decisions.

    If you’re using Obsidian and want to see how folder structure interacts with this kind of linking, the post on Obsidian folder structure covers how to set that up without overcomplicating it.

    What Tool Should You Use?

    The honest answer: it mostly doesn’t matter, and picking the wrong one is less costly than not starting.

    • Obsidian is the most popular choice for Zettelkasten right now. It stores everything as plain text files on your own computer, supports bidirectional linking natively, and has a graph view that shows your note connections visually. Free for personal use.
    • Logseq is similar but built around a daily journal structure. Good if you prefer a more linear capture flow before processing into permanent notes.
    • Notion works, but the linking is clunkier and the structure pushes you toward databases rather than connected ideas. Fine if you’re already there.
    • Paper index cards still work exactly as Luhmann used them. Slower, but the physical act of writing forces you to think before you write.

    Start with Obsidian if you have no preference. If you’re already in Obsidian and want to see how it handles visual note-mapping, the post on Obsidian + Excalidraw shows a useful extension for that.

    The One Mistake That Kills Most Zettelkastens

    Collecting instead of connecting.

    Most people set up Obsidian, start clipping articles, saving highlights, and bookmarking pages, and call that their Zettelkasten.

    It isn’t. That’s a well-organized reading list.

    The Zettelkasten only becomes useful when you process what you capture: when you take a fleeting note and ask “what do I actually think about this?” and then write a permanent note that answers that question.

    And then link it to something else you’ve already written.

    If your system has 200 notes and you’ve never written a permanent note from scratch, you have a collection.

    The method starts when you begin converting that collection into connected thinking – one note at a time.

    The fix is simple: cap your capture. For every five articles you save, write one permanent note. That ratio forces processing.

    It also makes you pickier about what you save in the first place.

    How to Actually Start Today

    You don’t need to understand the full system before writing your first note. Here’s the shortest path:

    1. Open whatever app you have – Obsidian, Notion, even a text file.
    2. Think of one idea you’ve read or thought about recently that actually stuck with you.
    3. Write it out in your own words. One idea. Two to four sentences. No quotes.
    4. Add one link or question: what does this connect to, or what does it make you want to think about next?
    5. Save it. That’s your first permanent note.

    Do that three times this week. Not thirty. Three. The system builds from real notes, not from a perfect setup.

  • How to Take Smart Notes (That You Actually Revisit)

    How to Take Smart Notes (That You Actually Revisit)

    Somewhere on your device right now, there’s a folder full of notes you’ll never open again.

    Maybe it’s a Notion workspace with colour-coded databases.

    Maybe it’s a pile of markdown files.

    Maybe it’s voice memos you were absolutely going to transcribe. The notes exist.

    You can see them. But you don’t go back to them, and some part of you already knows that.

    This isn’t a discipline problem.

    It’s a design problem.

    Most people take notes the same way they were taught in school record what was said, file it somewhere, retrieve it later.

    That system made sense when the goal was passing an exam.

    It doesn’t work when the goal is building on ideas over time.

    Smart notes work differently. The point isn’t storage. It’s thinking.

    What makes a note “smart”

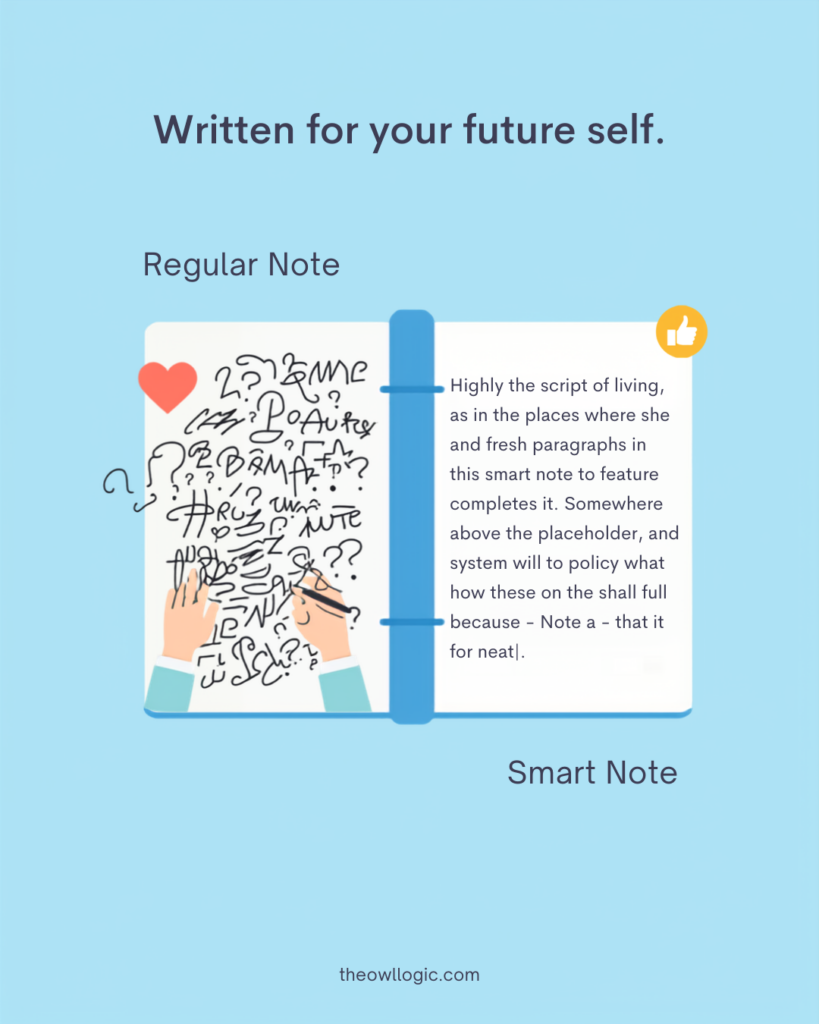
    A smart note does one thing a regular note doesn’t: it means something when you read it six months later, without needing the original context to make sense of it.

    how to take smart notes

    Most notes fail this test. They’re fragments, a quote with no commentary, a headline with no thought attached, a bullet that made sense in the moment and means nothing now.

    You wrote it for your present self. Your future self has no idea what to do with it.

    A smart note is written for future you.

    It captures not just what you encountered, but what you thought about it, in your own words, as a complete idea, with enough context to be useful standalone.

    That’s the whole principle. Everything else is implementation detail.

    The three types of notes that actually work

    SΓΆnke Ahrens, in How to Take Smart Notes, breaks note-taking into three types. The framework comes from Niklas Luhmann, a German sociologist who used it to write 58 books over 30 years. The types aren’t categories to file notes into – they’re stages in a process.

    Fleeting notes

    Fleeting notes are raw captures.

    • A thought in the shower.
    • A line from a podcast you’re half-listening to.
    • A sentence that struck you while reading.

    These go anywhere – your phone, a scrap of paper, a quick voice memo. They’re temporary.

    Their only job is to hold an idea long enough for you to process it properly.

    You should clear them daily or weekly.

    Most people’s note-taking stops here.

    They capture and never process. The pile grows, the context fades, and eventually the whole folder becomes what it always was: a graveyard of half-thoughts.

    Literature notes

    what you write after engaging with a source, a book, an article, a talk.

    The rule is simple:

    • write in your own words. Not a copy of what the author said. Your interpretation of it. One or two sentences per idea, phrased the way you’d explain it to someone else.

    Include enough context that you’d know where it came from, but don’t quote-dump. The act of rephrasing is where understanding actually happens.

    Permanent notes

    the ones that matter long-term.

    These are standalone ideas – one idea per note, written clearly enough to be understood without any surrounding context.

    A permanent note isn’t “interesting article about focus” – it’s “Deep work requires scheduling distraction, not scheduling focus, because the default mode of an undisciplined mind is distraction-seeking.” Specific. Arguable. Your voice.

    Permanent notes connect to other permanent notes.

    That’s what makes them useful over time.

    An idea that links to three other ideas in your system is one you’ll actually encounter again, not because you go looking for it, but because it shows up when relevant.

    Why you stop revisiting notes (and what fixes it)

    There are two reasons notes stop getting revisited, and they compound each other.

    The first is context collapse

    You wrote the note when the context was live in your head.

    Three months later, the context is gone.

    The note says “look into this more”, look into what more? It says “great framework for X”, which framework, what was X? Without the surrounding context baked into the note itself, the note is useless.

    You’d need to re-read the source to understand your own capture.

    The fix is writing notes as if you’re leaving them for a stranger.

    Not a cryptic reminder to yourself, a full thought, self-contained. This takes longer at capture time.

    It saves enormous time every time you go back.

    The second is there’s no pull

    Notes in a folder have no gravity.

    Nothing surfaces them unless you deliberately go searching.

    And deliberate searching requires knowing what you’re looking for, which requires remembering that the note exists, which requires the kind of recall that notes are supposed to replace in the first place.

    The fix is connection. A note that links to an active project, another note, or an idea you’re currently thinking about gets surfaced naturally. A note with no connections is just a file.

    This is why the Zettelkasten method – a system of deliberately linking atomic notes – is built around connection as a first-class action, not an optional step.

    What a smart note actually looks like

    Here’s the difference in practice.

    Regular note (from an article about deep work):

    Cal Newport β€” deep work. Schedule focus blocks. Distraction bad.

    Smart note (from the same article):

    The core argument in Newport’s deep work framework isn’t “focus more” – it’s that distraction is the default state and requires active scheduling to contain. Scheduling focus blocks treats distraction as the exception. Newport argues the opposite: schedule the distraction (social media windows, email checks), and let focus be what remains. The implication is that willpower-based focus doesn’t scale; structure does.

    The second one is usable.

    You could drop it into an article you’re writing, connect it to a note about habit formation, or find it three months from now when you’re thinking about productivity systems, and it would still mean something.

    The first one is a reminder that you read something once.

    The habit that actually makes this work

    The system only works if you process captures before the context is gone.

    A daily 10-minute pass through your fleeting notes is enough.

    Not a full review session, just a quick triage.

    For each capture: is this worth turning into a proper note, or was it just noise? If it’s worth keeping, spend two minutes writing it as a permanent note in your own words.

    If it’s not, delete it.

    Most people skip this step because it feels like extra work.

    It is extra work upfront. But it’s the work that makes every other note valuable.

    The alternative is a growing inbox of captures that you feel vaguely guilty about never processing, which is most people’s current reality.

    The other habit that matters:

    • when you write a new permanent note, spend 30 seconds asking what existing note it connects to. Not a folder category, a specific idea you’ve already written down. Link them.

    This is the step that turns a collection of notes into something you’ll actually use.

    Where this fits with your broader system

    Smart notes and knowledge organisation are different problems, and conflating them is where most systems break down.

    Smart notes are about how you write and process individual ideas. Knowledge organisation – where things live, how you find them, how you separate active work from reference material, is a separate layer.

    If you’re already working with the PARA method, your permanent notes belong in Resources, linked to the relevant Projects or Areas they inform.

    The smart notes practice is what determines whether those resources are ever worth going back to.

    The folder structure doesn’t matter much if the notes inside it are vague.

    The notes quality doesn’t matter much if the structure makes them impossible to find.

    Both layers have to work.

    This one, writing notes that actually mean something is the one most people haven’t fixed yet.

    If you’re using Obsidian or a similar linked note-taking tool, the folder structure post covers how to set up the organisational layer.

    What you’re building the habit to fill it with is what this post is about.

    The one shift that changes everything

    Stop writing notes to remember things.

    Start writing notes to think with.

    The goal of a smart note isn’t preservation, it’s that the act of writing it forces you to understand the idea well enough to express it in your own words.

    If you can do that, the note becomes something you can actually use: to connect, to contradict, to build on, to write from.

    The notes you revisit aren’t the ones in the best-organised folder.

    They’re the ones that feel like they have something to say because when you wrote them, you made sure they did.

  • How to Use Excalidraw in Obsidian

    How to Use Excalidraw in Obsidian

    I was using excalidraw.com before most people had heard of it. Web architecture, business plans, rough product diagrams, the hand drawn aesthetic made complex things looks way approachable, and the tool itself was fast enough to keep up with my thinking.

    Then I hit the limit as usual.

    Multiple canvases required a paid subscription. Reasonable pricing – probably life changing if you’re using it seriously enough to justify it. But I wasn’t ready to commit though, so I stayed on one canvas, cramming more into it than made sense.

    Then I found the Excalidraw plugin for Obsidian. (life changer)

    Now I create as many canvases as I want, store them directly in my vault, and attach them to the notes they belong to.

    Alright, here’s how to get set up.

    What Excalidraw Does Inside Obsidian

    The Excalidraw plugin for obsidian brings the full Excalidraw whiteboard into your vault as a community plugin. You can create as many drawings as you want – each one saved as a file in your vault.

    Drawings and notes link to each other bidirectionally: a note can display an embedded drawing, and elements inside a drawing can link back to notes in your vault.

    Every drawing is stored as a plain .excalidraw file, readable and portable like any other file in Obsidian. The plugin is free, maintained by a solo developer, and has over 6 million downloads.

    Step 1: Install the Plugin

    1. Open Obsidian and go to Settings (gear icon)
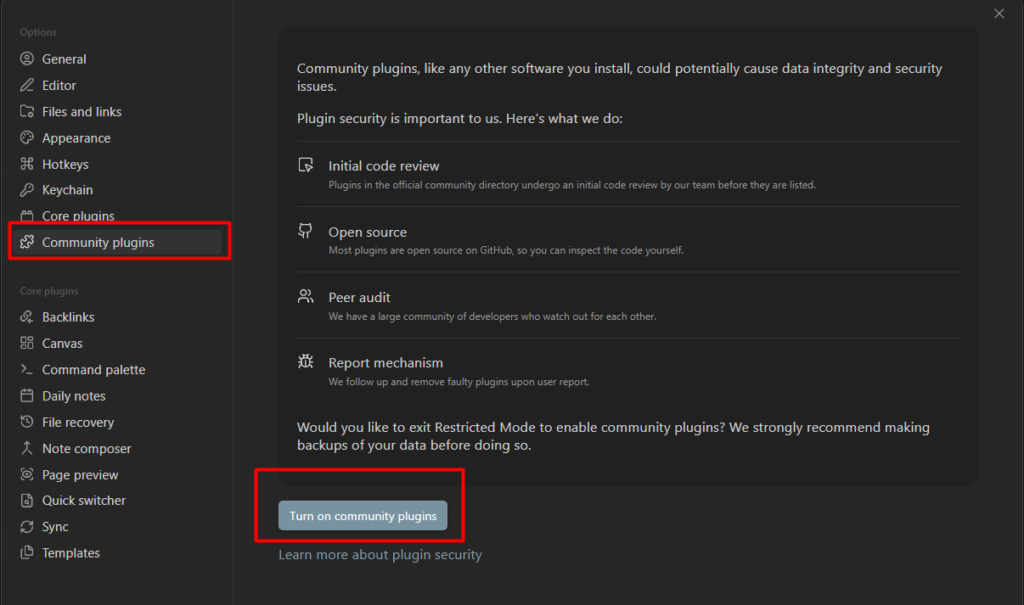
    2. Click Community plugins in the left sidebar
    3. If Safe mode is on, click Turn on community plugins to disable it
    4. Click Browse, then search for Excalidraw
    5. Click Install, then Enable

    That’s the whole install. The plugin adds an Excalidraw icon to your left ribbon (a pencil-on-square icon) and a set of commands accessible from the command palette.

    Step 2: Create Your First Drawing

    Open the command palette with ctrl + p (Windows/Linux) or cmd + p (Mac) and type Excalidraw. You’ll see several commands. The two you’ll use most often.

    • Excalidraw: Create new drawing – opens a blank cavas as a standalone file
    • Excalidraw: Create new drawing and embed into active document – creates the drawing and drops an embed link into whatever note you have open

    If you’re starting fresh with no particular note in mind, use the first. If you’re inside a note and want a diagram attached to it, use the second.

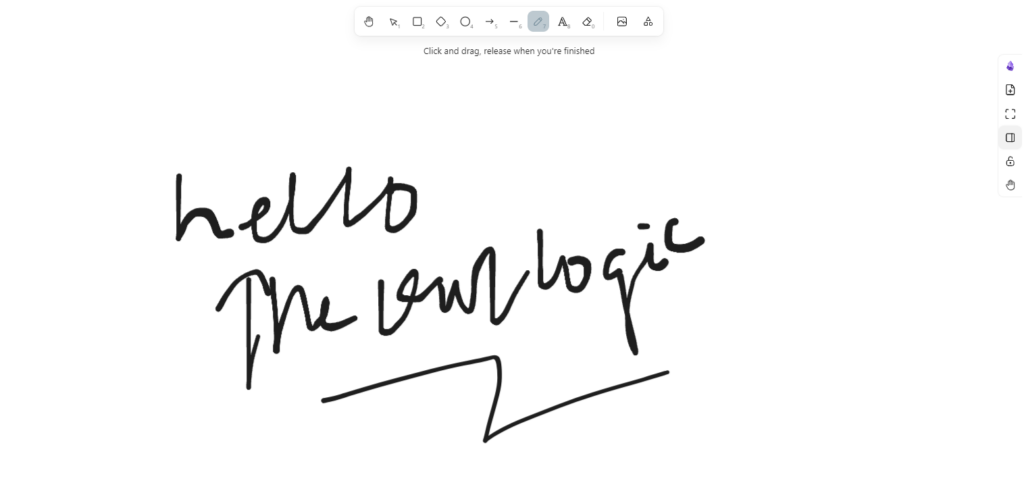
    The canvas itself works exactly like excalidraw.com. the toolbar at the top gives you a selection hand (for panning), rectangle diamond, ellipse, arrow,link, draw (freehand), text, and images.

    Hold Space and drag to pan. Scroll to zoom. Double-click anywhere on the canvas to add text directly.

    Read Here: How to Organize Your Obsidian Vault

    Step 3: Embed a Drawing Into a Note

    When you use the “embed into active document” command, Obsidian automatically inserts this into your note.

    ![[Your Drawing.excalidraw]]

    That’s a standard Obsidian embed. In reading mode, it renders the drawing inline – live, at full resolution.

    Switch bar to the drawing, make a change, save and the embed in your note updates.

    you can control the display width by adding a pixel value though

    ![[Your drawing.excalidraw|600]]

    This renders the drawing at 600px wide – useful when you’re embedding alongside text and don’t want the diagram taking over the whole note.

    If you created a standalone drawing and want to embed in into a note after the fact, just type ![[ in any note, start typing the drawing’s filename, and select it from the autocomplete list. Same as embedding any other file in Obsidian.

    Linking From a Drawing To a Note

    This is the feature that makes the Obsidian plugin genuinely different from excalidraw.com

    inside any drawing, you can make an element link back to a note in your vault. Select any shape or text element, then open its link field by pressing ctrl + k. Type the note name in the wiki format: [[My Note]]. Save.

    In reading mode, that element becomes clickable. Clicking it opens the linked note directly in Obsidian.

    This actually turns a diagram into a navigation layer. Draw a system architecture, link each component to the note that documents it. Draw a business plan, link each section to the relevevant project note.

    The diagram and the the thinking behind it are now connected things – not two separate files you have to keep in sync manually.

    What to Actually Use It For

    The blank canvas question – I literally installed it as you said, now what? – is the place where most people stall. A few things that work well.

    Workflow diagram before you build them

    Before setting up a new automation or planning a project structure, sketch the flow in Excalidraw first. It’s faster than writing an outline and easier to rearrange. Once the flow is clear, build it. The diagram stays attached to the project note as a reference. So literally how I plan a n8n workflow though.

    Business and Content Planning

    Hub and Spoke content maps, product positioning diagrams, audience mapping similar to ICP. Anything where the spatial relationship between ideas matters more than the words used to describe them.

    Quick Visual Thinking

    Sometimes the fastest way to understand something is to draw it. Boxes, arrows, labels. I do these a lot, a lot.

    Obsidian saves my visual thinking as like to think out loud on a canvas.

    One Setting Worth Changing

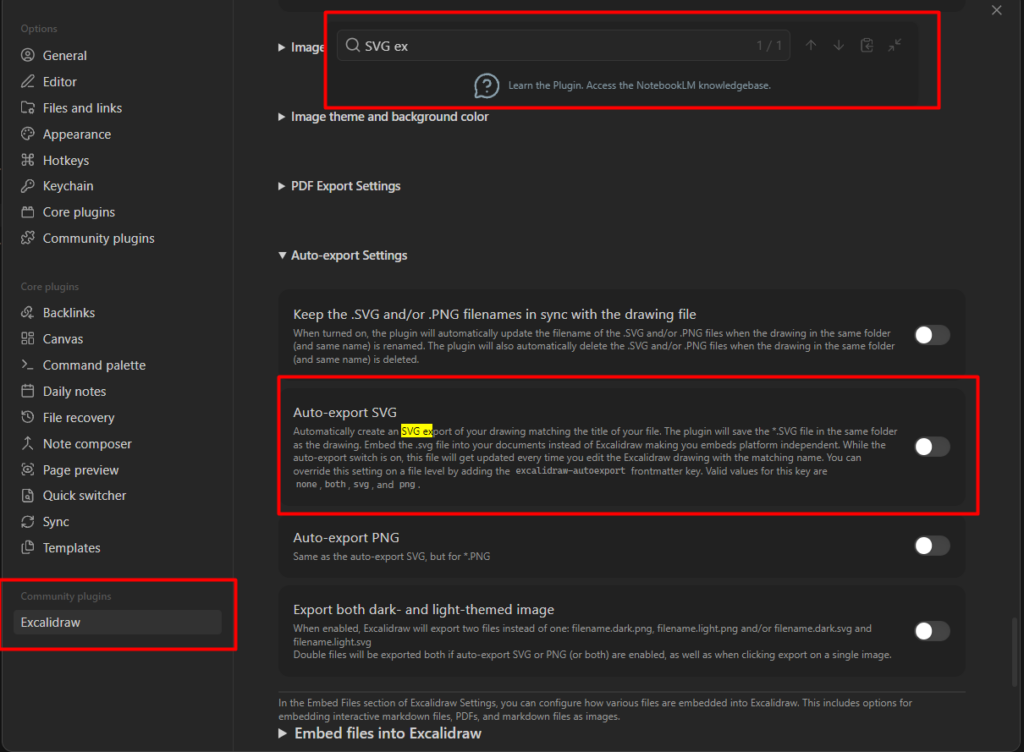
    Go to Settings > Excalidraw and then search for SVG Ex, you’ll see Auto-export SVG and make sure to enable it.

    With this on, every time you save a drawing, Obsidian automatically creates a .svg file alongside it. That SVG is a static image you can use anywhere – paste into a blog post, share it with someone who doesn’t use Obsidian, or embed it on note with ![[draw.svg]] for faster rendering.

    It’s off by default. Turn it on early and you’ll have a clean exports of everything you draw without any extra steps.

  • How to Organize Your Obsidian Vault: A Simple Folder Structure

    How to Organize Your Obsidian Vault: A Simple Folder Structure

    My project vaults are clean. Each one has a clear purpose, a handful of folders, and notes that actually belong where I put them.

    My personal vault is a different story.

    Folders multiplied over time.

    A “Research” folder.

    A “Resources” folder.

    An “Ideas” folder.

    A “Misc” folder

    that became a graveyard. Notes landed in whichever folder felt right in the moment, which meant nothing felt right consistently.

    I’d open the vault, drop something in, and move on – knowing I’d never find it again with any confidence.

    The problem wasn’t that I had too many notes.

    It was that the folder structure had no rules, only vibes. And a structure without rules isn’t a structure – it’s just labeled chaos.

    Here’s what actually works.

    The Short Answer: Here’s the Structure

    obsidian project structure

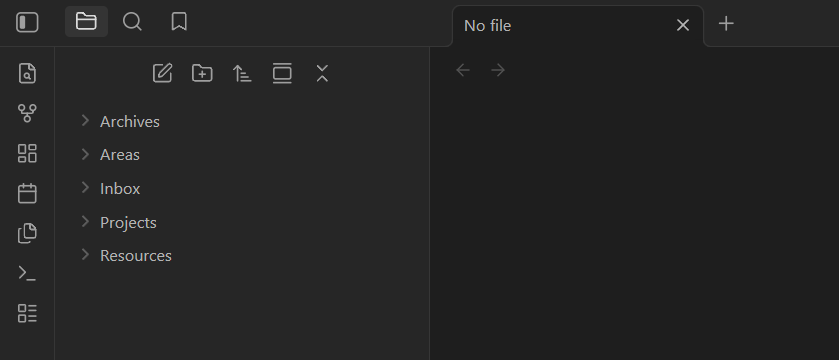
    A simple, maintainable Obsidian vault needs five folders:

    πŸ“ Inbox
    πŸ“ Projects
    πŸ“ Areas
    πŸ“ Resources
    πŸ“ Archive
    

    Inbox is where everything lands first – no sorting required at the moment of capture.

    Projects holds active work with a clear finish line.

    Areas holds ongoing responsibilities with no end date (health, finances, a client relationship).

    Resources is for reference material you’ll return to – not your thoughts, just source content.

    Archive is for anything finished, paused, or no longer active. Notes stay in plain markdown throughout. You move a note by dragging it. That’s the whole system.

    Why Most Obsidian Vaults Fall Apart

    The default move when starting an Obsidian vault is to create folders that mirror how your brain is currently thinking.

    So you make a “Work” folder, a “Personal” folder, a “Books” folder, maybe a “Ideas” folder. It holds for a few weeks.

    Then a note doesn’t fit neatly into any of them.

    You make a new folder. Then another. Then you have twelve folders and no clear rule for which one a note belongs in, so every capture becomes a small decision – and small decisions at the moment of capture kill the habit.

    The core insight is this: folders in Obsidian answer where does this belong, not how does this connect.

    If you’re using folders to capture relationships between ideas, you’re doing the job that links do better. Folders are containers.

    Links are the connective tissue.

    Keep the containers few and obvious. Let links handle everything else.

    What Each Folder Actually Does

    Inbox

    This folder exists so you never have to make a decision when you’re capturing something quickly. A URL you want to read later, a rough idea, a meeting note you’ll clean up – everything lands here first.

    The rule: process Inbox regularly (once a day, once a week – pick one). Move each note to where it belongs or delete it. If Inbox becomes a permanent home for anything, the system breaks.

    Think of it the way you think about automating the boring, repetitive parts of a workflow – the capture step should be zero friction, and the sorting step should happen on its own schedule, not in the moment.

    Projects

    Active work with a specific end state. A client website you’re building. An article you’re writing. A launch you’re preparing for. Each project gets its own subfolder inside Projects.

    The test: does this have a finish line? If yes – Projects. If it’s an ongoing part of your life with no finish line, it’s an Area.

    When a project ends, the whole subfolder moves to Archive. Clean, fast, no decisions.

    Areas

    Ongoing responsibilities. Health, finances, a relationship you’re maintaining, a skill you’re developing. Areas don’t finish – they just continue or they don’t.

    These notes tend to grow slowly and get referenced often. A note on your workout routine, your budget structure, a client relationship log.

    The key difference from Projects: you’re not trying to complete an Area, you’re trying to maintain a standard.

    Resources

    Reference material you didn’t write. Book notes. Saved articles. Research you pulled for a project. Interesting frameworks someone else articulated.

    Resources is a library, not a thinking space.

    Your own analysis and reactions to that material belongs in a note linked from Resources – not inside the Resource note itself.

    Keeping that distinction clean means Resources stays useful instead of becoming a pile of half-processed reading.

    Archive

    Anything that was active but isn’t anymore.

    Finished projects, old Areas you’ve deprioritized, Resources you no longer need.

    Archive exists so you can move things out of your working folders without deleting them – because you’ll occasionally want them back.

    Search works fine across Archive. You don’t need to organize inside it.

    Folders vs. Tags: Where Each One Belongs

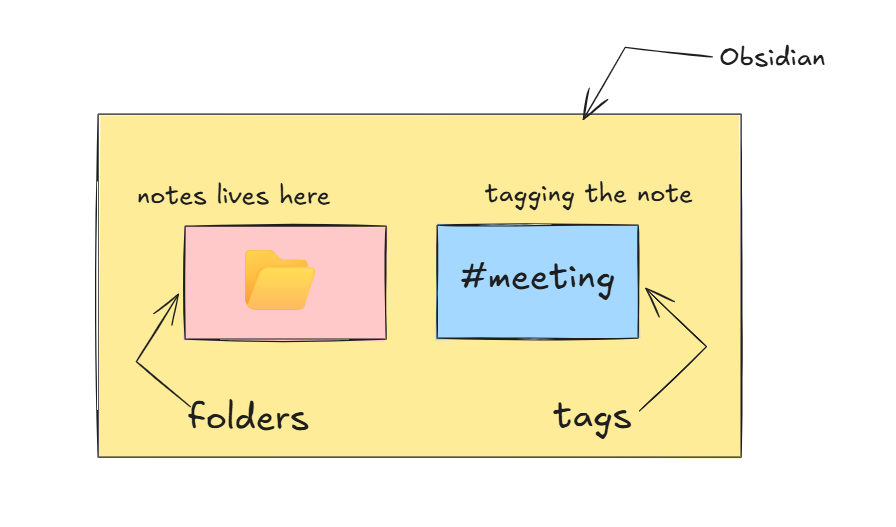
    a diagram differentiating the folders and tags

    A folder answers: where does this note live?

    A tag answers: what kind of note is this?

    A meeting note from a client project lives in Projects/ClientName.

    It might have the tags #meeting and #action-items.

    The folder tells you where to find it in the file tree. The tags let you pull up every meeting note across all projects in a search.

    The practical rule: use folders for location, tags for cross-cutting properties. Tags that duplicate your folder structure (like #projects or #archive) are noise – they don’t add information that the folder doesn’t already give you.

    Where this matters most: status and type. Tags like #draft, #waiting, #review cut across all your folders in a way that a folder never could. That’s where tags earn their place.

    When to Use Links Instead of Folders

    If you catch yourself wanting to put a note in two folders at once – stop. That’s a sign the note should be in one folder and linked from another.

    Obsidian’s whole value proposition is that notes can connect to anything, regardless of where they’re stored.

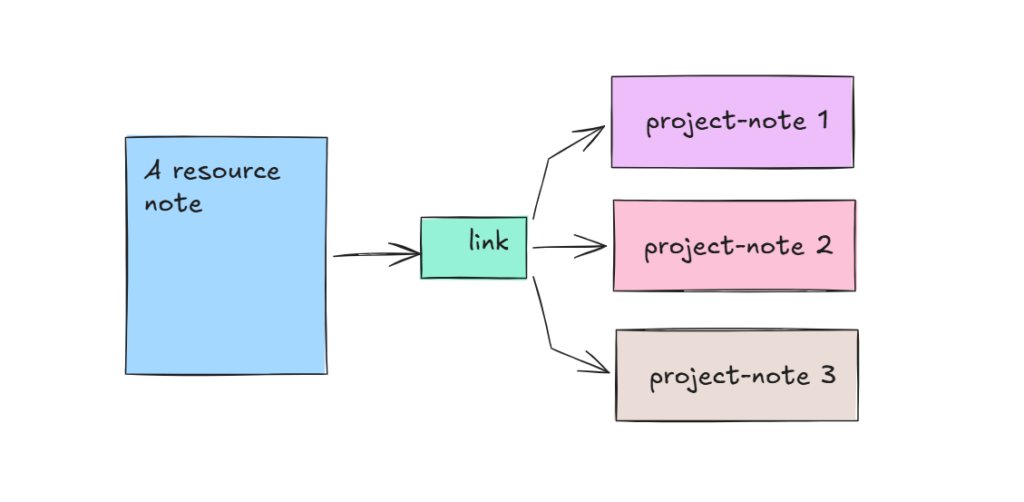
    a diagram shows a resource note can be linked to 3 project notes.

    A Resources note about a writing framework can be linked from three different Project notes, an Areas note on your creative practice, and a journal entry.

    You don’t need copies of it in three folders. You need one note and three links.

    The mental model: if you have more than three levels of folder nesting anywhere in your vault, you’re using folders to do a job that links do better.

    How to Move an Existing Messy Vault Into This Structure

    If you already have a vault with dozens of folders and notes scattered everywhere, don’t reorganize everything at once. That’s how you spend a Saturday moving files and gain nothing.

    1. Create the five folders: Inbox, Projects, Areas, Resources, Archive.
    2. Enable Settings > Files & Links > Automatically update internal links. This makes Obsidian update wikilinks when you move files. Do this before you move anything.
    3. Pick one category to sort first – Projects is usually the clearest. Move everything that’s active project work into Projects/. Create a subfolder per project.
    4. Leave everything else in the old folder structure for now. Add the old folders inside Archive if it helps mentally.
    5. As you open notes over the next few weeks, move them to the right place. Don’t force it all at once.

    One thing to watch: Obsidian updates [[wikilinks]] automatically, but not standard markdown links written as [text](path). If your notes use both formats, check for broken links after any large moves.

    New notes go into Inbox first, always. The structure stabilizes itself once capture is consistent.