Installing n8n locally is one of the best decisions you can make for workflow automation.
Why? Because unlike cloud platforms that charge $20-50/month and limit your workflows, running n8n on your computer is completely free. No restrictions on workflows, no execution limits, and your data never leaves your machine.
But here’s what nobody tells you: the installation process can be confusing. Should you use npm, or docker? What happens when you close the terminal? Where are your workflows even saved?
I hope this helps you out.
NPM
- Quickest setup, users already familiar with Node.js.
- Prerequisites – Node.js and npm installed.
- Data persistence – Easy, data is saved locally by default.
- Recommended Ram – Minimum 4GB+
Docker
- More robust, production-like setup, better isolation.
- Docker Desktop installed.
- Requires setting up a persistent volume (covered below).
- 8GB+ (Docker takes resources)
I’ve been there. I spent hours figuring this out so you don’t have to.
This guide covers everything you need to install n8n locally – whether you’re on Windows, Mac, or Linux. I’ve included screenshots for every step, troubleshooting for common errors, and honest advice about which installation method actually makes sense for you.
What you’ll get:
- Two installation methods explained (npm, Docker)
- Complete step-by-step instructions with screenshots
- Troubleshooting for the errors you’ll actually encounter
- Tips for keeping your installation secure and backed up
No technical jargon. No skipped steps. Just a straightforward guide to getting n8n running on your computer. Thank me later.
Ready? Let’s install n8n.
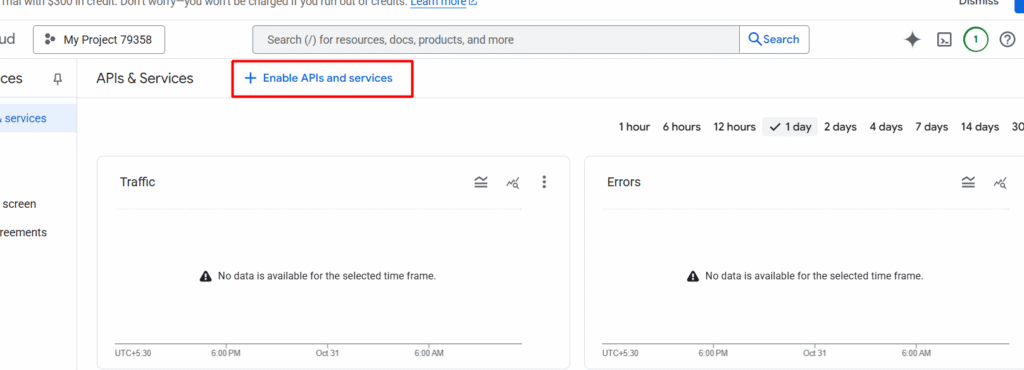
Installing n8n locally with NPM
For those who know what NPM is? that’s great. but for those who don’t know? NPM stands for Node Package Manager which is opensource package manager for Node.js
Step 0: Installing Warp Terminal (Optional)
This is an optional method, and this is how I actually work though, Install warp (It’s free), and use warp as your terminal.
The reason I say install warp is perhaps windows users would have hard time terminal issues, sometimes leading PowerShell security issues. The above step is totally optional though.
Step 1: Verify Node Installation
Open up your terminal or use warp, and type node -v and npm -v you can check it out the below gif.
Most probably you won’t have installed the node.js. Let’s go with the step 2
Step 2: Install Node.js
- Go to Node JS official site, and click on download LTS version
- Based on the Operating system preference download the installer whether you got Linux or MacOS.
- Install Node.js

Step 3: Re-verify Node.js installation
- make sure to run this command on your terminal
node -vthen you will see your Node.js version.
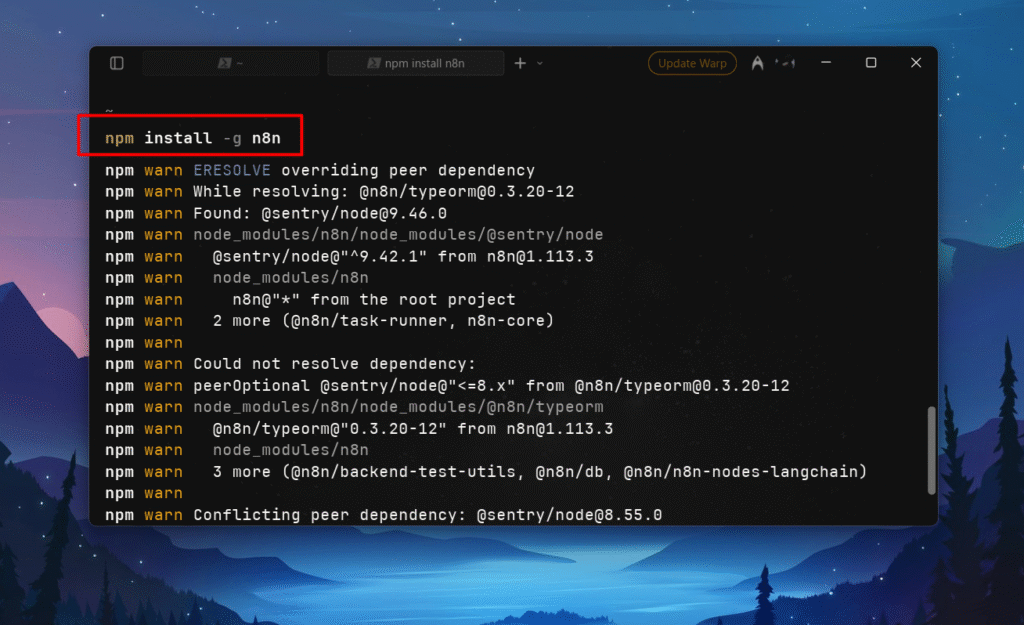
Step 4: Installing n8n
- go to warp or terminal, type
npm install -g n8n. - Installation takes 3 – 5 mins approximately.
- After installation, Go to your terminal and type n8n to open.
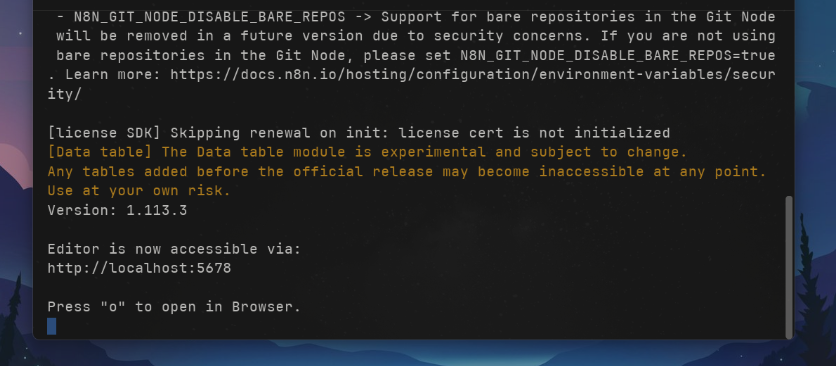
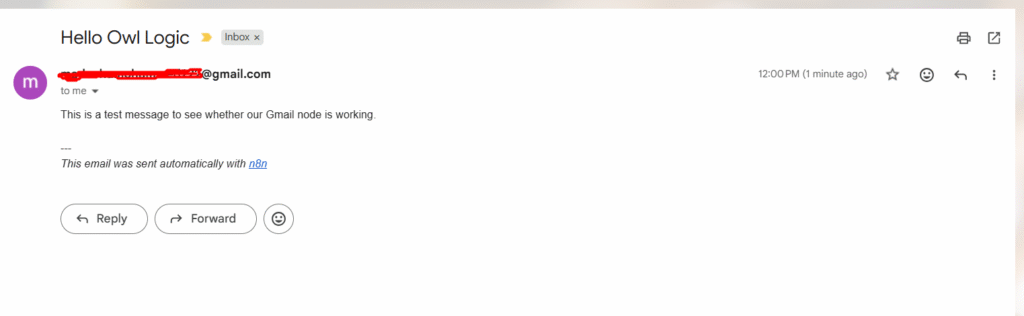
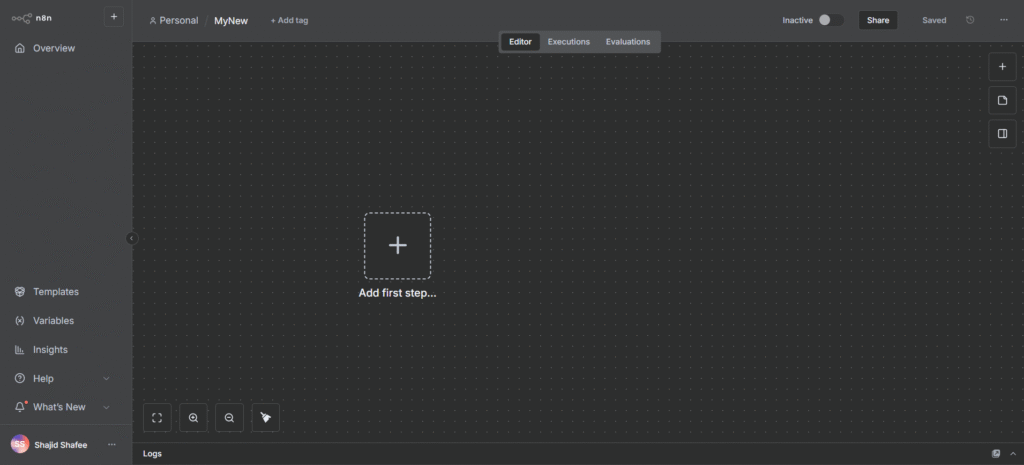
- Now n8n is accessible via http://localhost:5678 or you can press “o” to open in your browser.
- After that make sure register an account, and verify it with your email-address.
- then you’re done.
Alright here’s the tips,
- To terminate the n8n from running, then you press
ctrl+ c on the terminal or warp, this will terminates and closes n8n for you. - If you want to run n8n again, then go to terminal > type n8n.
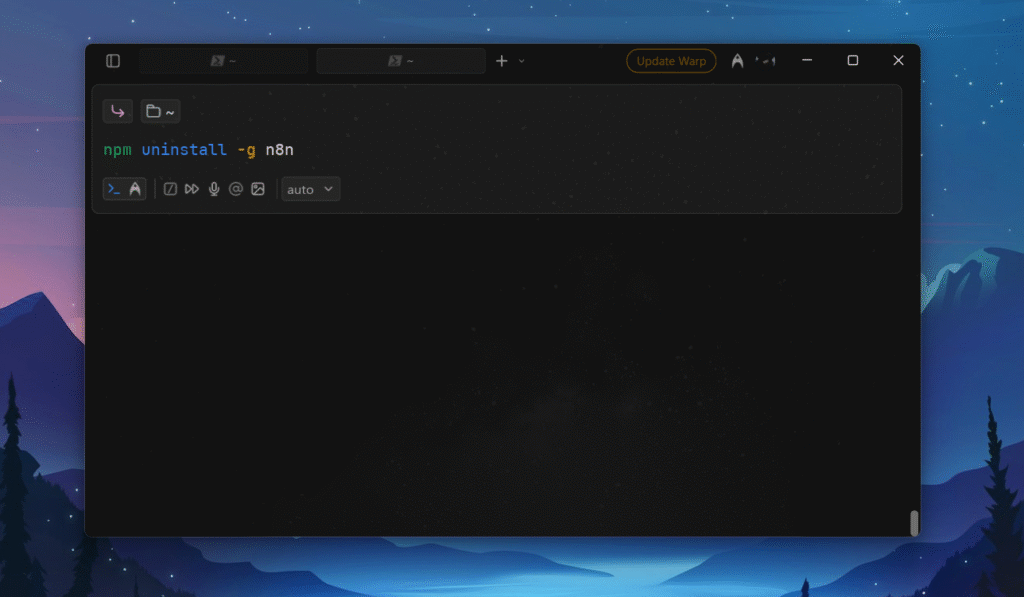
- Maybe, you wanted to uninstall the n8n? write this command in your terminal / warp
npm uninstall -g n8n
Installing n8n Locally With Docker
Docker is like a virtual container that packages an app and everything it needs to run into one neat box, so it works the same way on any computer. basically packaging the whole n8n into one container (Think it as a box), then you can use it on your computer. that is what it is.
For Docker, At least you need 4 GB of RAM (but, 8GB is recommended) I do have 20GB of RAM, and yet 3 GB taken for container. Most of the time it container stables around 1.7 – 2.0 GB of RAM.
Step 1: Install Docker
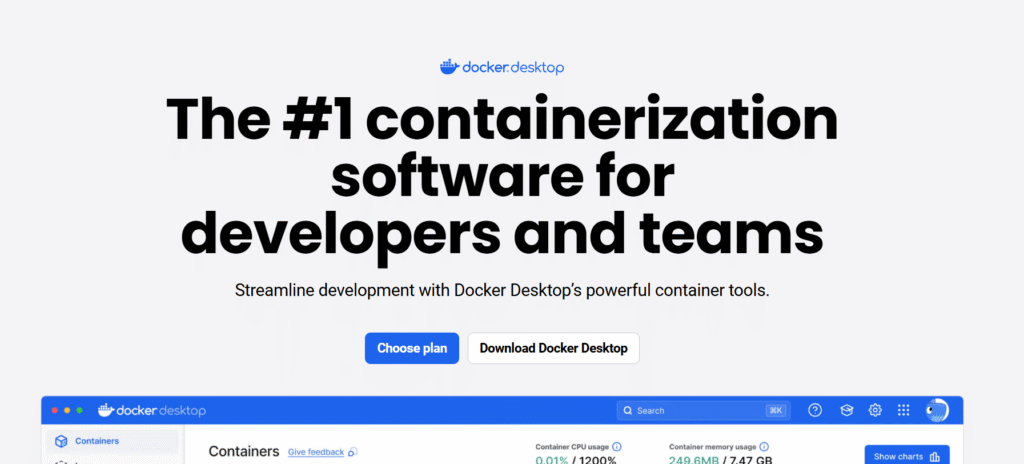
- Go to docker desktop link here, and click on Download Docker Desktop.
- Choose your operating system – Windows, Mac, Linux.
- You will get around approximately ~517 MB to download.
- Once download is completed, then install it on your directory.
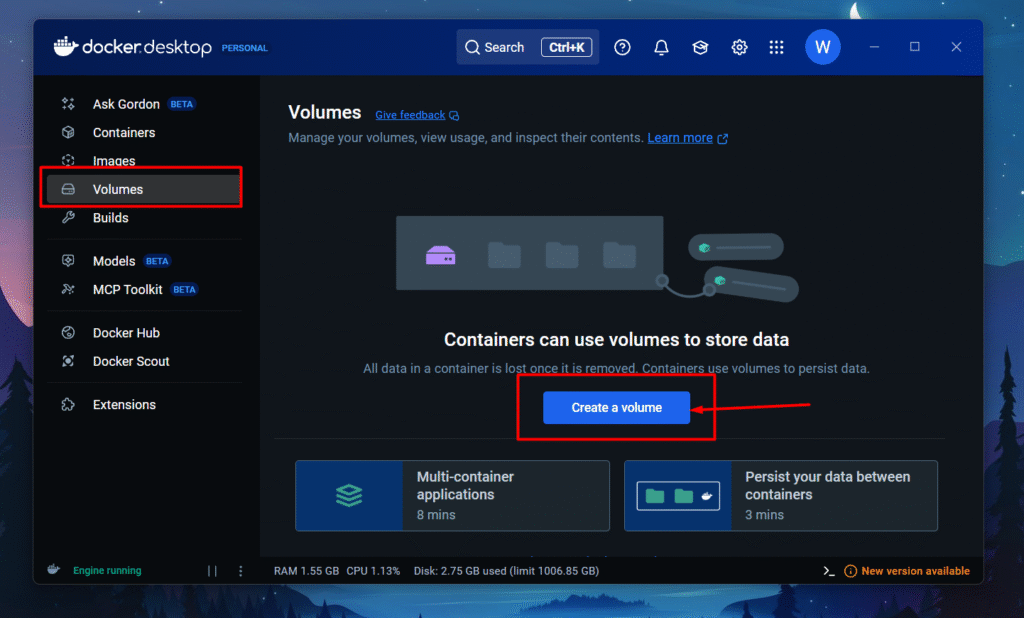
Step 2: Creating Volumes on Docker Desktop
This is an essential step in install n8n, you can still directly install without volume on docker but data won’t persist. Think it like as a folder that stores all your credentials/workflows.
- Go to Volumes > Create a volume
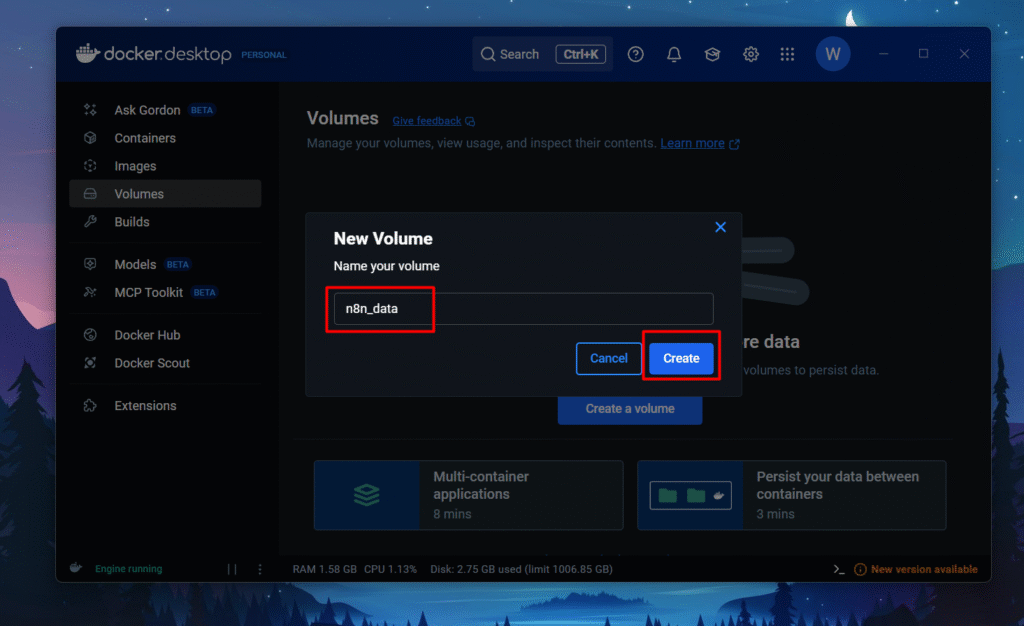
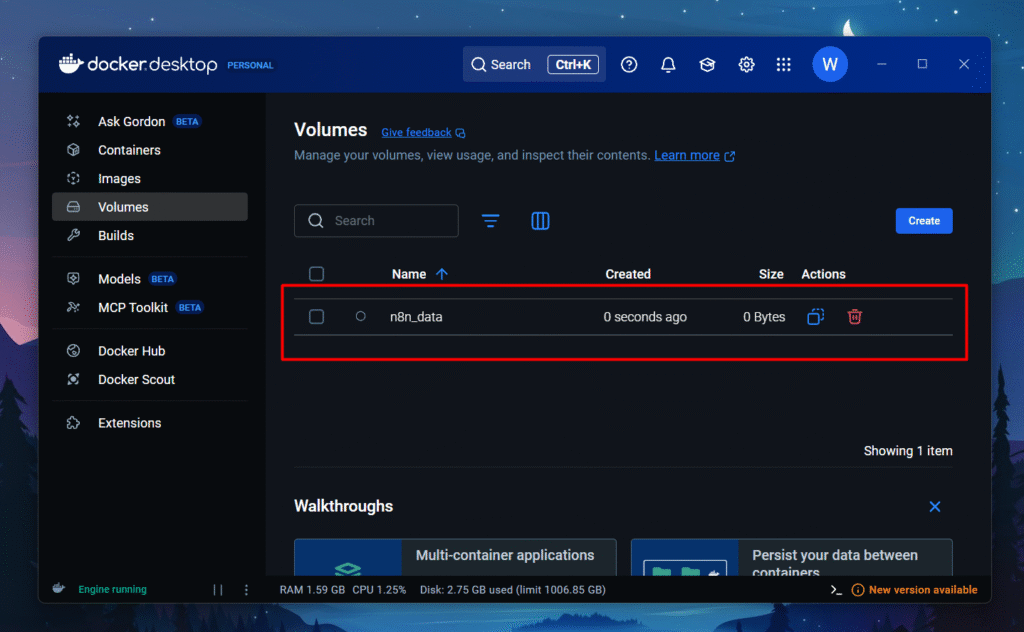
- Name your volume as
n8n-dataand hit create
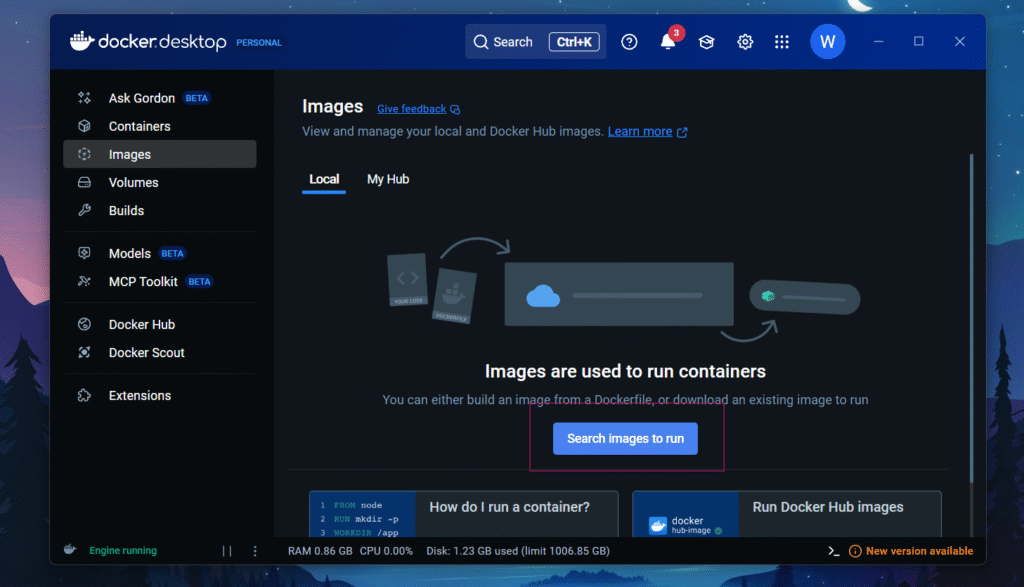
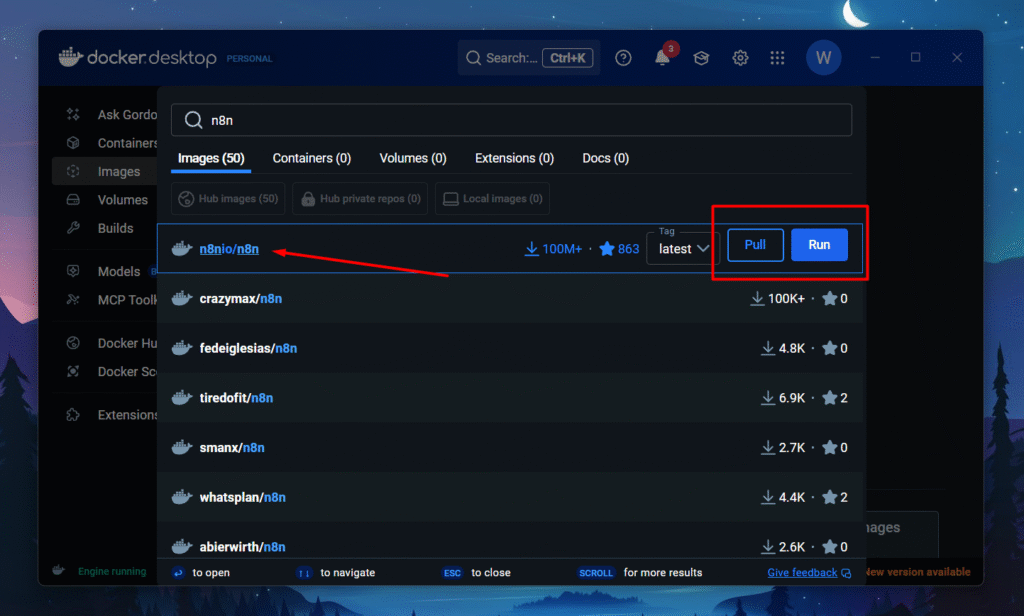
Step 3: Installing n8n Image on Docker Desktop
- Go to Images > Search images to run
- Search for
n8nio/n8n(which comes under n8n’s domain and also has 100M+ downloads) - Click on
Pull
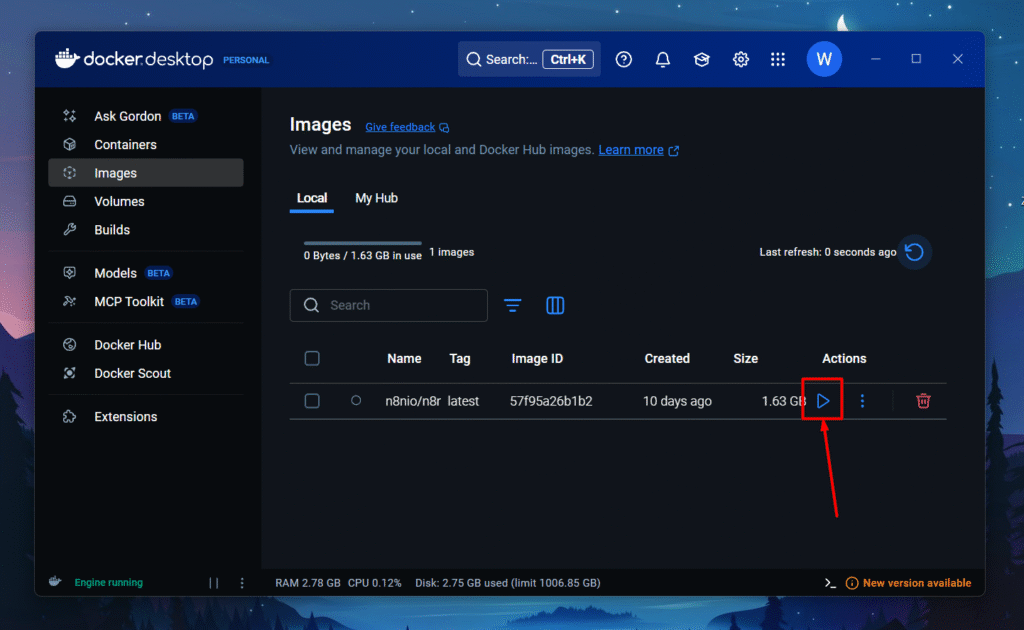
Step 4: Configuring n8n Image & Settings on Docker
- Click on the Play button
- Drop down optional settings

- Container Name, you can give any name you like this
hello_dockeror a random name will be generated. - Ports – Enter Host Port ->
5678 - Volumes
- Host path :
n8n_data - Container path :
/home/node/.n8n
- Host path :
- Now drop down to Environment variables.
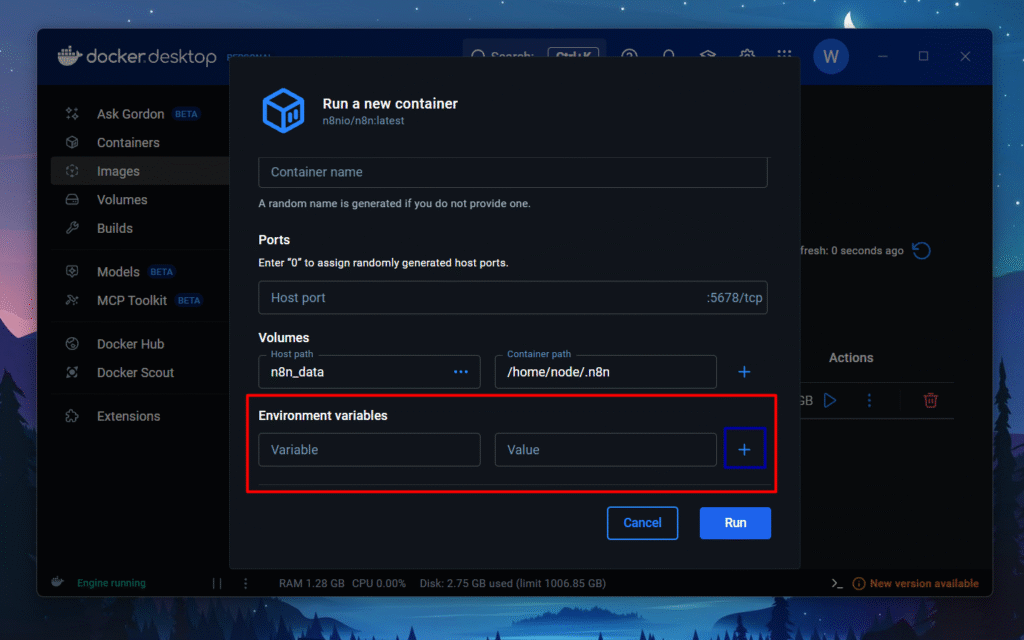
- In Environment variables, you need to add 4 variables, so press
+icon to create 3 more Environment variables.
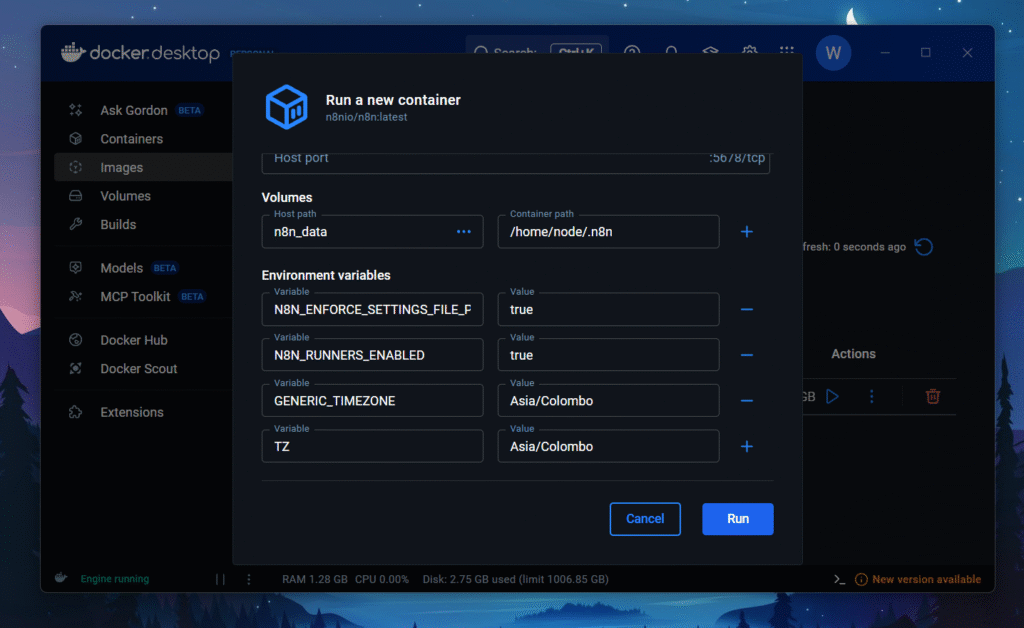
- N8N_ENFORCE_SETTINGS_FILE_PERMISSIONS = true
- N8N_RUNNERS_ENABLED = true
- GENERIC_TIMEZONE = Asia/Colombo
- TZ = Asia/Colombo
- Make sure to recheck everything is correct.
- Click on Run
Listen to this carefully, The generic time-zone, and TZ actual my timezone, You’ve to replace that value with your timezone. You can find your local timezone here.
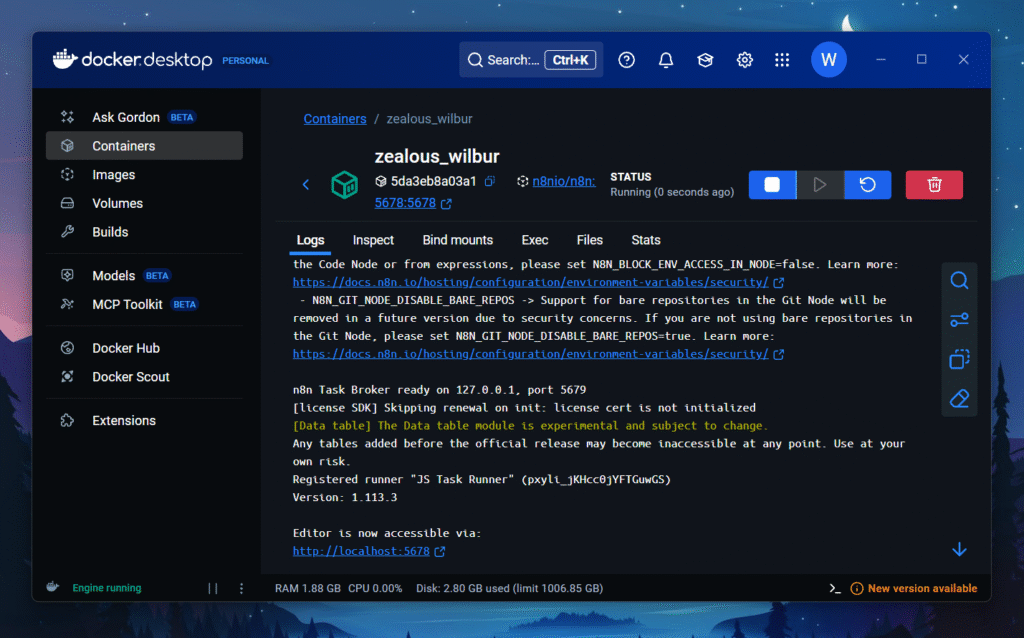
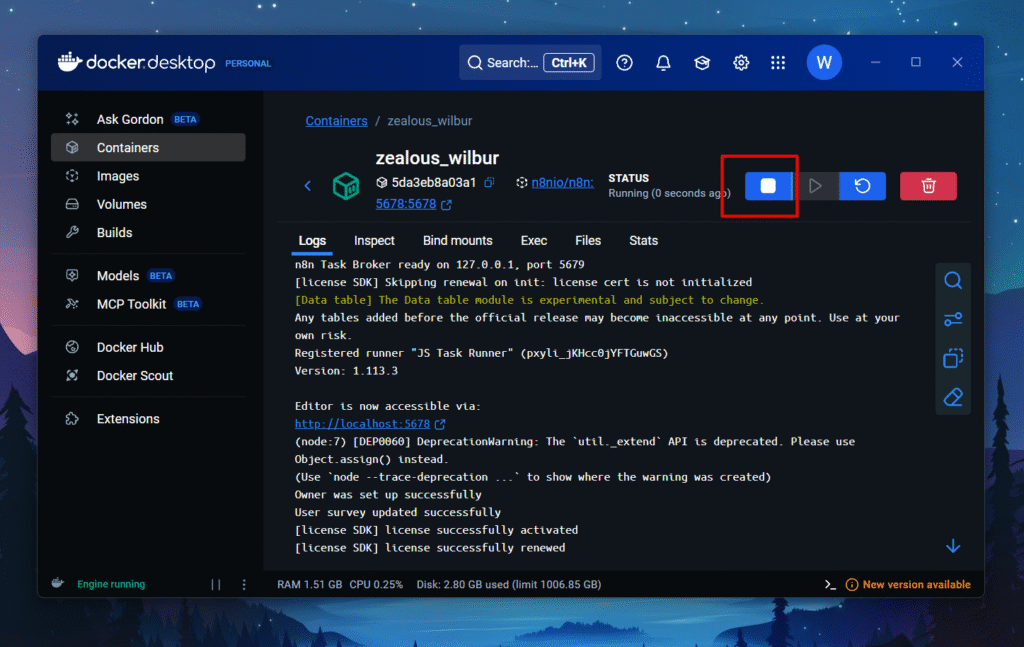
- This is the interface you will get once the container starts to run.
- Editor now accessible via
http://localhost:5678
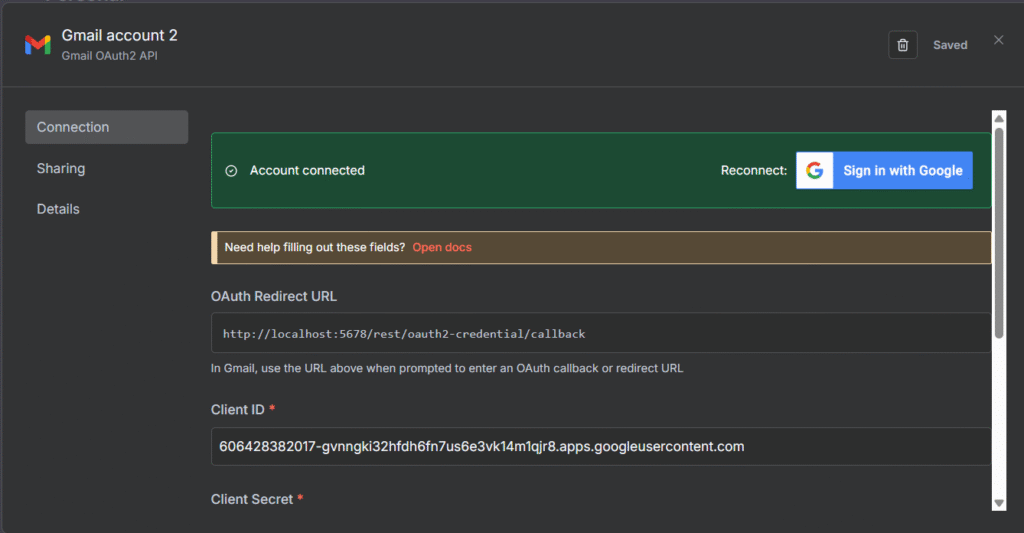
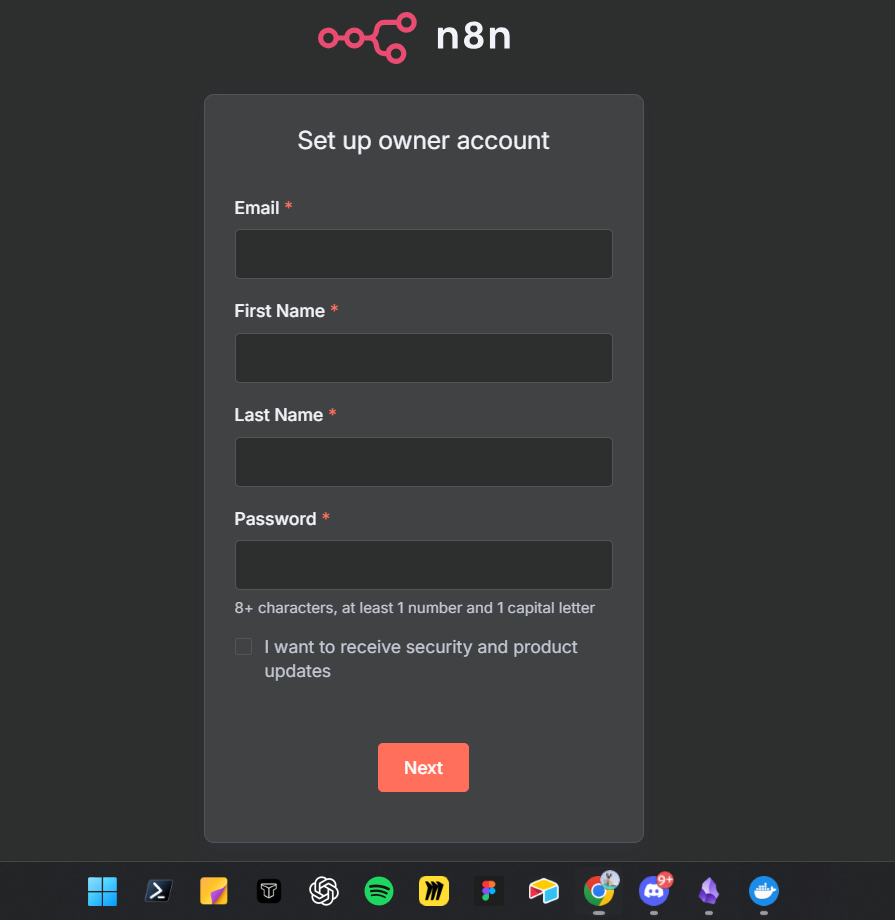
Step 5: Configuring Your n8n Account
- Enter your information such as email, password, first name and all.

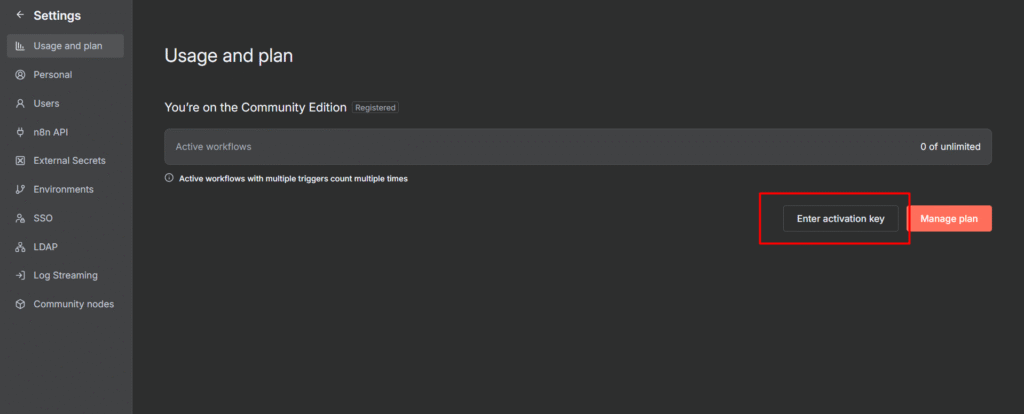
- Once you registering, then n8n will start sending a n8n license key to unlock selected paid features.
- Once you retrieved the license key, go to Settings > Usage and Plan > Enter Activation Key > Paste the activation key.

- you can see in docker container, mine is
zealous_wilburwherein license successfully activated in logs.
Yaay! finally installed on docker. Congratulations, that’s a solid wild ride. Now you know, how to access your n8n locally. Yes, I sense some questions coming out from your mind. I totally get it. I try to answer them below as a references for you, or else click here to post the question on our reddit-community.
Step 6: How to Stop n8n Container
- that’s pretty straightforward click on the
StopIcon in the container, and before stopping, make sure save your workflows.
The best practice: Save your workflow often, even when you made a small changes.
Essential Docker Commands for n8n
This is pretty much fun using docker with your terminal / warp because that gives you different vibe, and yeah in background a tech wiz soundtrack. that’s make you one.
docker ps -a
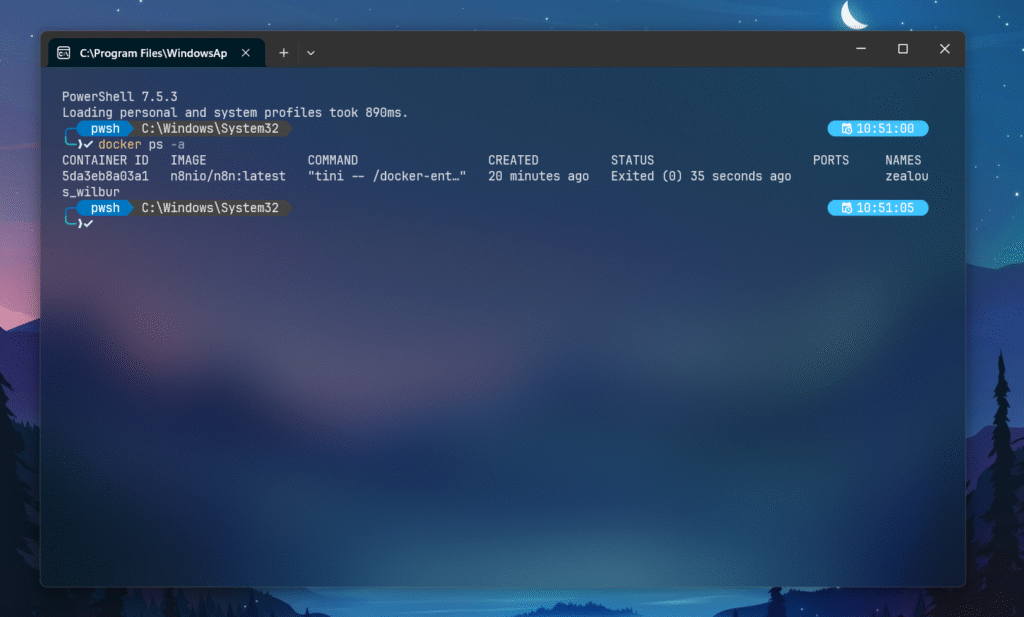
docker psonly shows the running containers, and-aoption include all the containers that exited, stopped or paused. that’s why you can see thezealous_wilburhas been exited 35 seconds ago.docker stop <container id>– This will stop the specific container that matches the ID.docker rm <container id>– this command will remove the container
My Thoughts
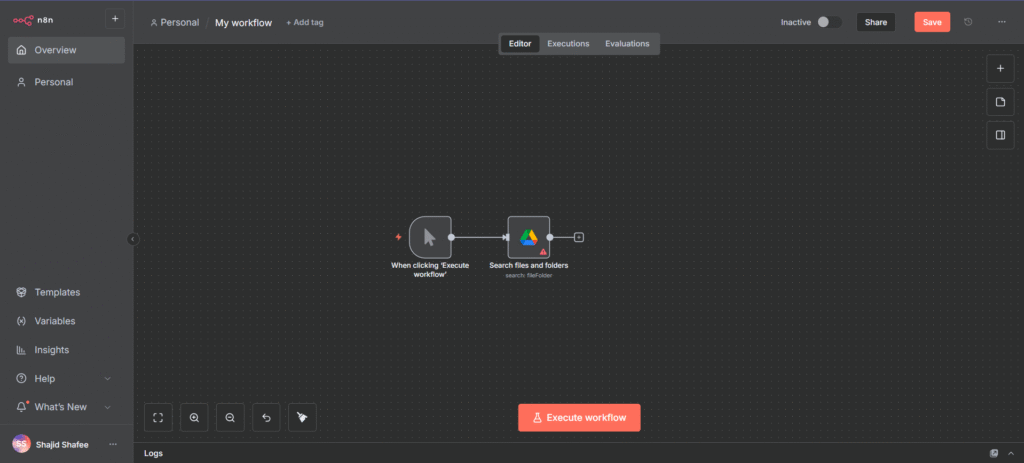
Take a moment appreciate yourself, you’ve came this far, You’re now running n8n locally. This means you have got no execution limits, and full control over your data, The hardest part is over, Now is the time to head back to http://localhost:5678 and start building automations.
If you’d any issue with the content, click here to comment on our reddit-post. This will help me to understand the issue and tackle by myself.