At some point in n8n, you’ll want to connect to a service that doesn’t have a native node.
A weather API. A payment gateway. An internal tool your company built. Or maybe the native node exists but doesn’t expose the specific endpoint you need.
That’s when you open the HTTP Request node.
It’s one of the first things worth learning properly – not because it’s complicated, but because it unlocks basically every API on the internet.
Once you understand how it works, you’re not limited to whatever n8n has built-in support for.
This is a beginner’s guide. If you’re a pro, feel free to read through it as a quick refresher.
What the HTTP Request Node Does
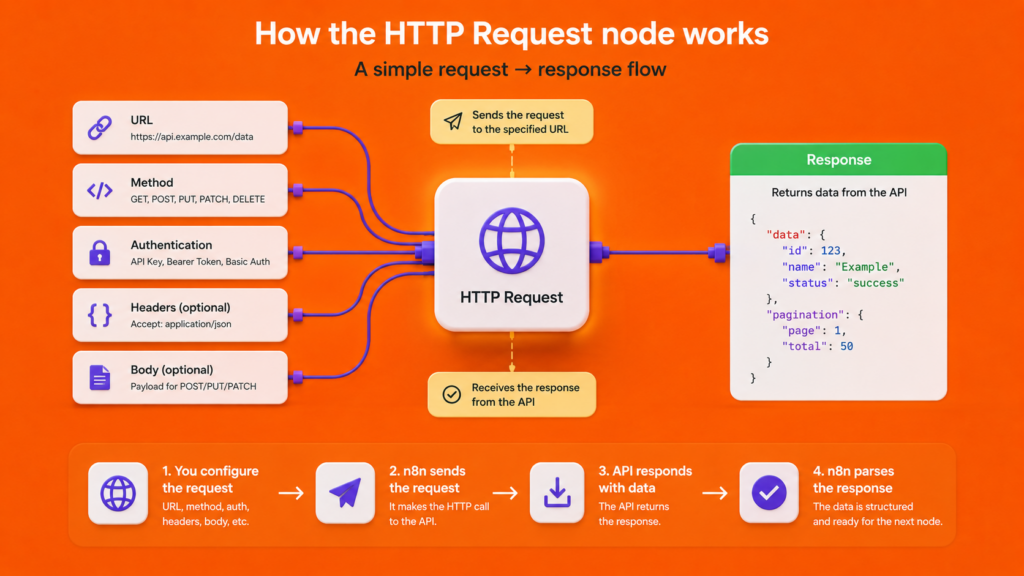
The HTTP Request node lets you send a request to any URL that accepts HTTP calls – which is how almost every API on the internet works.
You give it a URL, tell it what type of request to make (GET, POST, etc.), optionally add authentication and a request body, and it returns whatever the API sends back.
The response comes back as structured data in n8n, ready to pass into the next node. That’s the whole thing. It’s not magic, it’s just a direct line to any service that has a REST API.
If you’ve ever used Postman or copied a curl command from API docs, this is the same concept, built into your workflow.
When You Need It (and When You Don’t)
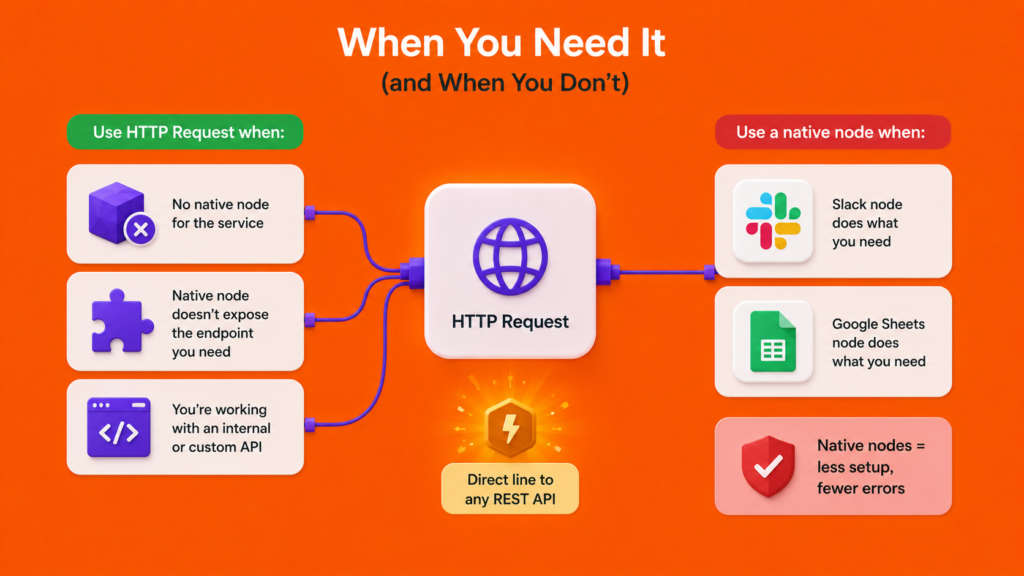
Before reaching for the HTTP Request node, check if n8n already has a native integration for the service.
The node library covers hundreds of apps, and native nodes handle authentication and response parsing automatically – less setup and fewer errors.
Use the HTTP Request node when:
- There’s no native node for the service you want to connect
- A native node exists but doesn’t expose the specific endpoint you need
- You’re working with an internal or custom API
If a Slack node or Google Sheets node does what you need, use that instead. The HTTP Request node is for when nothing else fits.
The Five HTTP Methods – What They Mean in Practice
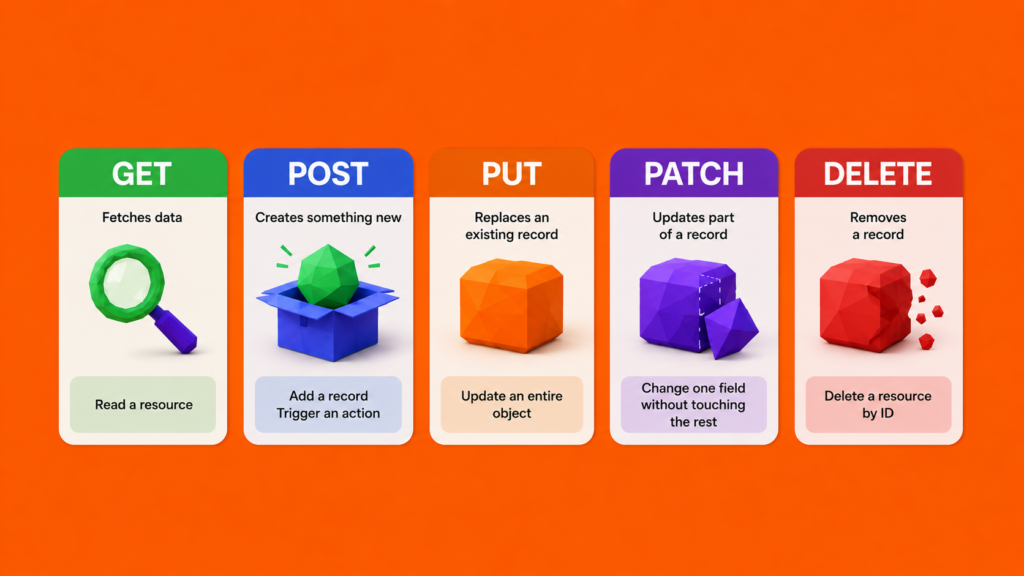
Every HTTP request uses a method that tells the server what you want to do. You pick this in the node’s Method dropdown. Here’s what each one means:
| Method | What it does | Typical use |
|---|---|---|
| GET | Fetches data | Pull a list of records, check status, read a resource |
| POST | Creates something new | Submit a form, add a record, trigger an action |
| PUT | Replaces an existing record | Update an entire object with new data |
| PATCH | Updates part of a record | Change one field without touching the rest |
| DELETE | Removes a record | Delete a resource by ID |
For reading data from an API, you’ll almost always use GET. For sending data, creating a contact, submitting an order, triggering a webhook – you’ll use POST. PUT and PATCH come up when you’re updating existing records.
DELETE is self-explanatory but use it carefully in production workflows.
Your First HTTP Request: A Working Example
Here’s a complete walkthrough using JSONPlaceholder, a free public API that returns realistic test data. No sign-up, no API key, works immediately.
What we’re building: A workflow that fetches a list of users from an external API.
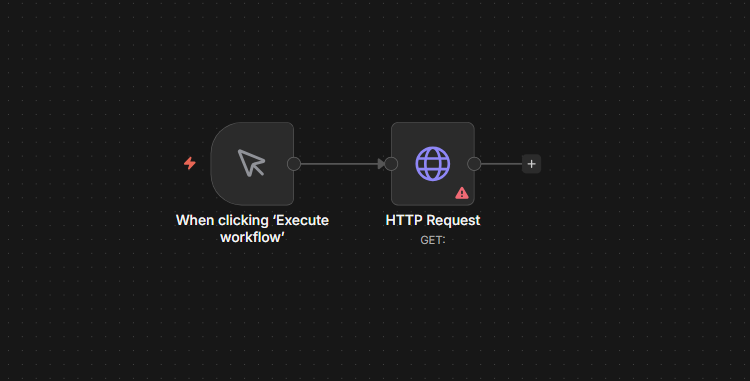
Step 1 – Add a Manual Trigger
Create a new workflow, click +, and add a Manual Trigger node. This lets you run it on demand while testing.
Step 2 – Add the HTTP Request Node
Click + after the trigger, search for HTTP Request, and add it.
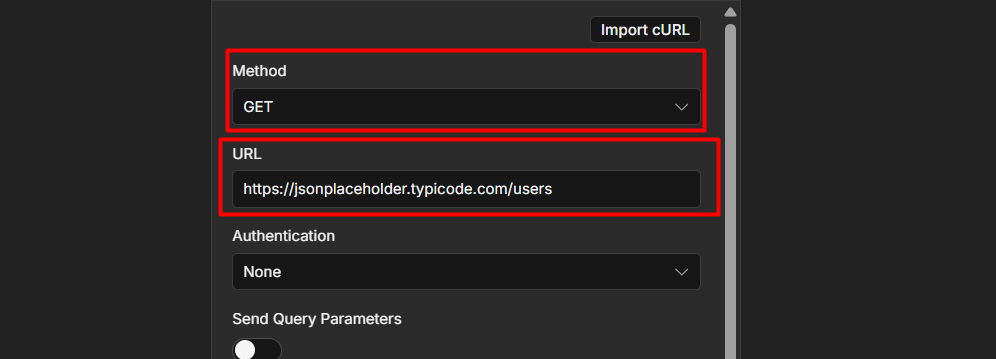
Step 3 – Configure the node
Set these fields:
- Method:
GET - URL:
https://jsonplaceholder.typicode.com/users
That’s it. Leave everything else at the default for now.
Step 4 – Execute and inspect
Click Execute workflow. The node will run and return an array of 10 user objects. Click the node to open the output panel — you’ll see each user as a separate item with fields like name, email, address, and company.
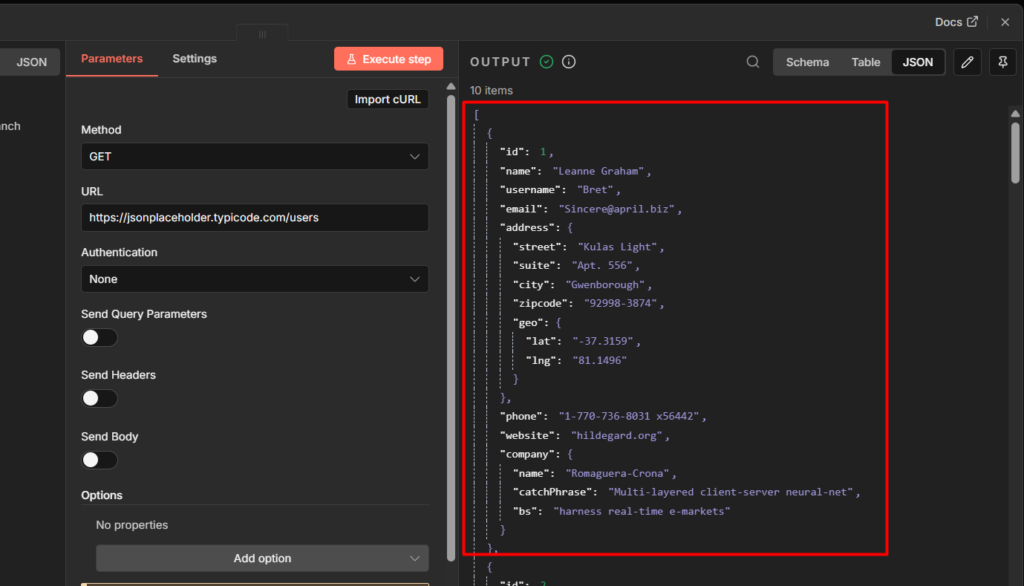
{
  "id": 1,
  "name": "Leanne Graham",
  "username": "Bret",
  "email": "Sincere@april.biz",
  "phone": "1-770-736-0988 x56442"
}
You can now pipe this data into any other node — filter by city, write to Google Sheets, send an email per user. The HTTP Request node did its job: it fetched the data and handed it off.
Fetching a single record
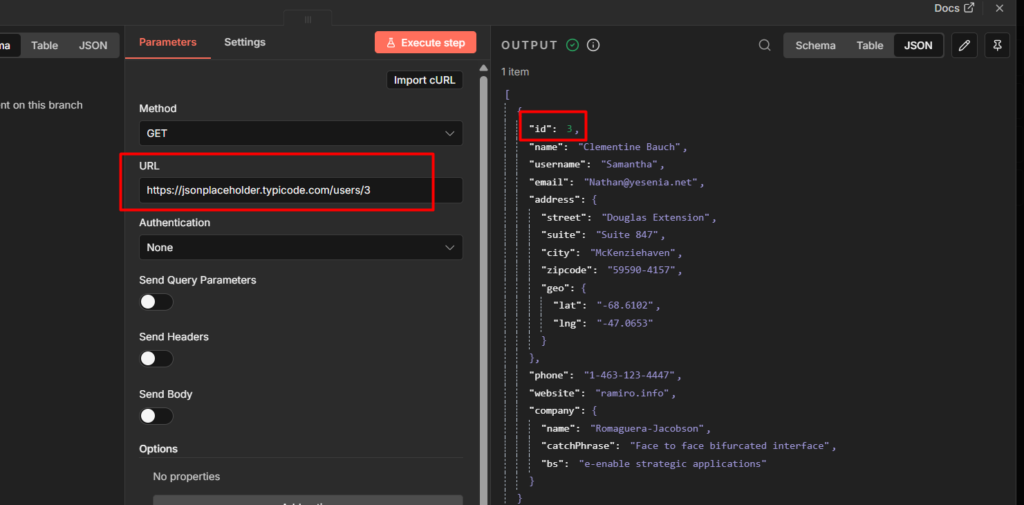
If you only want one user, you can append an ID to the URL: https://jsonplaceholder.typicode.com/users/3
Or make the ID dynamic by referencing data from a previous node using an n8n expression:
Click the expression icon (the small = button) next to the URL field to switch into expression mode. This is how you build workflows where the HTTP request adapts based on incoming data.
Adding Authentication: API Key and Bearer Token
Free public APIs like JSONPlaceholder don’t require authentication.
Real services almost always do. When you hit a 401 Unauthorized error, authentication is the fix.
The HTTP Request node has an Authentication section directly in the node. The two methods you’ll encounter most often:
API Key
Most common with services like OpenWeatherMap, NewsAPI, or any SaaS tool that gives you a key in their developer settings.
In the node, set Authentication to Generic Credential Type, then select Header Auth. Add the header name (usually Authorization or X-API-Key — check the API docs) and your key as the value.
The cleaner way: store the credential in n8n’s credential manager instead of pasting the key directly into the node.
Go to Settings → Credentials, create a new Header Auth credential, and reference it from the node.
This keeps your key out of the workflow JSON and lets you rotate it in one place. The full setup is covered in the n8n credentials guide.
Bearer Token
Used by services that issue temporary access tokens — many modern APIs and anything OAuth-based.
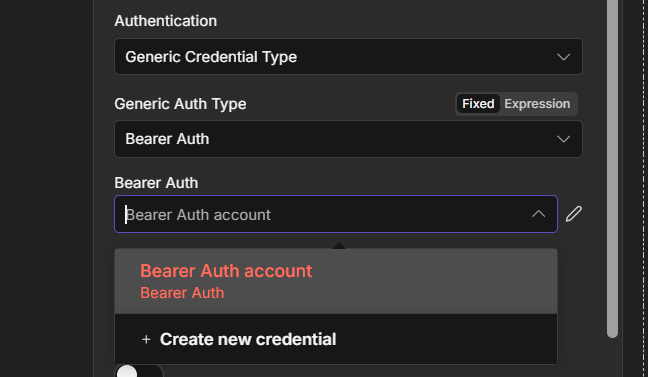
Set Authentication to Generic Credential Type, select Bearer Token Auth, and paste your token.
If n8n has a Predefined Credential Type for the service you’re connecting to, use that instead. It handles the credential format automatically. You’ll see this option in the Authentication dropdown when it’s available.
Reading the Response: Where Your Data Goes
After a successful request, n8n makes the response available as output items – the same structured data format every other node uses. Open the node’s output panel after execution and you’ll see your data organized as items, each with a json key containing the response fields.
To reference a field in a later node, use an expression like: {{ $json.email }}
If the API returns an array (a list of records), n8n keeps it as a single item with the array nested inside. You’ll often want to split that into individual items so each record flows through the workflow separately. The Split Out node handles this — add it after the HTTP Request node, point it at the array field, and each element becomes its own item.
Understanding how to navigate and use this output is what separates a working API call from a useful workflow. The n8n expressions guide covers this in full.
When It Fails: The Three Errors Beginners Always See
401 Unauthorized – Your authentication is missing or wrong. Double-check the header name, the credential type, and that the token or key hasn’t expired.
404 Not Found – The URL is wrong. Either a typo, a missing record ID, or the endpoint has changed. Check the API docs and compare your URL exactly.
400 Bad Request – Usually means the body of your POST request is malformed. The API expected JSON but got something else, or a required field is missing. Check what the API docs say the request body should look like, then look at what you’re actually sending.
If the node returns an HTML page instead of JSON, that’s almost always an error page from the server – the URL is pointing somewhere it shouldn’t. The raw HTML will show up in your output panel and usually tells you what went wrong.
For anything beyond these three, the n8n error handling guide covers the full pattern: how to catch failures, retry requests, and log what went wrong without stopping your workflow.
Leave a Reply