Airtable sits at an interesting spot – It’s more structured (steroid) than a spreadsheet but more approachable than a proper database. That makes it a natural fit for storing leads, content pipelines, project data and anything else needs columns, filters, and views without spinning up Postgres.
Connecting it to n8n is straightforward and we will go in-depth
- Which scopes your credential needs
- Why Update and Delete require a Record ID you have to fetch first.
- Why the Airtable trigger isn’t real-time
skip these would cost you hours of debugging empty records and trigger that never fires.
Let’s get started, setup the credentials.
Setting Up Your Airtable Credential
Airtable removed it’s legacy API in february 2024. If you’re following an older tutorial that shows an API Key field in Airtable’s account settings, that method no longer exists. The only options now are Personal Access Token (recommended) and OAuth 2.
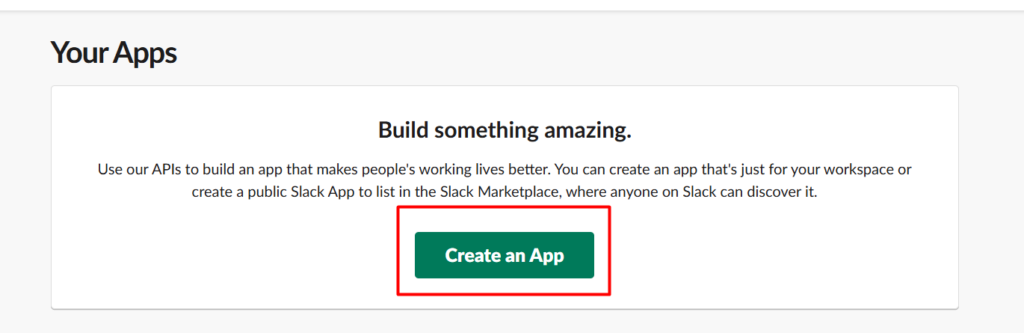
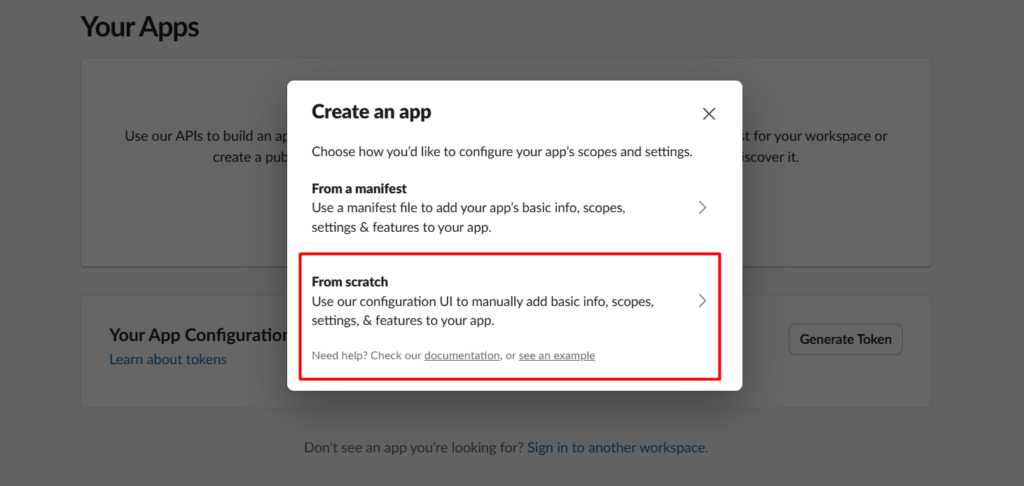
Step 1
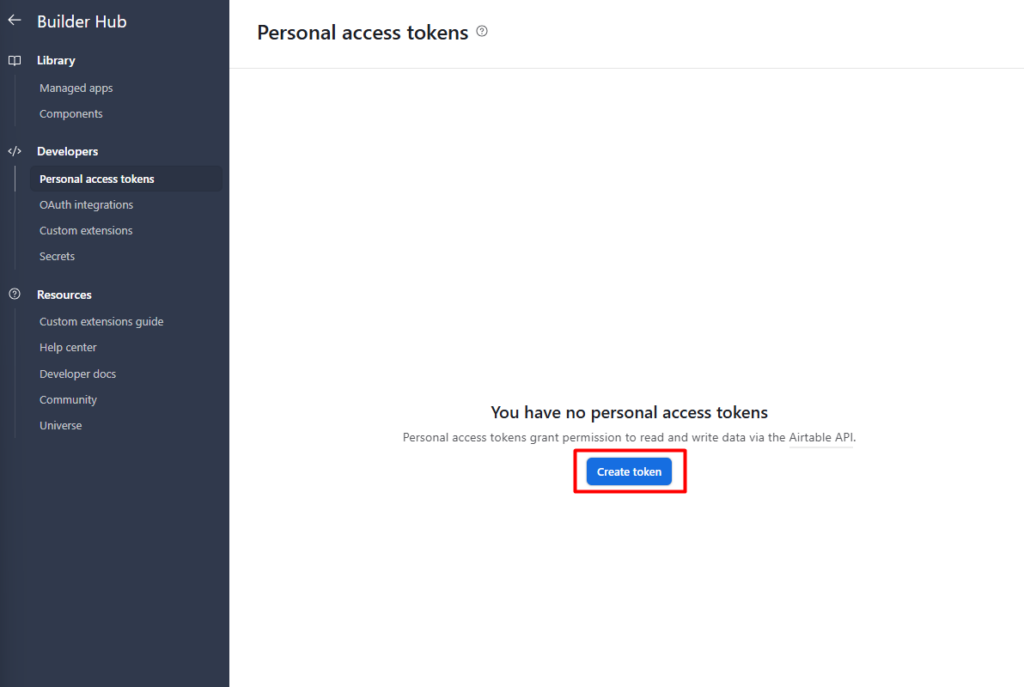
- Go to airtable.com/create/tokens and click on the
Create token
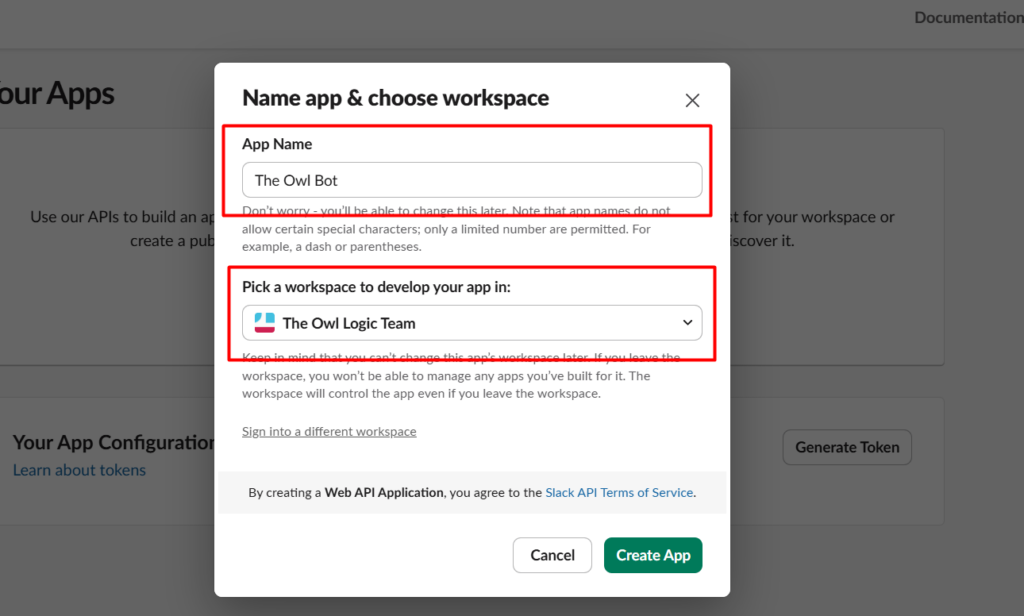
Step 2
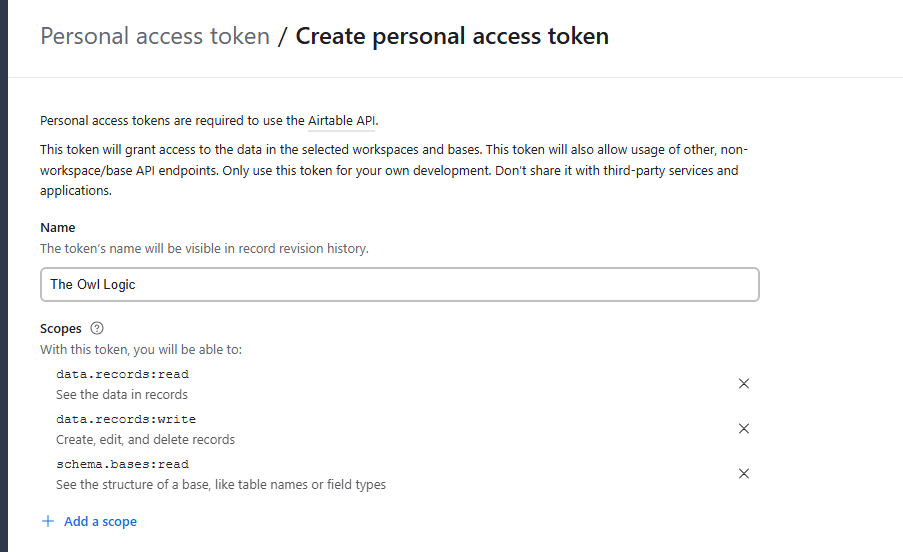
- Give it a name, for now I’ll add as “The Owl Logic”
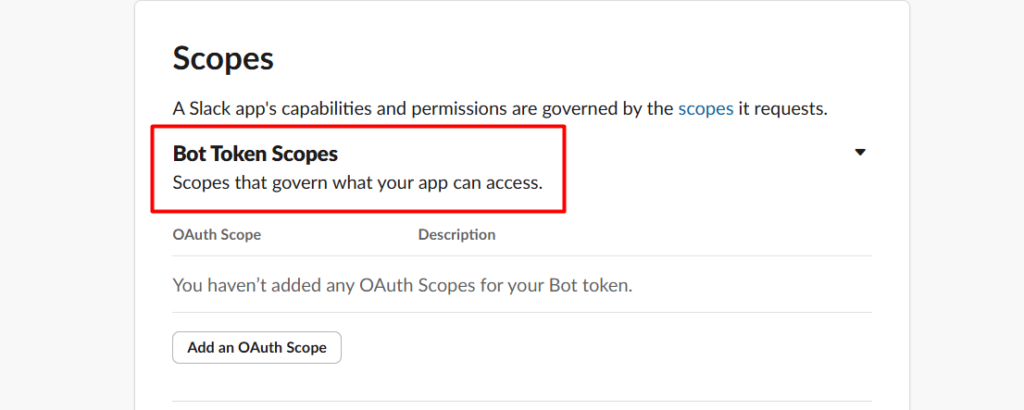
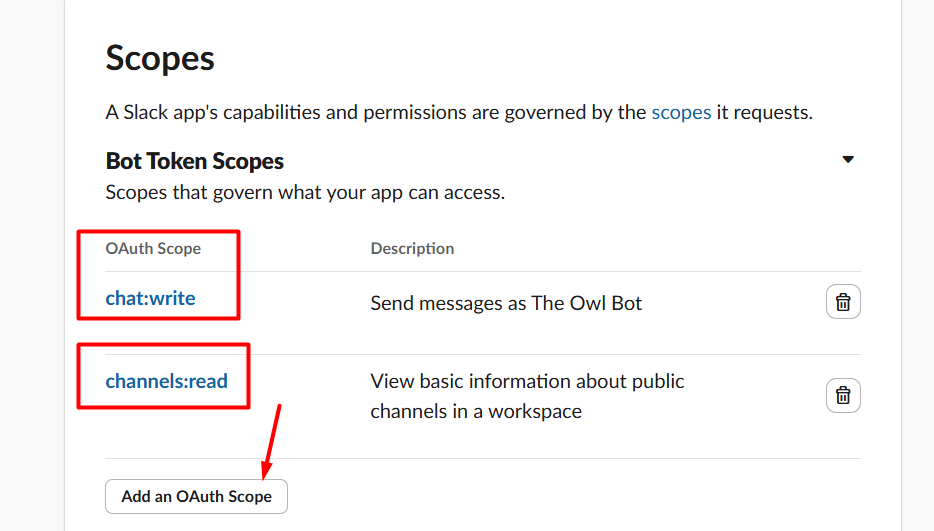
- Add these three scopes
data.records:read– read records from tablesdata.records:write– create, update, and delete recordsschema.bases:read– read table structure so n8n can list your bases and columns
That third scope is the one almost everyone misses. Without it, n8n connects successfully but the base dropdown stays empty. You end up with a valid credential that can’t actually do anything useful in the UI.
Step 3
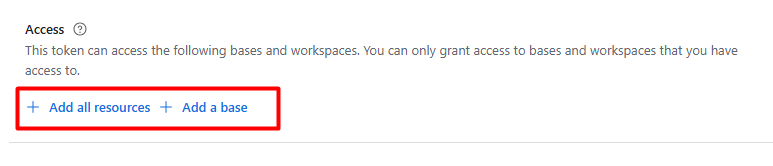
Under Access, select which base or bases this token can access. You can grant access to all bases in a workspace or limit it to specific ones.
I selected the Add all resources to ensure a current and future bases are connected.
Step 4

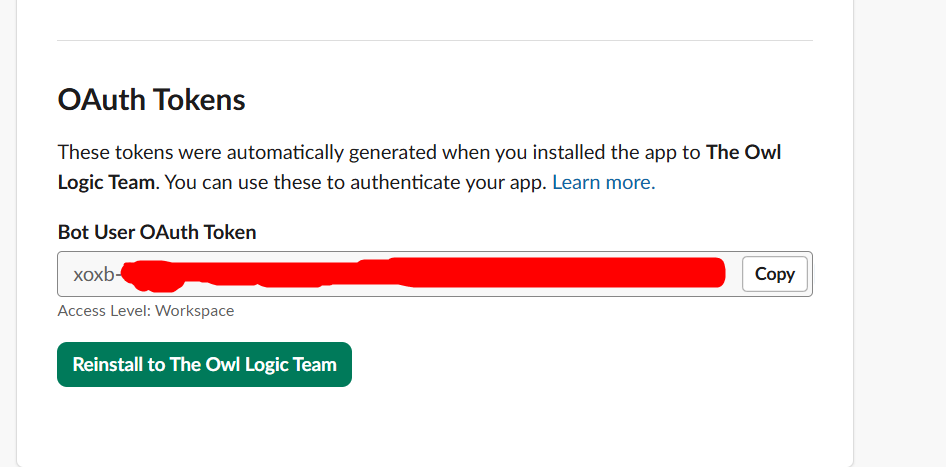
Click Create token, copy it immediately (Airtable only shows it once), so make sure to copy and paste it on a notepad or somewhere safe.
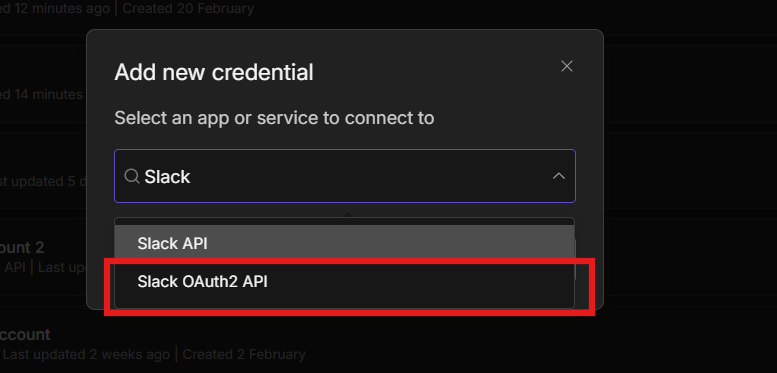
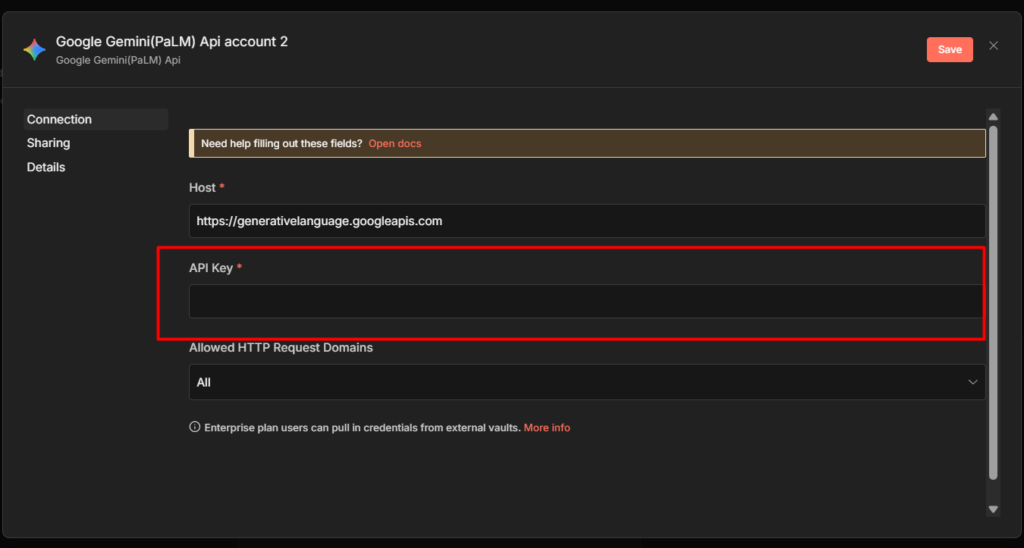
Step 5
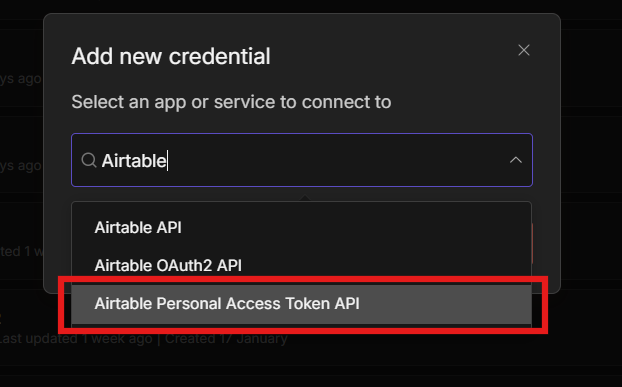
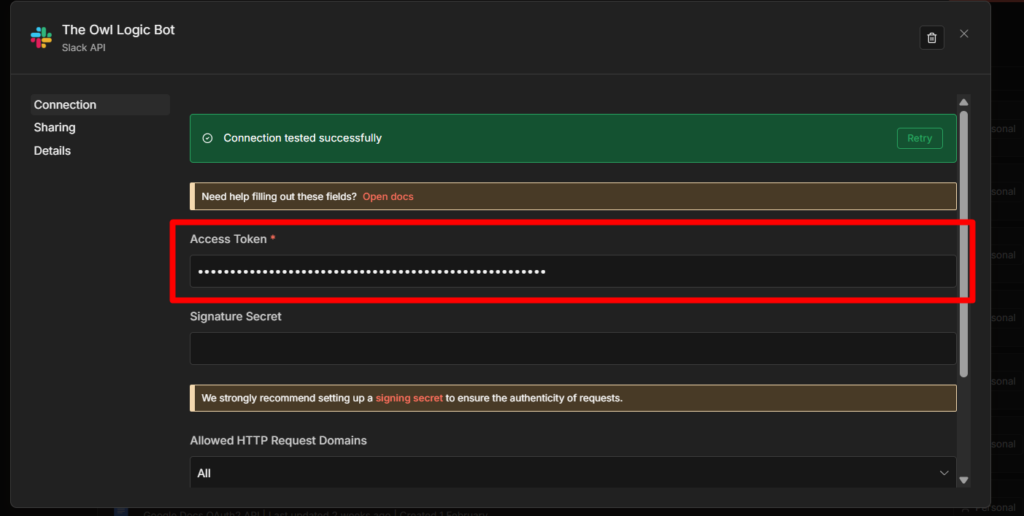
- Go to n8n > Create credentials > Airtable Personal Access Token
- Paste the Personal Access Token
Well, it’s working but this is totally different from Google Spreadsheet.
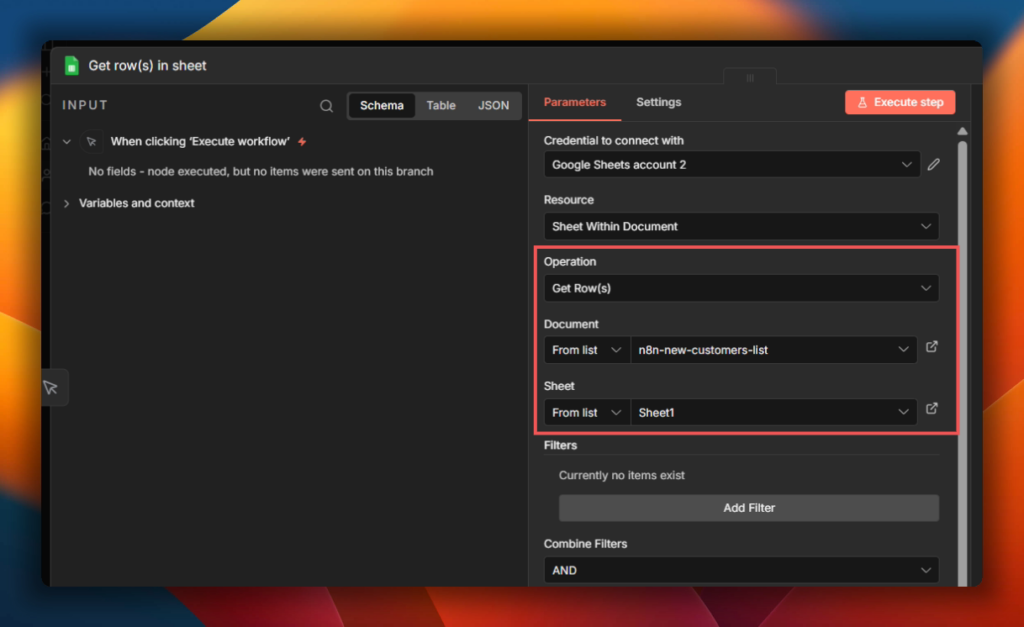
Reading Records (List All vs. Filter by Formula)
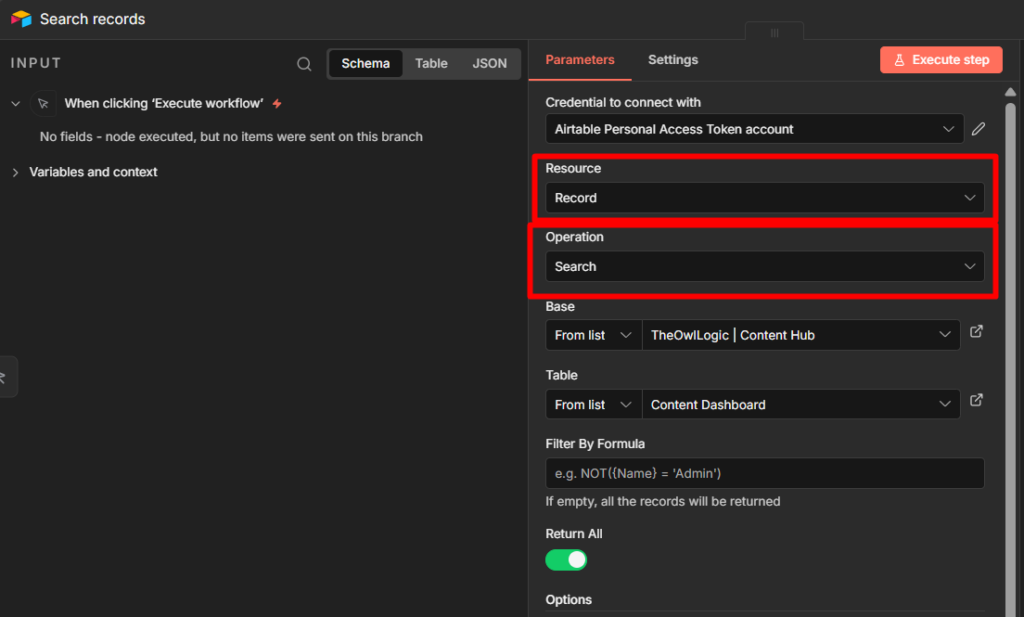
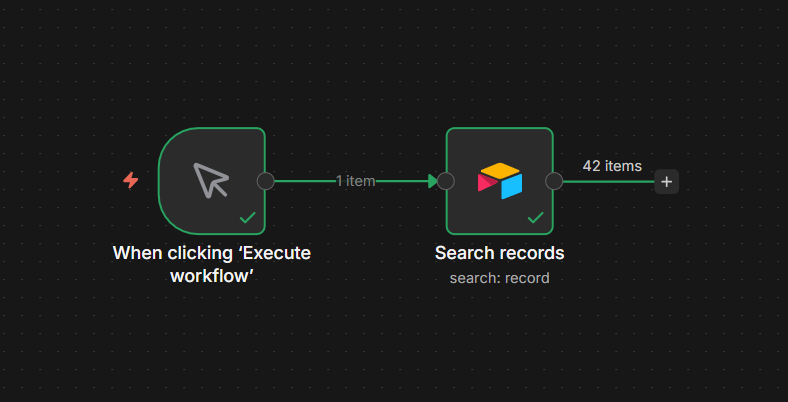
Both operations use Resource: Record > Operation: Search.
The difference is whether you filter at the Airtable level or pull everything and filter in n8n.
Pulling everything and filtering with an IF node works, but it’s wasteful. If your table has 500 records and you only need 12, you’re passing 500 items through your workflow for no reason. Filter by Formula handles the selection in Airtable before the data reaches n8n.
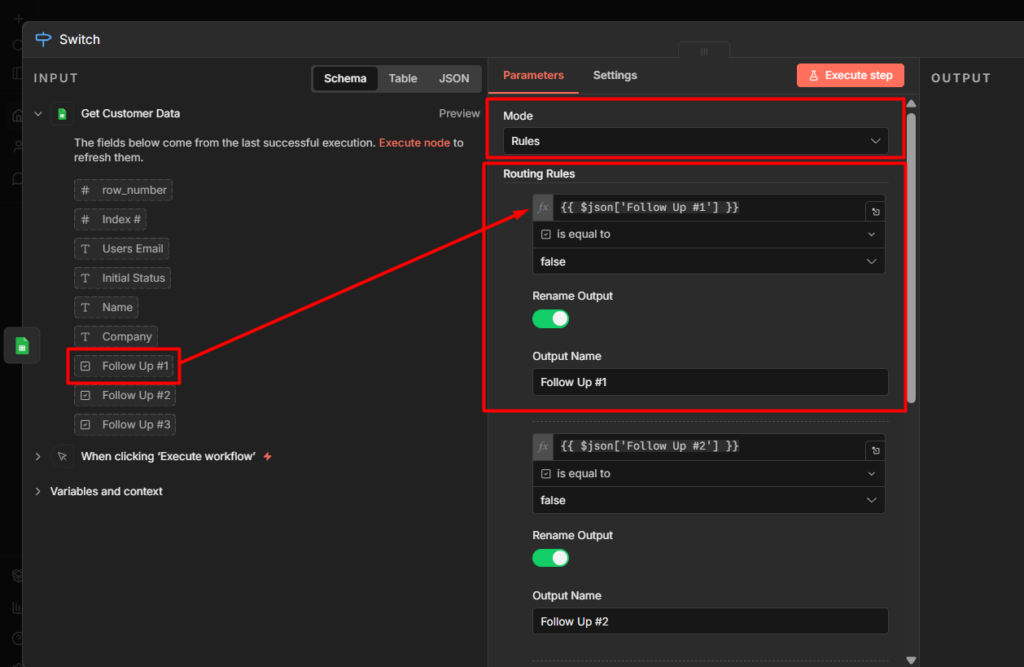
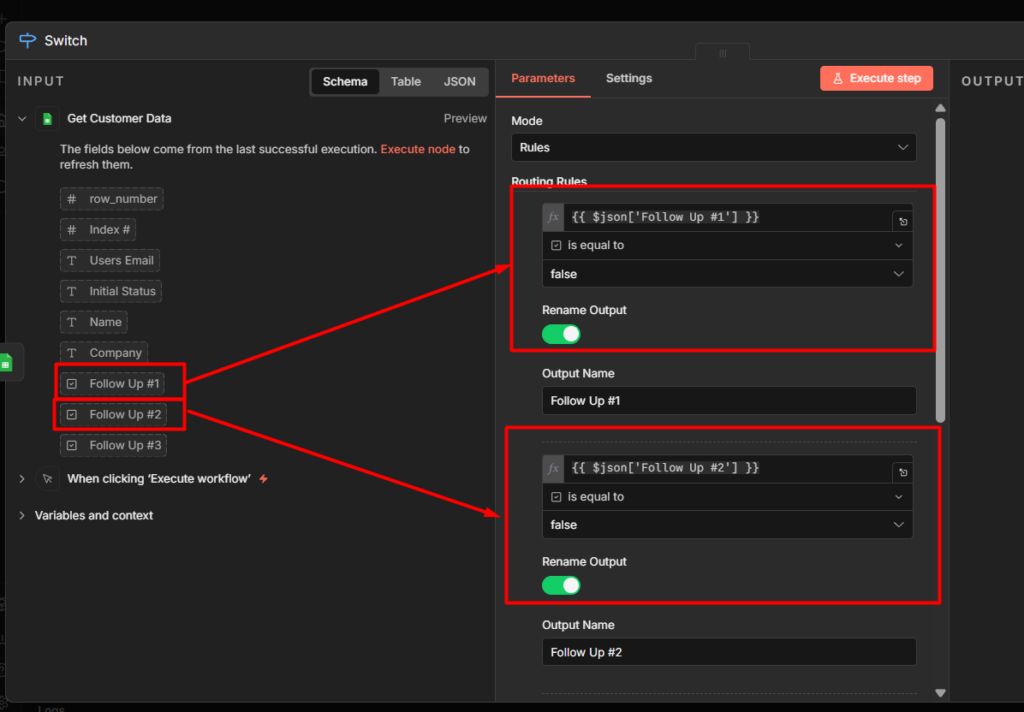
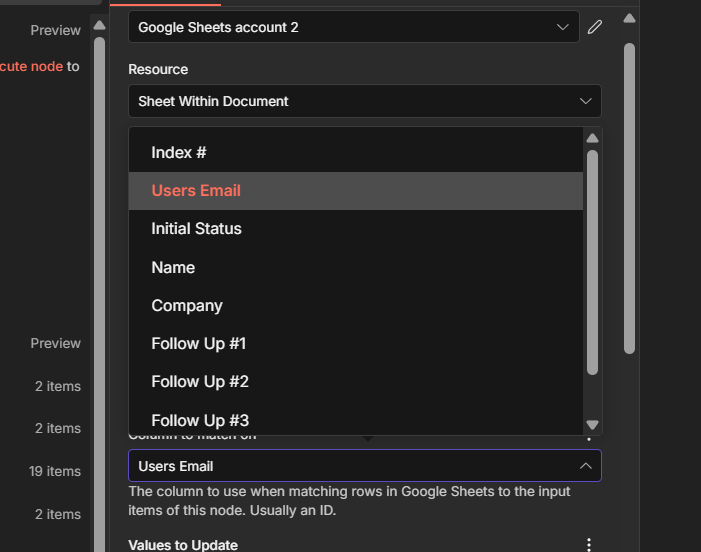
To use it: open the Airtable node > add the Filter By Formula option > enter your formula


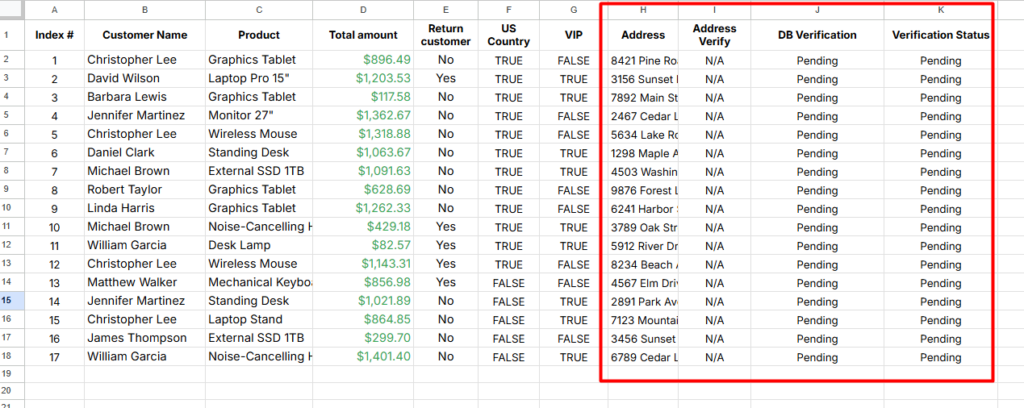
Basically, In the Filter By Formula Section, I called the column as {status} that equals to “writing”, This way you can grab all the writing items to the node.
Field names are case-sensitive and must match exactly. If your column named Email Address, then formula must use {Email Address}. using {email address} or {emailAddress} leads to an error.
For no filter at all, leave the formula field empty . The node returns every record in the table.
Creating Records
Resource: Record > Operation: Create
The node offers two mapping modes:
Map Automatically – n8n takes the field names from your incoming data and maps them to Airtable columns with matching names. This only works when your data field name already match your Airtable column names exactly (again, case-sensitive)
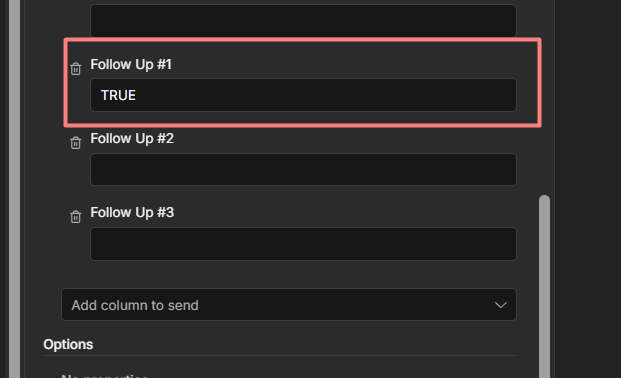
Map Each Field Manually – you specify each Airtable column and map it to an expression. More steps, but explicit. You know exactly what’s going where.
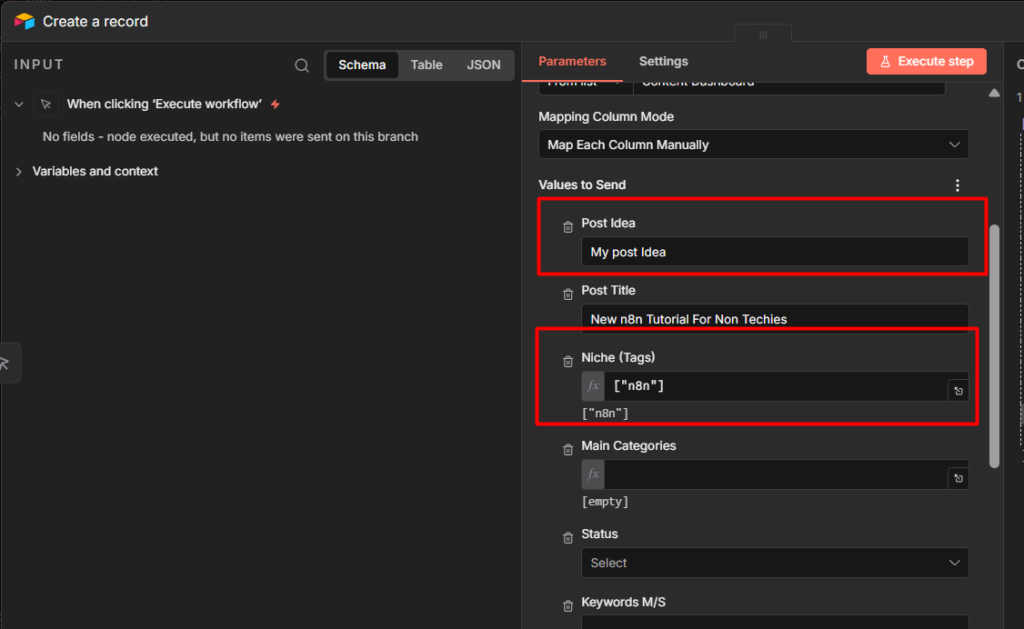
Records created but fields are empty? This is a field name mismatch. The record was created, but the column names didn’t match so Airtable ignored the data. Open your Airtable table, copy the exact column name character-for-character (including spaces and capitalization), and update your field mapping in n8n.
Updating and Deleting Records
This is where most beginners gets stranded.
You cannot update or delete a record by field value. Both operations requires the Airtable Record ID – a string like recABCDEF12345678 that Airtable assigns to every row internally. You don’t see it in the default grid view, but it exists for every record.
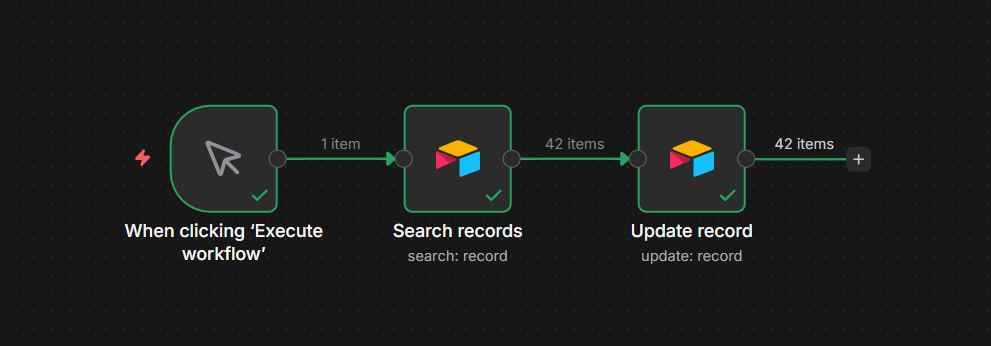
This means Update and Delete always take two steps: first find the record to get its ID, then act on it.
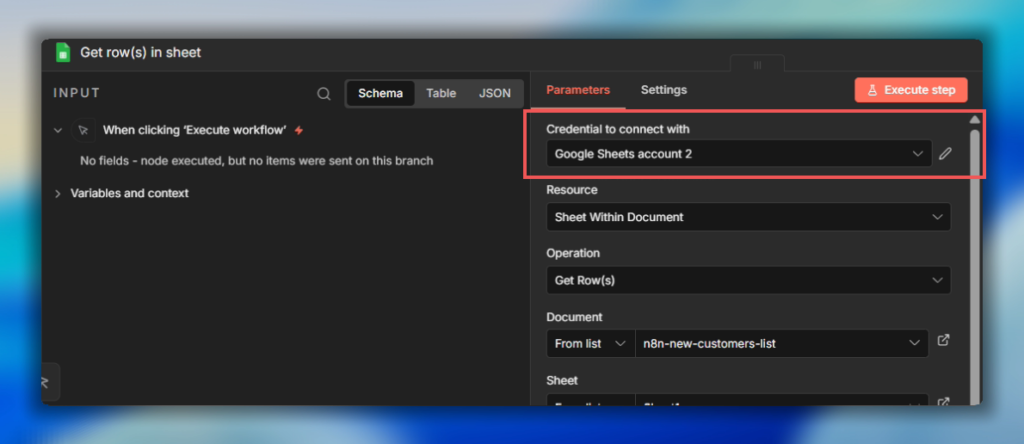
Step 1: Search for the Record
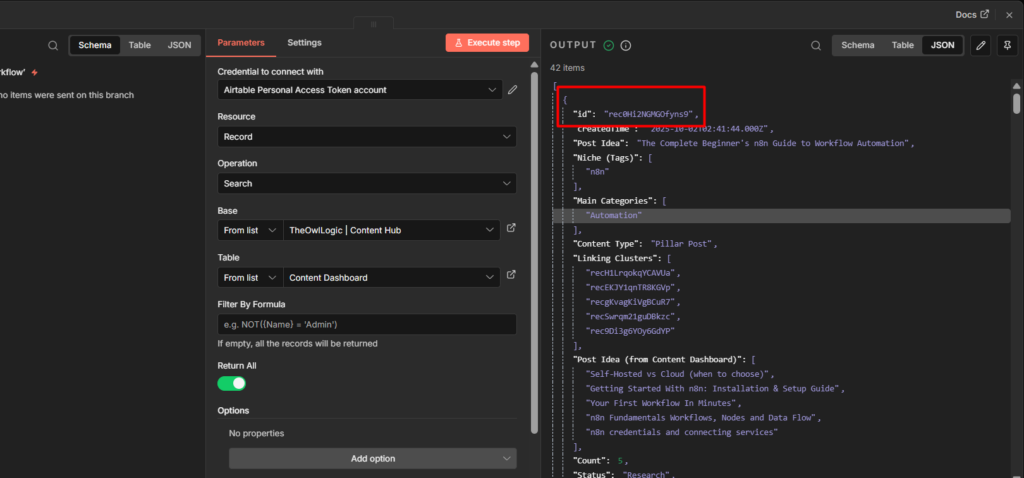
Resource: Record > Operation: Search > Filter By Formula or You can Return All.
When this executes, each returned record includes an id field alongside your data fields. That id is the Record ID.
Step 2: Update Using ID
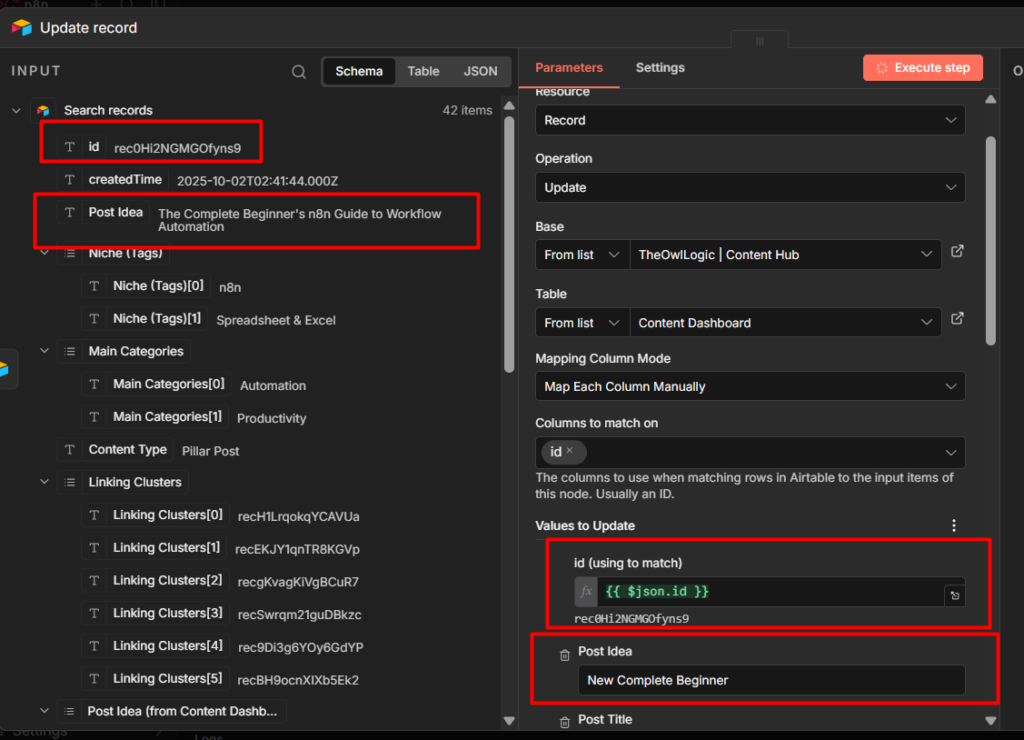
Resource: Record > Operation: Update > ID
Now, I’m going to map the ID to ID (using to match) and changes the Post Idea from previous context to a new updated idea which is the “New Complete Beginner”
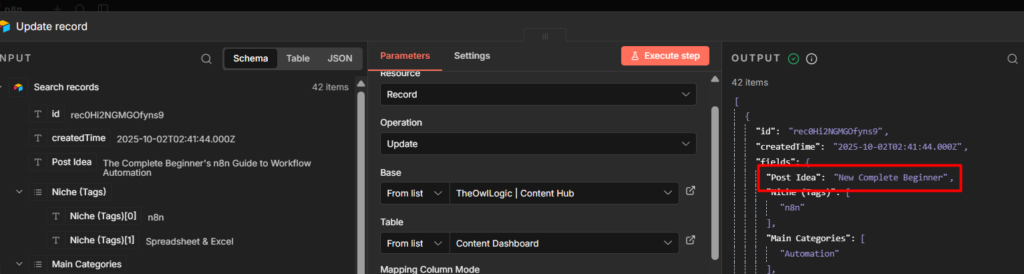
It changed.
Delete works the same way – Search first, then pass the ID to Delete Operation
One thing to watch: If your search returns multiple records, the update only processes the first one by default. Make your formula specific enough to return a single record. If you genuinely need to update all matching records, you’ll need Loop Over Items to process each one.
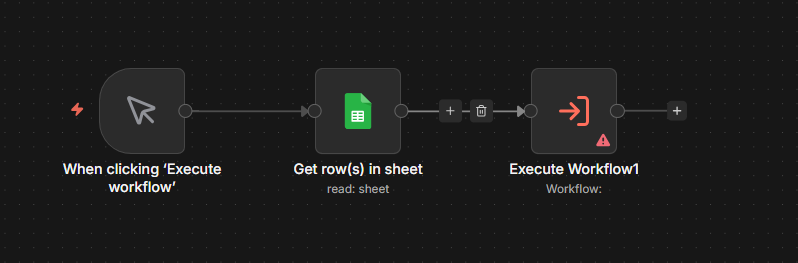
Using the Airtable Trigger
The Airtable Trigger doesn’t use webhooks. It polls – it checks your table on a schedule and looks for records that have changed since the last check. This means it’s not real-time. Depending on how you configure it, there can be a 1 – 15 minute delay between a record being created or changed in Airtable and your workflow starting.
If you need instant response to Airtable changes, the trigger isn’t the right tool. Use a form, webhook or another event source to feed data into n8n directly instead of polling Airtable for it.
For use cases where a small delay is acceptable – daily syncs, batch processing, schedule enrichment then the trigger works well.
3 Most Common Errors That Break Airtable Workflows in n8n
1. Bases dropdown is empty after connecting the credential
The schema.bases:read scope is missing from your Personal Access Token. Fix: go back to Airtable’s token settings, add the missing scope, and save. You don’t need to recreate the token in n8n, just update the scopes in Airtable and the existing credential will pick them up.
2. 429 Too Many Requests — records stop mid-loop
Airtable’s rate limit is 5 requests per second per base, and 50 requests per second across all bases per access token. When you loop over records and create or update them one by one, you hit this quickly with larger datasets.
Fix: add a Wait node set to 200ms inside your loop. That keeps you under 5 requests per second. For larger batches where you need to stay well under the limit, 500ms is safer. See the rate limiting guide for more detailed approach.
3. Update node fails with “Record ID required”
You’re passing field data to the Update operation without an id value. Fix: add a Search step before the Update, filter to the specific record you want, and use {{ $json.id }} as the ID field in the Update node. The two-step pattern (Search → Update) is required, there’s no way around it.
My Final Thoughts
Airtable and n8n make a strong pair once you understand how they actually communicate. The credential scopes determine what n8n can see.
The Record ID determines what you can change. The trigger polls on a schedule, not in real-time. Get those three things right and most of the confusion disappears.
To recap what matters most: always include schema.bases:read when creating your Personal Access Token, use Filter By Formula to keep your workflows lean, treat Update and Delete as two-step operations, and add a Wait node inside loops before you hit rate limits rather than after.
From here you can start layering Airtable into real workflows, routing new leads from a form, syncing a content pipeline, updating project statuses from Slack. The patterns you learned here scale directly to those use cases.