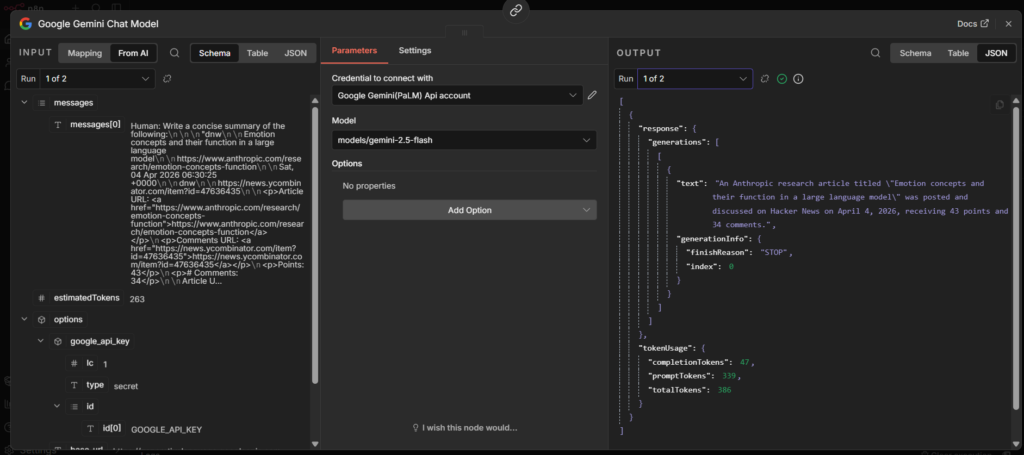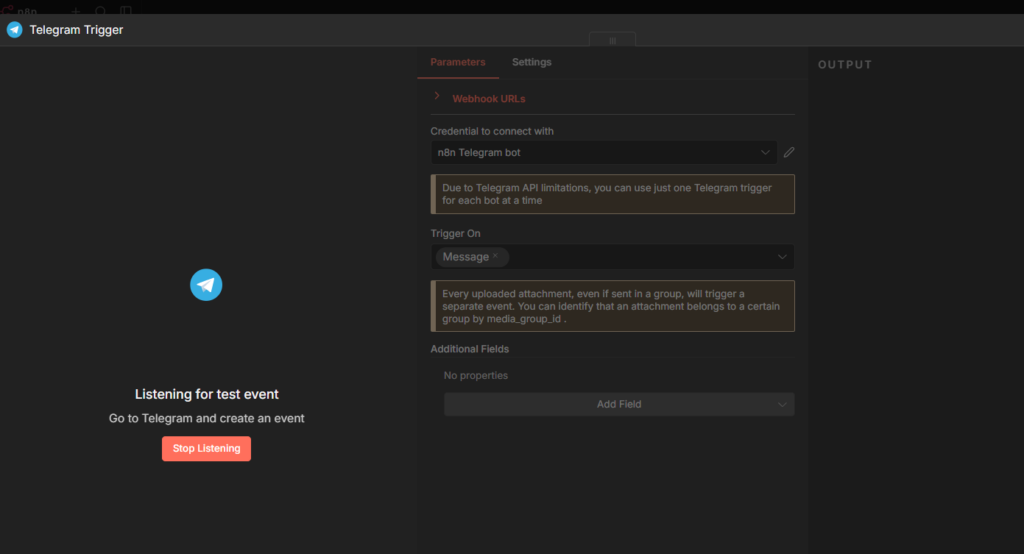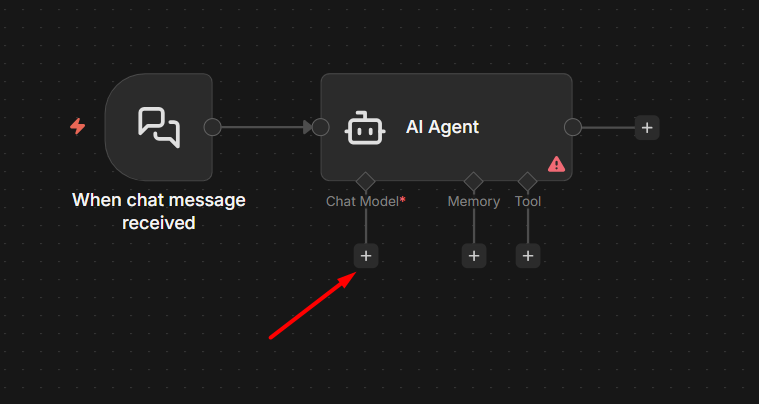
My first AI agent took about four minutes to build.
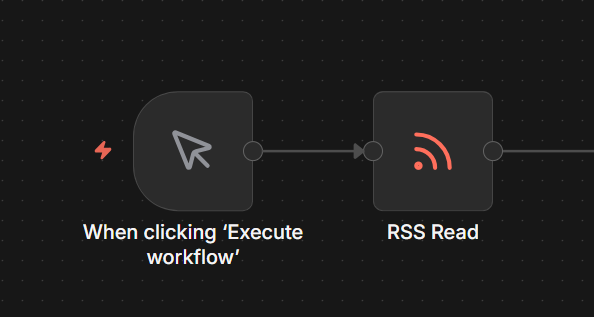
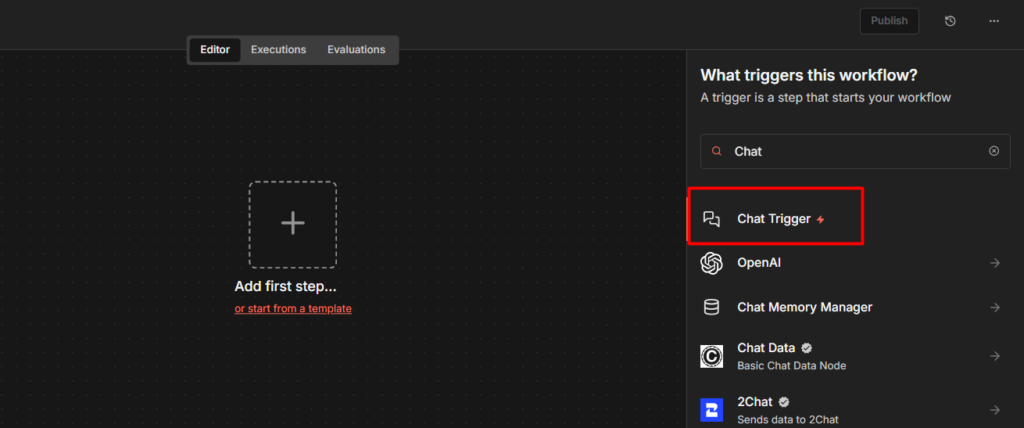
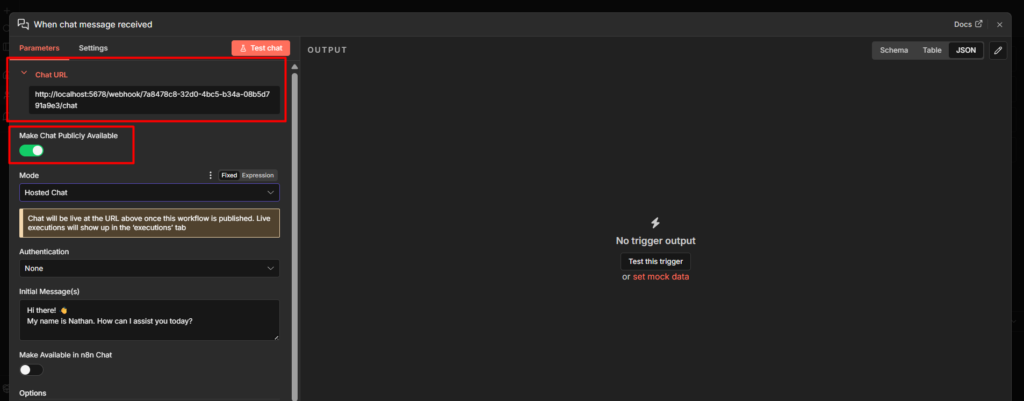
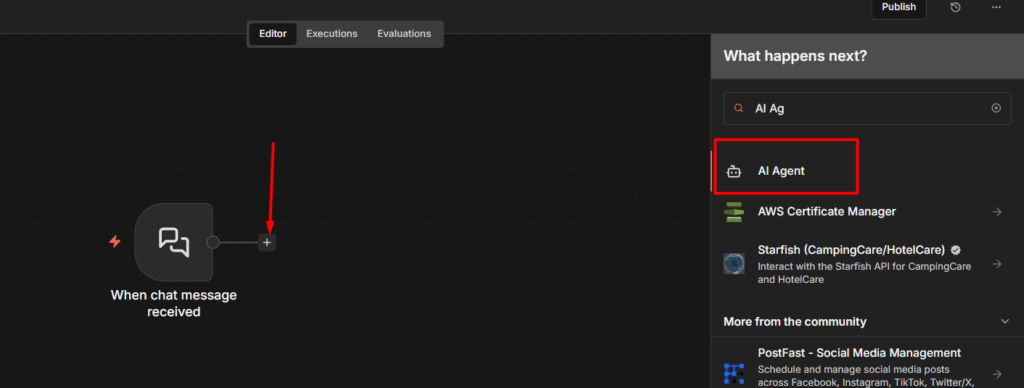
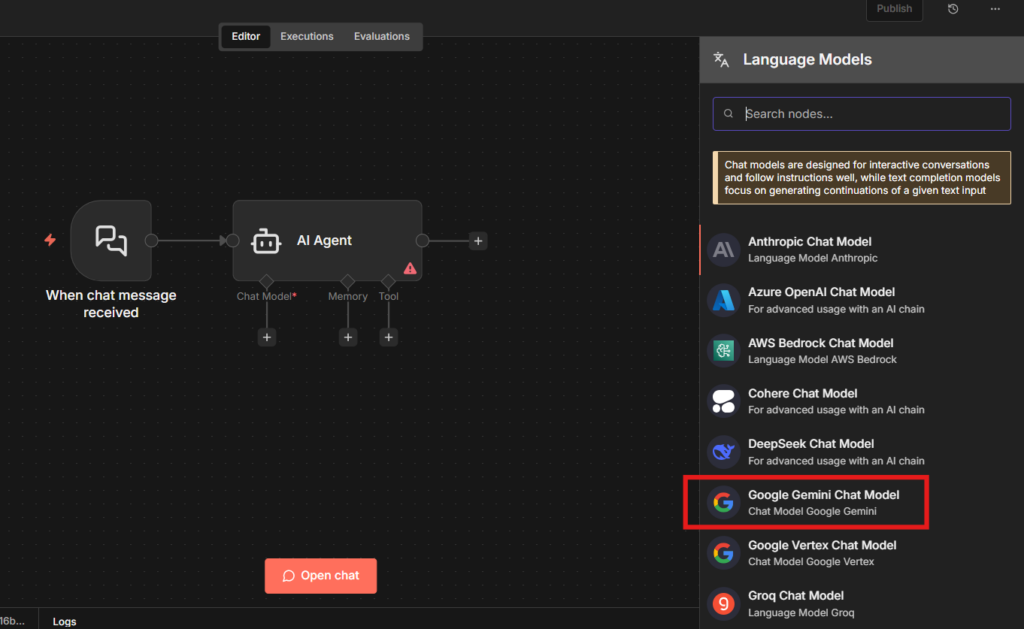
Chat Trigger node. Gemini model connected. Hit execute. Typed “Hello” got back “Hello! How can I help you today?”
I genuinely thought I was done. I told people I built an AI agent.
The next day I came back and typed something that referenced our earlier conversation.
The agent had no idea what I was talking about. Total blank. Like meeting someone who smiled at your warmly yesterday and today looks right through you.
Amnesia patient. Full reset. Zero memory of anything.
That’s when I realized: what I’d built wasn’t really an agent. It was a chat window with a model attached.
Smart, sure. but stateless. No memory of yesterday, no awareness of context, no persistence of any kind.
Every message it receives is the first message it’s ever received.
Fixing that one thing opened a whole set of new questions. What is context, exactly? Where does it live? How does the agent retrieve it? How much of it can you pass before the model chokes?
What follows is everything I wish someone had told me before I wired up that first AI node.
Here’s the Short Version (If you’re skimming)

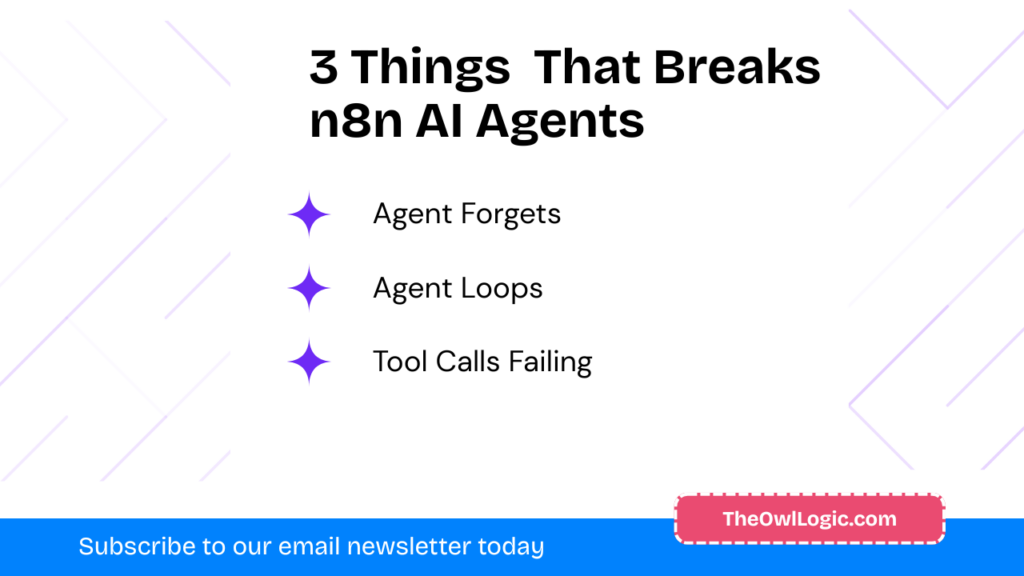
Building an AI agent in n8n is straightforward until your first production failure. Here’s what actually trips people up:
- Simple Memory only lasts for the current session – when it’s restarts n8n and its gone.
- Your System Prompt is doing the real configuration work – not the model settings
- The agent will call tools in a loop if you don’t cap the iteration limit.
- The description you write on each tool node is literally the instruction the LLM uses to decide when to call it.
- Happy-path testing in the Chat UI hides every failure that happens with real, messy input.
Know these five things before you build anything you plan to use more than once.
1. Simple Memory Is Not Production Memory
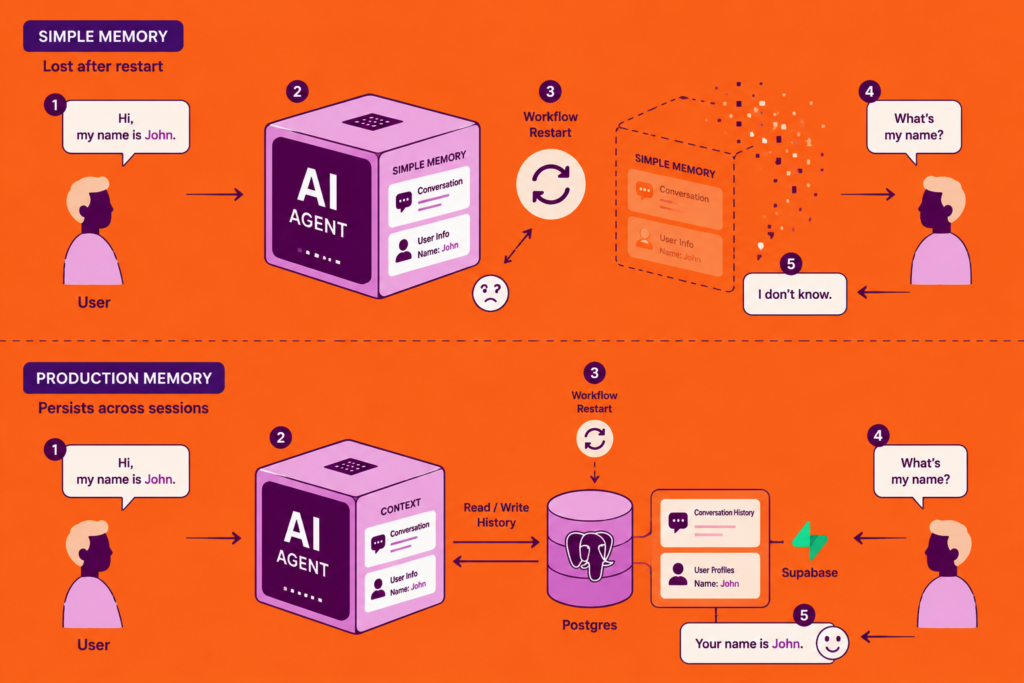
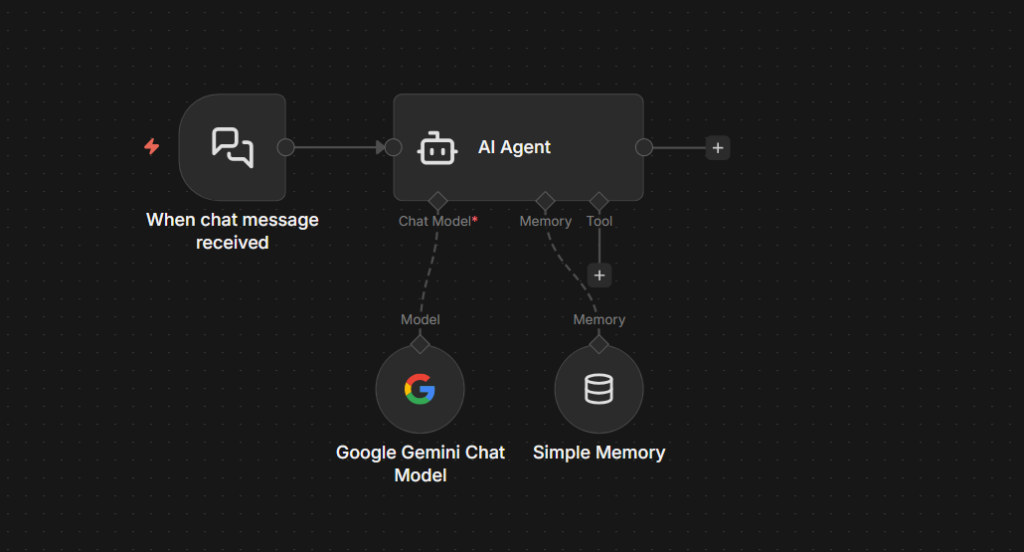
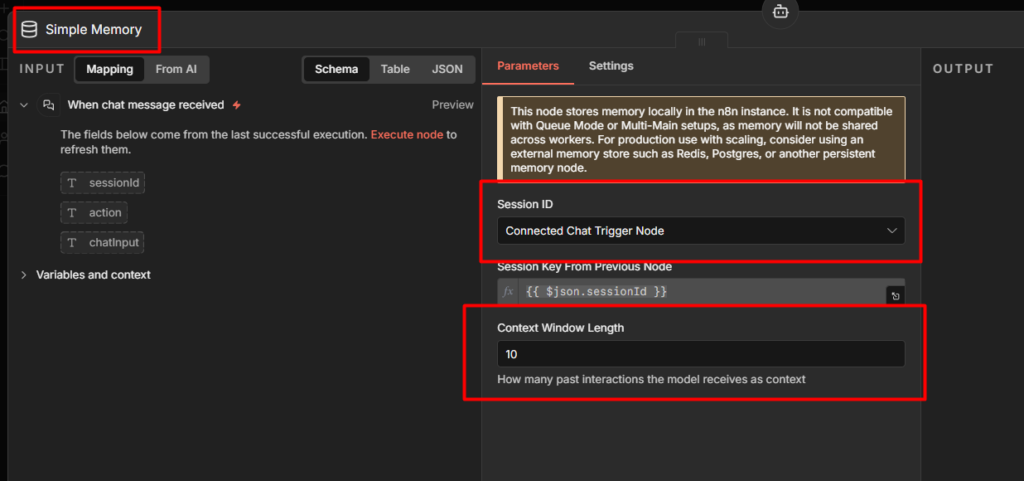
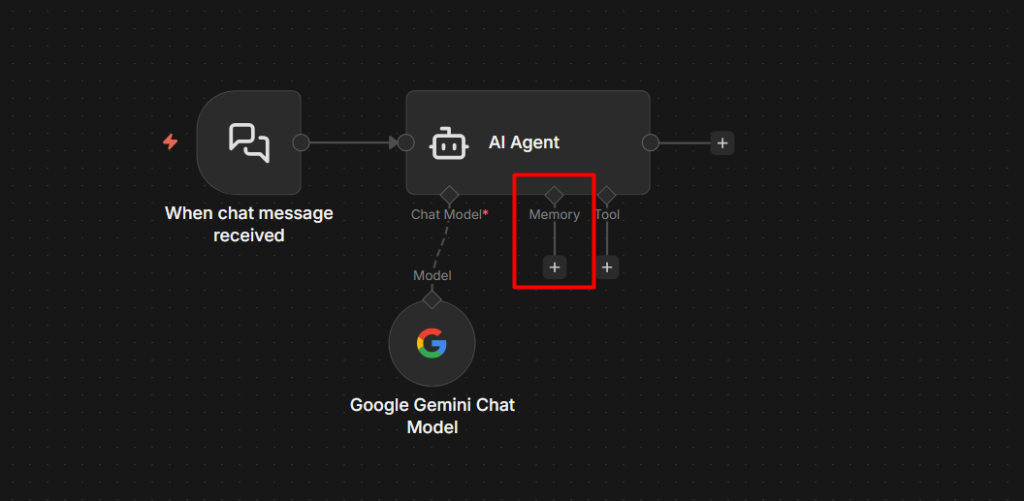
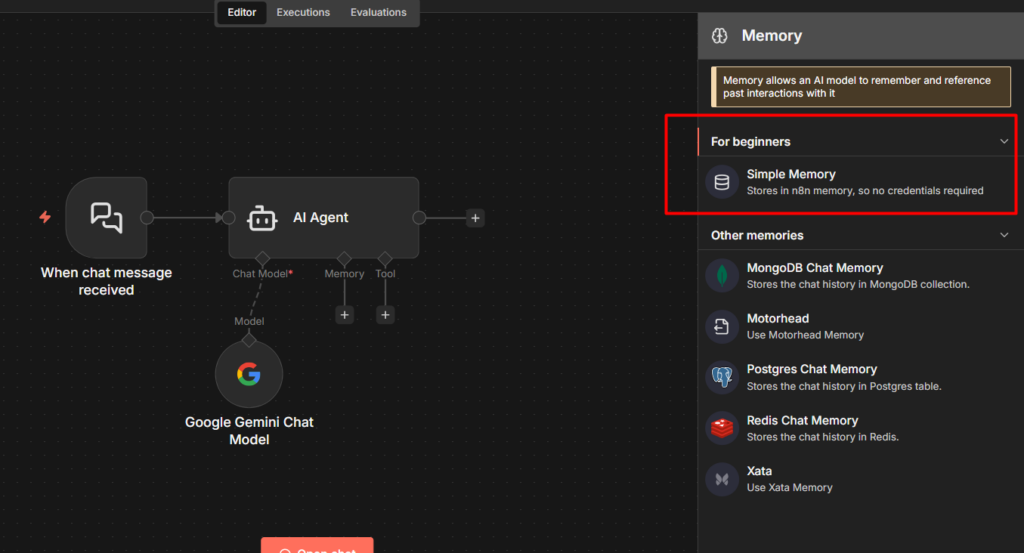
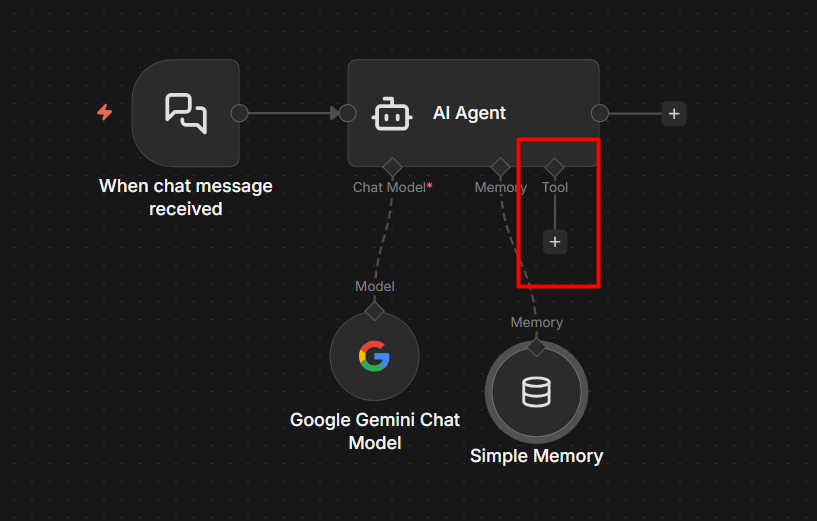
When you first add a Memory sub-node to your AI Agent, n8n gives you Simple Memory as the default. It works immediately. The agent remembers what you said two messages ago, threads context, feels like real memory.
It isn’t.
Simple Memory stores conversation history in RAM – in the running process, nothing else.
The moment your workflow restarts, the session ends, or n8n itself restarts, every conversation it was holding disappears. No database.
No file. Nothing written anywhere. It evaporates.
This matters the second your agent is handling real users.
User A sends a message. Workflow runs, Simple Memory holds the context.
User A sends a follow-up three minutes later – new workflow execution, Simple Memory is empty. The agent introduces itself again. User A closes the tab.
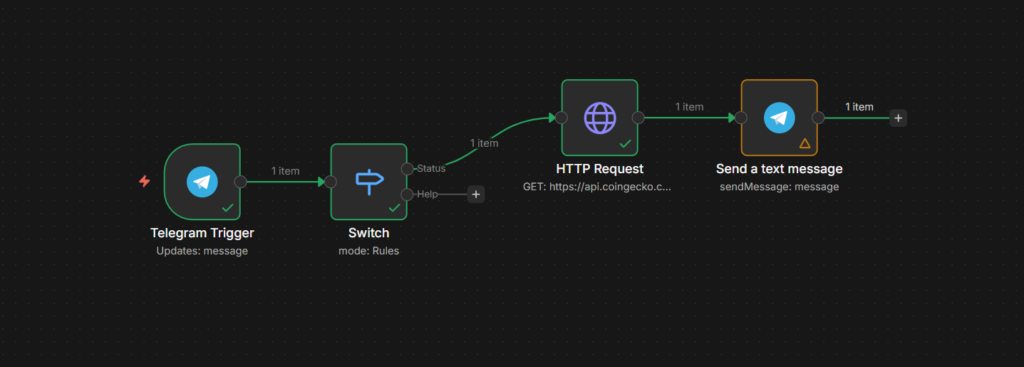
For actual persistence, you need to store conversation history in an external database and retrieve it at the start of each workflow run. Postgres and Supabase are the most common setups. The pattern looks like this:
Workflow Starts
- fetch user’s conversation history from DB
- pass the history into AI Agent as context
- agent responds
- append the new message back to DB
It adds nodes. It adds setup time. It’s the difference between a demo and something works.
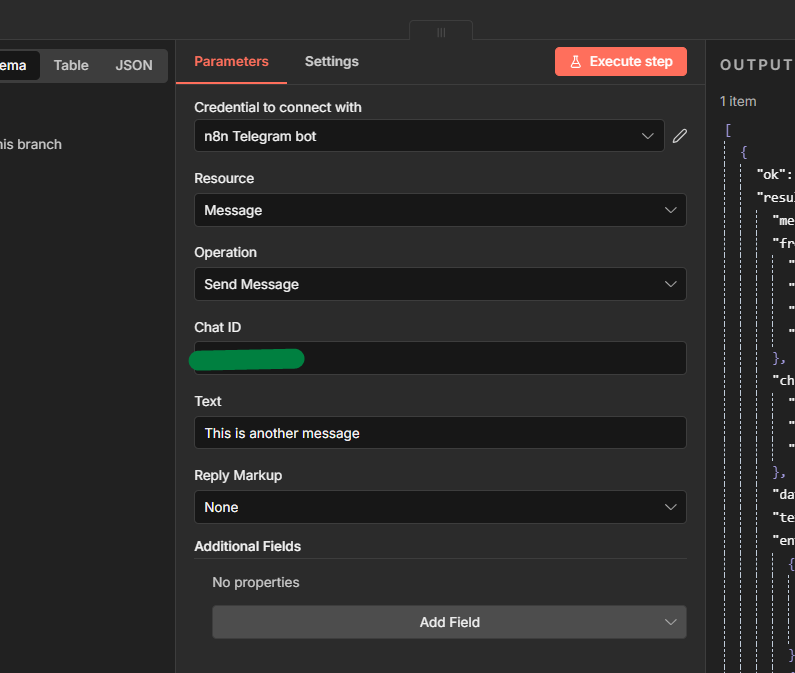
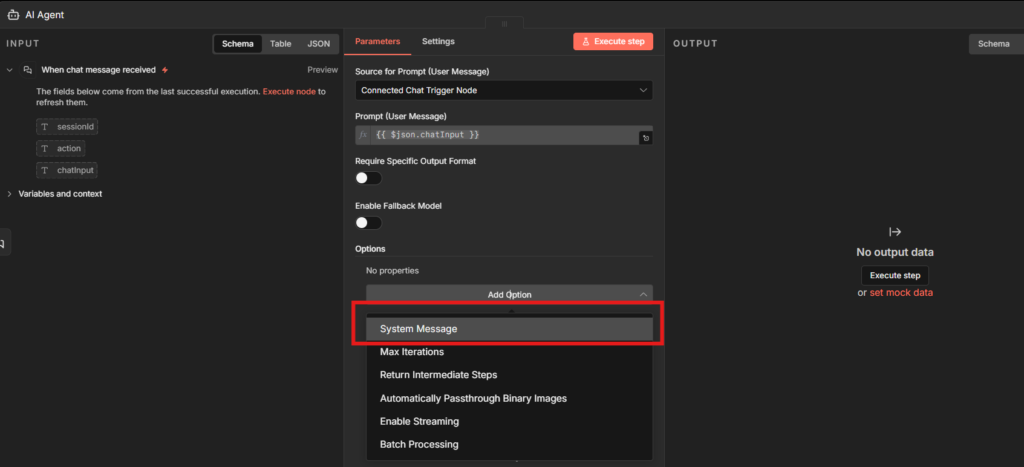
2. Your System Prompt Is Doing All the Real Configuration
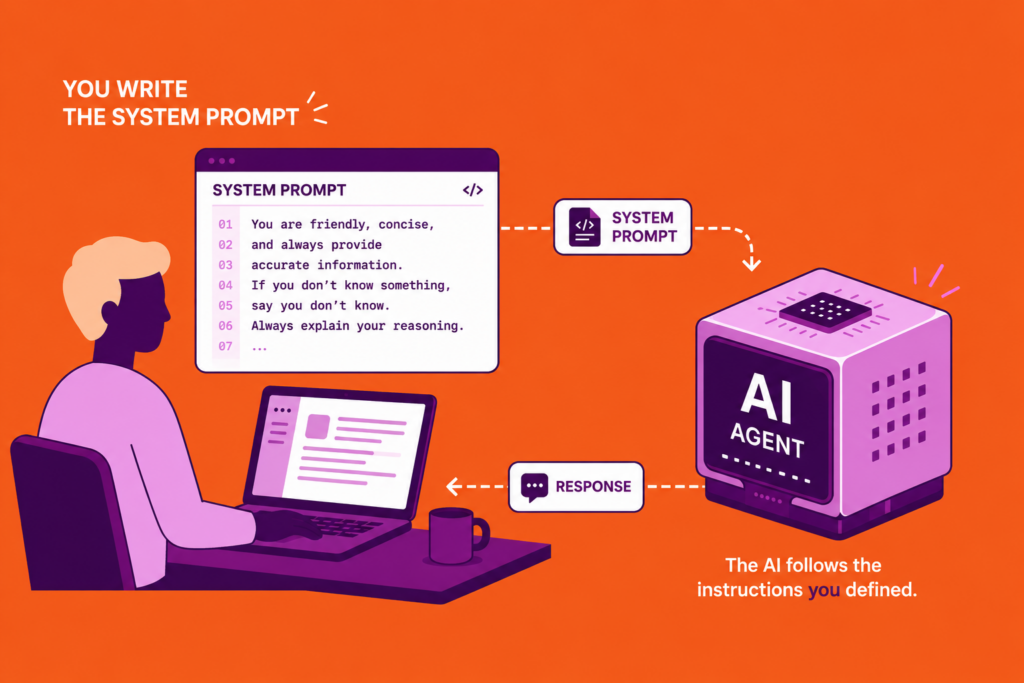
Most people write one line in the system prompt field. Something like: “You are a helpful assistant.“
Then they wonder why the agent answers questions it shouldn’t, goes off-topic or maybe hallucinate, calls tools in the wrong order, or produces output in a format nothing downstream can parse.
The system prompt isn’t a label you attach to the model. It’s the only place you’re actually configuring the agent’s behavior.
The model settings – temperature, top-p – nudge randomness.
The system prompt shapes what the agent does, how it responds, what it refuses or perhaps guardrails, and in what format it returns output.
A system prompt that does real work looks more like this:
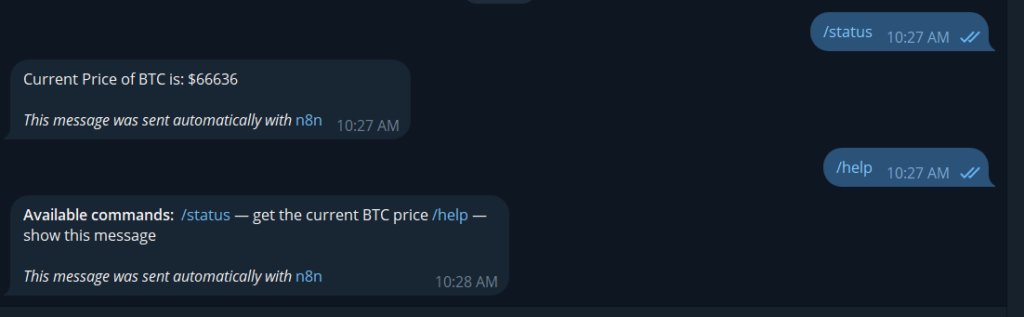
You are a customer support agent for [Company].

Your job: answer questions about orders, refunds, and product issues only.
If someone asks something outside these topics, politely redirect them.

Always respond in this JSON format:
{
  "message": "your response here",
  "category": "order | refund | product | other",
  "escalate": true | false
}

If you cannot resolve the issue, set escalate to true.
That’s not long. But it’s specific. It tells the agent what to do, what not to do, and what to return. Every missing constraint is a behavior you haven’t defined – which means the model fills it in however it sees fit.
When your agent acts unpredictably, the system prompt is the first place to look.
3. The Agent Will Loop If You Don’t Cap It
The AI Agent node has a setting called Max Iterations. It controls how many times the agent can call a tool before n8n forces it to stop and return a response.
The default is generous. Too generous for most cases.
Here’s what happens without a sensible cap: the agent calls a tool, gets a result, decides it needs more information, calls another tool, gets confused, calls the first tool again, loops. Depending on the model and the tools you’ve connected, this can run for a while before anything fails visibly.
By then you’ve burned API credits and the workflow has timed out.
Set Max Iterations to something reasonable. Five to ten is usually enough for a well-scoped agent.
If your agent genuinely needs more than ten tool calls to complete a single task, that’s a design problem, not a number to increase.
The other thing worth knowing: when the agent hits the iteration limit, it doesn’t crash.
It returns whatever it has at that point, which may be incomplete.
Build your downstream nodes to handle that – don’t assume the agent’s final output is always a finished response.
For handling what happens when things go wrong beyond tool loops, the error handling guide covers the workflow-level patterns.
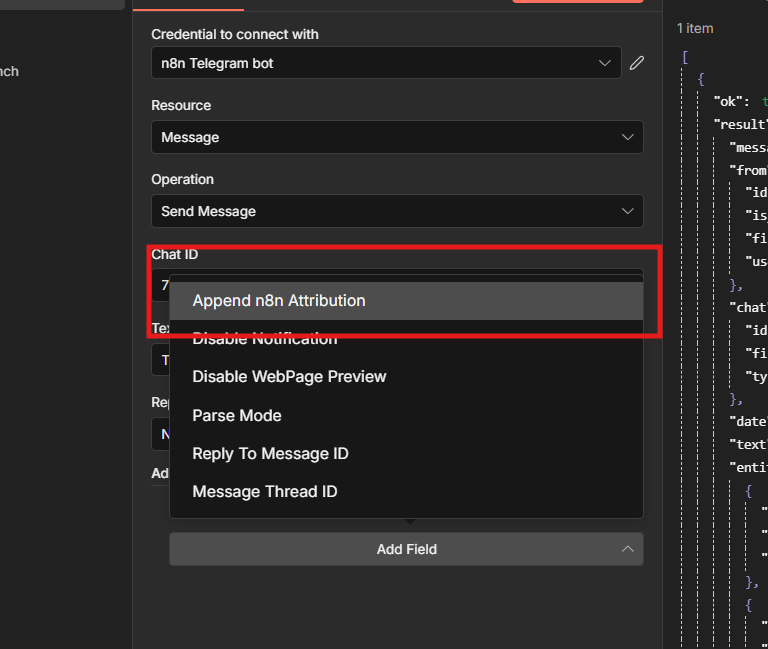
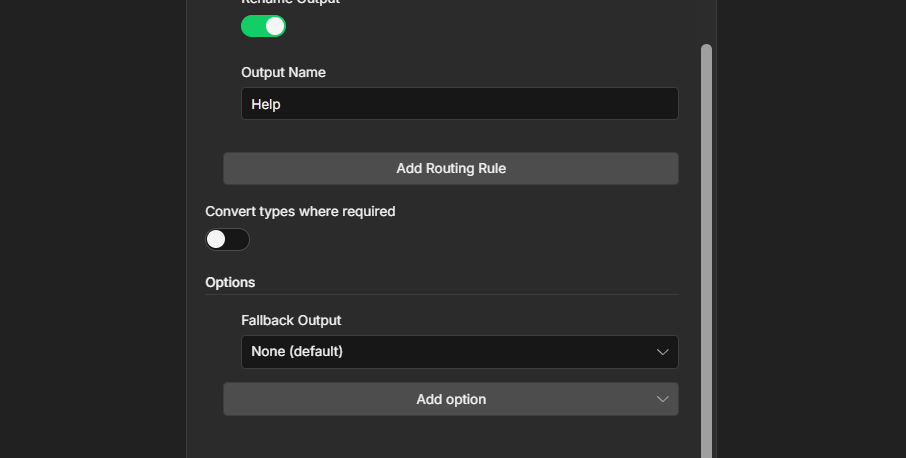
4. Tool Descriptions Are Instructions, Not Labels
When you add a tool to your AI Agent – a workflow tool, an HTTP Request, a custom function, there’s a Description field. Most people write something short. “Gets customer data.” “Sends email.”
That description is not for you. It’s for the model.
n8n passes the tool name and description to the LLM when it’s deciding which tool to call. The model reads your description and uses it to figure out when to invoke that tool, what input to send, and whether this is the right tool for the current step.
A vague description produces inconsistent tool selection. The model guesses. Sometimes it guesses right.
A description that actually works tells the model the trigger condition and the expected input:
Use this tool when the user asks about their order status or shipping.
Input: the order ID as a string. Example: "ORD-12345".
Returns: current order status, estimated delivery date, and tracking URL.
Three sentences. Now the model knows exactly when to call it, what to send, and what to expect back.
Rewriting your tool descriptions this way is the single fastest way to make agent behavior more consistent without changing anything else.
5. Test With Bad Input, Not Good Input
The Chat UI in n8n is excellent for testing.
You can fire messages directly at your agent, watch the tool calls, check the output. Fast, real feedback.
The problem: you already know what your agent expects. You write clean, complete messages.
Real users do all of those things.
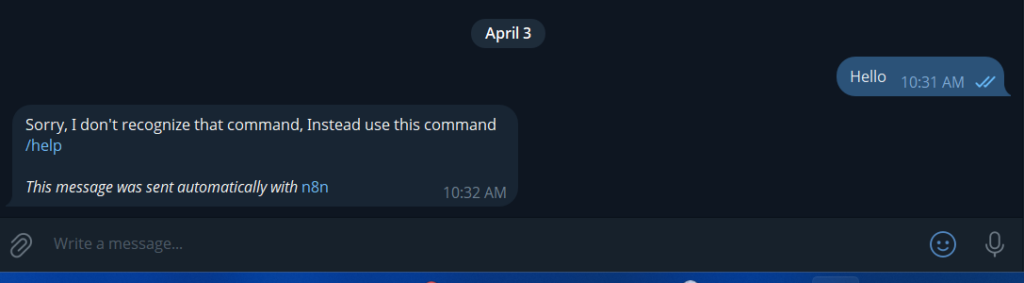
Before you call an agent ready, run it through inputs it wasn’t designed for:
- “yeah do the thing” – no clear intent
- A message referencing something the agent has no context for
- An empty message
- A question entirely outside its defined scope
Watch what happens. If it calls the wrong tool, loops, or returns a malformed response – that’s exactly the information you need. Fix the system prompt or tool descriptions before that behavior reaches anyone outside your own browser tab.
The n8n Chat UI is a safe sandbox. Use it to break things on purpose.
Where to Go From Here
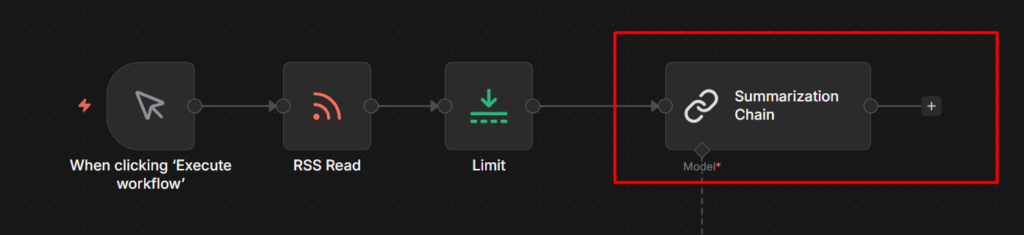
If you haven’t built your first AI agent with n8n, and want the step-by-step setup, How to Build an n8n AI Agent Workflow walks through the full build from a Chat Trigger to a working agent with memory and tools connected.
The agent you build on day two will be better than the one you build on day one. That’s the actual lesson. None of these gotchas are obscure, they just don’t show up until you’ve run the thing at least once and observed it break.